background image

Getting Started 

Disconnecting 


User Guide 

21


Disconnecting 

   To disconnect the YMS:   

1.  Turn off the YMS using the power switch on the rear panel. 

2.  Safely unplug the device from the power source, if necessary. 

Summary of Contents for YOGGIE MANAGEMENT SERVER

Page 1: ......

Page 2: ......

Page 3: ...ms of Use Agreement The technology and products described in this material are protected by registered and or pending patents of Yoggie Security Systems Ltd and or its licensors Yoggie Yoggie logo Yoggie com Yoggie Gatekeeper Yoggie Pico Yoggie SOHO Gatekeeper Pro Gatekeeper Pico Pro Yoggie Pico Personal Yoggie Pico Pro Yoggie Firestick Pico Yoggie Management Server are trademarks or registered tr...

Page 4: ...stems Ltd only trained service technicians are authorized to remove the covers and access any components inside the system Keep your system away from radiation and heat sources Do not block cooling vents or air intakes If any of the following conditions occur disconnect the product from the power source and replace the part or contact your trained service provider The power cable or plug is damage...

Page 5: ...MENTS 20 DISCONNECTING 21 MANAGING THE YMS DEVICE 22 YMS PREFERENCES 22 Configuring the Time Zone 22 Configuring the Corporate Password 22 Configuring an External IP Address 23 Configuring Display Preferences 23 MANAGING USERS 25 Adding a User 25 Modifying User Properties 26 Deleting a User 26 MANAGING GATEKEEPER DEVICES 27 VIEWING SECURITY LOGS 27 DISABLING ENABLING A GATEKEEPER DEVICE 29 UNREGIS...

Page 6: ...DISABLING PROTECTION 39 CONFIGURING POLICY PARAMETERS 41 CONFIGURING FIREWALL SETTINGS 42 Rules 42 Blacklist and Whitelist 44 Enabling Port Forwarding 45 CONFIGURING IDS IPS SETTINGS 47 CONFIGURING VPN SETTINGS 47 Generic VPN 48 Cisco VPN 48 CONFIGURING ANTI VIRUS SETTINGS 49 CONFIGURING ANTI SPAM SETTINGS 50 CONFIGURING WEB FILTERING SETTINGS 51 LOGGING AND REPORTING 52 VIEWING THE SYSTEM LOG 52 ...

Page 7: ...ure 19 Security Log 28 Figure 20 YMS Security Element 30 Figure 21 Gatekeeper Groups 31 Figure 22 Group Editor 32 Figure 23 Directory Services 33 Figure 24 Security Profiles 36 Figure 25 Security Profile Details 37 Figure 26 Policy Editor 38 Figure 27 Password Generator 39 Figure 28 Firewall Policy Rules 42 Figure 29 Firewall Policy Rule Editor 43 Figure 30 Firewall Policy Blacklist 44 Figure 31 F...

Page 8: ...oggie Management Server User Guide 7 Figure 45 Security Summary Report Text and Chart 57 Figure 46 Security Summary Report Bar Chart 58 Figure 47 Web Filtering Category Summary Report Pie Chart 59 Figure 48 Registration Report Text 59 ...

Page 9: ...nt Server Style and Syntax Conventions Verdana Regular text Arial Bold Names of fields and other page components Arial Italics Special terms the first time they appear Monospace Bold Text entered by the user on the computer page Notes which offer an additional explanation or a hint on how to overcome a common problem Warnings which indicate extra caution needed in order to avoid potential problems...

Page 10: ...its activity in real time and ensures uninterrupted protection by keeping the Gatekeeper units up to date with the latest security and firmware updates A YMS unit extends the IT manager s ability to easily enforce security policies on various groups in the organization using a Web based management console without requiring any agent installation YMS supports day to day administration tasks such as...

Page 11: ...Introduction Using the Yoggie Management Server 10 Yoggie Management Server Figure 1 Yoggie Corporate Security Solution ...

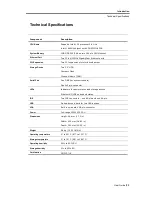
Page 12: ...isk on Module DOM Serial Port One DB9 for system console One 2x5 pin connector LEDs Indicators for power status and storage access Ethernet AC LNK and speed status IDE Two IDE connectors one 40 pin and one 44 pin USB Pin header on board for two USB devices VGA Built in on board VGA pin connector Power Full range 220W ATX PSU Dimensions Height 44 mm 1 73 in Width 430 mm 16 83 in Depth 390 mm 15 35 ...

Page 13: ...shipped fully assembled and covered The YMS device includes two mounting brackets built into the sides of the device housing To prepare the YMS for a 19 rack installation 1 Fasten the mounting brackets to the side rails of the rack using two screws on each side not included Ensure that proper grounding is provided for the rack assembly to prevent potential electrical problems in the devices mounte...

Page 14: ... device 1 On the rear panel turn on the power switch The device powers up immediately The lights on the front panel of the device indicate the status of the unit as follows The blue LED in the Yoggie logo and the green LED are illuminated if the device has power The red LED is illuminated if there is hard disk activity 2 The device takes up to two minutes to fully load Figure 3 YMS Device front pa...

Page 15: ...e installed in the network DMZ with two additional rules on the corporate Firewall External Any YMS External Public IP Address YMS TCP UDP port 5222 Internal LAN YMS Private IP address YMS TCP UDP port 5222 and YMS TCP 443 In corporate networks which use two firewalls Internal and External add the External rule to the External Firewall and add the Internal rule to the Internal Firewall External us...

Page 16: ...figure the network interface to include the following network settings IP Address 1 1 1 9 Subnet Mask 255 255 255 0 3 Access the management console by opening a Web browser and typing the following URL https 1 1 1 1 To connect to the YMS through the network 1 Connect the YMS to the network using the LAN1 port 2 Verify that the YMS has received an IP address belonging to the corporate LAN To log in...

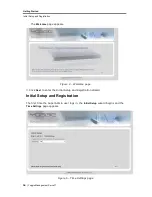
Page 17: ...e Welcome page appears Figure 4 Welcome page 3 Click Next to enter the Initial Setup and Registration Wizard Initial Setup and Registration The first time the Super Admin user logs in the Initial Setup wizard begins and the Time Settings page appears Figure 5 Time Settings page ...

Page 18: ...e settings are acquired automatically from the network DHCP server Proceed to the next step Obtain network settings manually all the settings are acquired manually that is by the user typing values for the settings Type values for the following settings IP Address The IP address you would like to assign to the YMS Subnet Mask The subnet mask of the network to which the YMS is connected Gateway The...

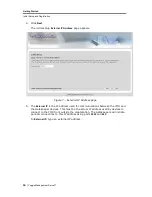
Page 19: ...IP Address page 5 The External IP is the IP address used for communications between the YMS and the Gatekeeper devices This must be the actual IP address used by devices to connect to the YMS from outside the organization The Gatekeepers will initiate periodic connections to this IP address using ports 5222 and 443 In External IP type an external IP address ...

Page 20: ...ord will be used by the Gatekeepers to log in to the Yoggie Management Server It is strongly recommended to change the default admin password To change the password in the left menu click Users and navigate to Password 9 Click Finish to complete registration The Yoggie Management Server is now configured and operational To enforce corporate policy each Gatekeeper in the organization must be config...

Page 21: ...20 Yoggie Management Server YMS Page Elements The main page of the Yoggie Management Server software contains the following elements Status Area Navigation Bar Main Panel Figure 9 YMS Page Elements Status Area Navigation Bar Main Panel ...

Page 22: ...Getting Started Disconnecting User Guide 21 Disconnecting To disconnect the YMS 1 Turn off the YMS using the power switch on the rear panel 2 Safely unplug the device from the power source if necessary ...

Page 23: ...e installation process To set the time zone 1 Navigate to Configuration General The Time Zone and Corporate Password page appears Figure 10 Time Zone and Corporate Password page 2 In Timezone select a time zone 3 Click Save Configuring the Corporate Password The YMS corporate password is used to prevent unauthorized users who do not belong to the corporate from connecting to the YMS The password i...

Page 24: ...nal IP Address The External IP Address is used to connect to the YMS from outside the organization To configure an external IP address 1 Navigate to Configuration Network The automatically assigned network settings appear Figure 11 Network Settings page 2 Click Edit You are prompted to update your networking settings 3 Type the new settings and click Apply Configuring Display Preferences YMS provi...

Page 25: ...splayed in the Gatekeepers list 3 In Security Logs modify the default number of entries displayed in the Security Logs list 4 In System Logs modify the default number of entries displayed in the System Logs list 5 In Time interval of Contacted change the timeframe shown in days to the value of the Contacted parameter in the status area at the top of the main page the Contacted parameter shows the ...

Page 26: ...This user can view and change all configuration settings except the user related settings View Only Standard user this user can only view Gatekeeper properties logs and reports Only the navigation bar elements relevant to the specific user who has logged in are displayed Adding a User To add a user 1 Navigate to the Users page Figure 13 Users page ...

Page 27: ...er Properties To change user properties 1 Navigate to the Users page see Figure 13 2 Select a user and click Edit The Edit User page appears see Figure 14 3 To change the password select the Change password check box 4 In Password type a new password 5 In Verify Password retype the password for confirmation 6 In Email address change the user s email address if required 7 Click Submit Deleting a Us...

Page 28: ...filter the entire Security Log To view a security activity of a Gatekeeper device 1 Navigate to Gatekeepers A list of Gatekeeper devices is displayed Figure 15 Gatekeeper Devices 2 In Field select from the drop down list the desired criteria to narrow down the list of devices 3 In the text box type the serial number of a specific Gatekeeper device and click Search The device appears in the list of...

Page 29: ...vices Viewing Security Logs 28 Yoggie Management Server The Gatekeeper Details page appears Figure 16 Gatekeeper Device Detail 5 Click View Logs The Security Log for the Gatekeeper device is displayed Figure 17 Security Log ...

Page 30: ...Figure 16 3 Click Disable Device The Gatekeeper Status changes to Disabled To enable a Gatekeeper device 1 Navigate to Gatekeepers A list of gatekeeper devices is displayed see Figure 15 2 Under Serial Number click the serial number of the Gatekeeper device you want to enable The details page appears see Figure 16 3 Click Enable Device The Gatekeeper Status changes to Enabled Unregistering a Gatek...

Page 31: ...diagram Figure 18 YMS Security Element The procedure necessary for setting up the YMS to enforce corporate security on the organization s Gatekeeper units includes the following tasks Creating Groups see Managing Groups Associating each Gatekeeper device with a Group Defining a set of Policies see Managing Policies Creating Security Profiles based on the Policies see Managing Security Profiles Set...

Page 32: ...een defined each new Gatekeeper which registers to the YMS automatically belongs to the default Group Yoggie Default Group The IT manager can manually define new Groups in the YMS Alternatively Groups which correspond to departments in the organization can easily be propagated from the corporate Directory Services database Adding a Group A group can be created manually or via the Directory Service...

Page 33: ... the chosen Security Profile for the Group The available security levels are High Medium Low 7 To locate Gatekeeper devices more easily you can filter the list of Gatekeeper devices To filter the list by Serial Number Select the Serial Number checkbox in Filter By type the device serial number Name Select the Name checkbox in Filter By type the device name Group Select the Group checkbox in Filter...

Page 34: ...ify all the details required to locate the groups you want to use In Directory Service version select Active Directory 2003 as it is currently the only supported version In Distinguished Name type a query using the following format CN username CN Users DC test DC yoggie objectClass In IP Address type the IP address of the ldap server In Port type the number of the port used for communication with ...

Page 35: ...ust added appear in the Groups page You can navigate to this page to add members to the groups and configure security Each group initially has no members and is assigned the Yoggie default Security Profile Modifying Group Properties To change group properties 1 Navigate to the Groups page The Gateway Groups page is displayed see Figure 19 2 Under Name click the name of a group The Group Editor pag...

Page 36: ...te Security Managing Groups User Guide 35 2 Click the X button to the left of the group to be deleted The confirmation prompt appears Once a Group is deleted all its members automatically join the Yoggie Default Group ...

Page 37: ...et of three Policies high medium and low and is applicable to one or more groups Only one of the three policies is enforced at any given time If a Security Profile was not defined for a group the Yoggie Default Security Profile is applied to the Group Adding a Security Profile To add a new security profile 1 Navigate to the Security Profiles page Figure 22 Security Profiles ...

Page 38: ... the profile 5 For each of the three levels High Policy Med Policy and Low Policy to change a level Click Select Choose a Policy Click Apply 6 In the Security Profile Details page click Save Modifying Profile Properties To change a Security Profile 1 Navigate to the Security Profiles page and click the name of the profile you want to change 2 Modify the profile s properties click Reset to reset to...

Page 39: ...d a new policy 1 Navigate to the Security Profiles page and click Policy Editor The Policy Editor page appears listing all existing Policies Figure 24 Policy Editor 2 Do one of the following To create a policy using an existing policy as a starting point select the base policy and click Duplicate To create a policy using the YMS default settings as a starting point click New 3 Follow detailed inst...

Page 40: ... unique identification number and displays it on the laptop The YMS Password Generator uses the identification number to generate a password The password has a limited usage time and a limited validity period The password is delivered to the end user by any means acceptable to the IT manager The user enters the password to disable the enforcement until the Gatekeeper protection can be restored To ...

Page 41: ...ggie Management Server 4 In Effective time type the number of hours of connection time allowed 5 Click Generate A new password is displayed 6 Notify the Gatekeeper user of the new password in any way acceptable to your organization for example phone or fax ...

Page 42: ... Choosing the High Policy may reduce overall functionality The level of security may automatically change from a lower level to a higher level and vice versa depending on the level of threats approaching the Gatekeeper device This feature is called Adaptive Security Policy A Security Policy includes the configuration of constraints for the following security issues each represented by a tab in the...

Page 43: ...take precedence over the blacklist whitelist checkmark specifications When there are two or more rules a rule positioned higher in the list takes precedence over rules positioned lower in the list If the whitelist and the blacklist are both selected the whitelist overrides any specifications in the blacklist Rules To add a rule 1 Navigate to the Policy Editor page and select the Firewall tab 2 Cli...

Page 44: ...ic being monitored Inbound Outbound Remote IP Address Source of inbound or destination of outbound traffic Any IP address format Port Range Start and end numbers of a series of ports from to Type Protocol of the rule applies to TCP UDP or both TCP UDP TCP UDP Action Action to apply Block Unblock Comment Textual note String 5 Click Add The rule is added to the Firewall Policy 6 To change the order ...

Page 45: ...nd Whitelist You can specify a blacklist of ports to be blocked and a whitelist of ports to be allowed Note that any customized Rules override the specifications in the blacklist or whitelist To use the blacklist whitelist 1 Navigate to the Policy Editor page and open the Firewall tab 2 Click the Blacklist Whitelist link The Outbound Port Blacklist Whitelist page is displayed Figure 28 Firewall Po...

Page 46: ...he blacklist whitelist The buttons at the top of each page provide shortcuts for making checkbox selections Select All Clear All Toggle 5 Click Save to save the current policy or Save As to name a new policy Enabling Port Forwarding This feature is only relevant in units which can be connected to the PC via pass through setup To enable disable Port Forwarding 1 Navigate to the Policy Editor page a...

Page 47: ...arding link The following page is displayed Figure 30 Firewall Policy Port Forwarding 3 Select the Allow Yoggie Gatekeeper users to define Port Forwarding checkbox to enable Port Forwarding or clear the checkbox to disable Port Forwarding 4 Click Save to save the current policy or Save As to name a new policy ...

Page 48: ... specify for each category whether the traffic is allowed logged or blocked 4 Click Save to save the current policy or Save As to name a new policy Configuring VPN Settings The Gatekeeper has a Generic VPN client which allows the Gatekeeper to integrate with VPN servers from various vendors The YMS enables the administrator to configure selected VPN client settings to be enforced on the organizati...

Page 49: ...rs Parameter Description Values Connection Type Type of VPN connection IPSec Tunnel VPN Gateway Address Address of the VPN Gateway IP address format Remote Network Address Address of the machine from which the connection is made IP address format Remote Network Mask optional Mask defining a set of network addresses Network Mask format Cisco VPN ...

Page 50: ...define the Gatekeeper unit scan capabilities regarding various threats including viruses Trojans spyware rootkits and other malicious programs Scanning can be performed on various Internet protocols and file sizes To configure Anti Virus settings 1 Navigate to the Policy Editor Antivirus tab 2 Select the first checkbox to block downloads over 10 MB 3 Select one or more of the four Protocols to sca...

Page 51: ...s subject line To configure Anti Spam settings 1 Navigate to the Policy Editor Anti Spam tab The following page is displayed Figure 35 Anti Spam Policy 2 Select the Activate Anti spam checkbox to activate anti spam checks 3 If Anti spam is activated select clear the Tag subject lines of suspicious spam emails checkbox to include exclude a spam warning tag in the subject line of each suspicious ema...

Page 52: ...e available To configure Web filtering settings 1 Navigate to the Policy Editor Web Filtering tab The following page appears Figure 36 Web Filtering Policy 2 Select the Activate Web Filtering checkbox to turn on this feature 3 Select the checkboxes to the left of one or more categories to specify what type of content to block 4 Click Save to save the current policy or Save As to name a new policy ...

Page 53: ...istory is recorded in the System Log and Security Log for subsequent reference A large number of textual and graphical reports based on queries of the stored data can be prepared Viewing the System Log To view System Log entries 1 Navigate to System Logs The System Logs page is displayed Figure 37 System Logs ...

Page 54: ...tem Log Individual Entry Viewing the Security Log The basic Security Log contains event data regarding all Gatekeeper devices You can also view the log for a specific device by clicking the View Logs button at the bottom of the Gatekeeper Details page see Figure 16 Error Reference source not found To view Security Log entries 1 Navigate to Security Logs Figure 39 Security Log ...

Page 55: ...ing and Reporting Viewing the Security Log 54 Yoggie Management Server 2 Click a security event to see its details The log event details appear in the Log Event page Figure 40 Security Log Individual Entry ...

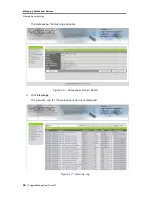
Page 56: ...s present information about the various types of security events in the form of graphical charts These charts reflect information gathered during the last 24 hours of operation To design and view a report 1 Navigate to Reports The Reports list is displayed Figure 41 YMS Reports ...

Page 57: ...lect Choose from list to choose specific gatekeepers Select By Name and in Filter type the specific gatekeeper name to filter the list of gatekeepers according to name Select By Serial Number and in Filter type the specific gatekeeper serial number to filter the list of gatekeepers according to serial number 5 In the Format area In Type select the type of report Text Bar chart Pie chart or Combine...

Page 58: ...Logging and Reporting Report Examples User Guide 57 Report Examples Figure 43 Security Summary Report Text and Chart ...

Page 59: ...Logging and Reporting Report Examples 58 Yoggie Management Server Figure 44 Security Summary Report Bar Chart ...

Page 60: ...Logging and Reporting Report Examples User Guide 59 Figure 45 Web Filtering Category Summary Report Pie Chart Figure 46 Registration Report Text ...

Reviews: