WARRANTY:
In addition to the warranty required by law, this product is
guaranteed for 5 years
from date of manufacture. The material
must be used according to the instructions provided and for its intended use. Faults must not be caused by deterioration or accidents
resulting from negligence, anomalous use or incorrect installation. In all cases, the warranty only includes replacement of faulty products.
No compensation for loss or damage may be claimed.
DS1054-050B
P2
P12
Urmet S.p.a. – 10154 TOrINO (ITaLY) – Via Bologna 188/C
For technical information, go to www.yokis.com or call:
Customer Service: +39 011.23.39.810 - export dept. Phone: +39 011.24.00.250/256
Fax: +39 011.24.00.296
dIreCTIVe 2012/19/eU OF THe eUrOPeaN ParLIaMeNT aNd OF THe COUNCIL of 4 July
2012 on waste electrical and electronic equipment (Weee)
The symbol of the crossed-out wheeled bin on the product or on its packaging indicates that this
product must not be disposed of with your other household waste.
Instead, it is your responsibility to dispose of your waste equipment by handing it over to a
designated collection point for the recycling of waste electrical and electronic equipment.
The separate collection and recycling of your waste equipment at the time of disposal will help to
conserve natural resources and ensure that it is recycled in a manner that protects human health
and the environment.
For more information about where you can drop off your waste equipment for recycling, please contact your
local city office, your household waste disposal service or the shop where you purchased the product.
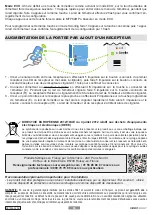
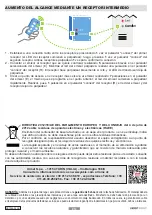
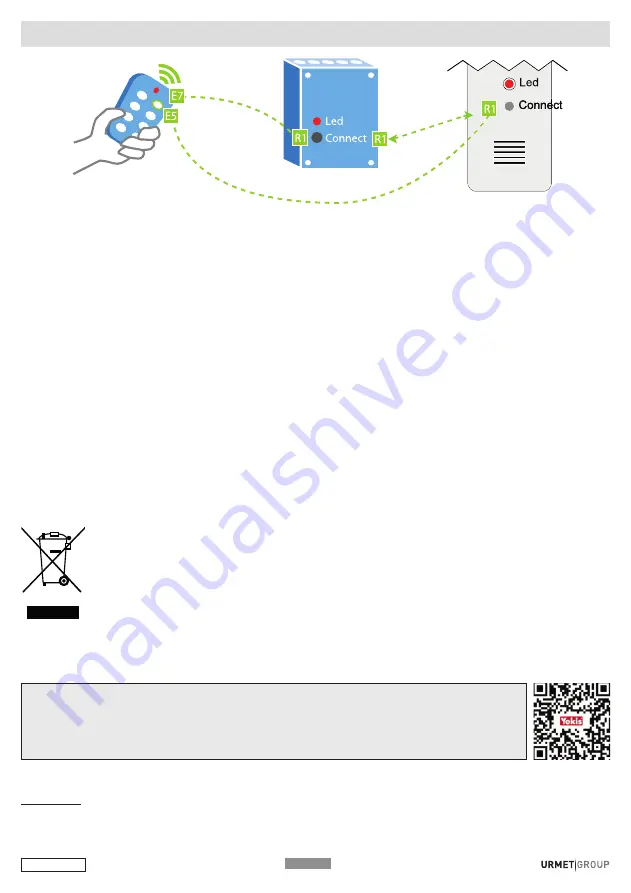
1 - Establish a radio connection between the receivers by pressing the "connect" button of the first receiver
once
(the LED of the receiver will start blinking), then press the "connect" button of the second receiver
once
. Both receivers will blink once to confirm the connection.
2 - Connect the transmitter to the receiver to be controlled by pressing the chosen pushbutton on the transmitter
(E)
5 times
. Press the pushbutton in the “Connect” hole of the receiver (R) while the transmitter LED is
flashing. The receivers will make the relay blink briefly and the LED of the transmitter will stop blinking.
3 - At this point, create an access point on the receiver nearest to the transmitter by pressing the transmitter (E)
pushbutton
7 times
(the same one programmed in the previous step). The transmitter LED will start flashing
rapidly. Then press the pushbutton in the “Connect” hole of the first receiver (R) once (
1 press
). The
transmitter and receiver LED will stop flashing.
HOW TO INCREASE THE RANGE USING AN INTERMEDIATE RECEIVER
Summary of Contents for 5454498
Page 30: ...DS1054 050B P2 P30...
Page 31: ...DS1054 050B P2 P31...
Page 32: ...DS1054 050B P2 P32...


