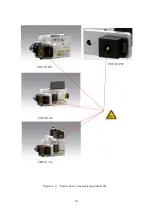
-11-
1.5.2 About the Class 3B Laser
Laser products are classified by their acceptable exposure limit ( AEL) based on the
laser beam wavelengths and power characteristics, and a common set of safety
standards is applied to the products in each class. The CSU-X1 is classified as a
laser hazard CLASS 3B instrument in accordance with WHO regulations, which
indicates that it is capable of producing skin or eye damage if used improperly.
Direct viewing into the laser beam or the viewing of reflected beams must strictly be
prevented. The WHO recommendations concerning health and industrial protection
when handling laser instruments must strictly be observed..
1.5.3 Safety
Precautions
(1)
Controlled access area
The laser products shall be operated within controlled access areas.
(2)
Warning Signs
At the entrance of the controlled access areas, post laser warning signs.
(3)
Surface reflection
Metallic and other lustrous and reflective surfaces may reflect laser beams. Make
sure that no unexpected reflection of laser beams may occur.
(4)
Beam path
The laser beam coming through the optical fiber is injected into the CSU-X1 via an
FC connector. Never remove the FC connector connected to the CSU-X1 unless the
outgoing laser beam is stopped. Do not directly view or touch the laser beam source,
optical fiber, or laser beam coming out of the CSU-X1.
(5)
Protective glasses
When you want to observe the direct light or reflected light, protect your eyes by
wearing protective glasses.
(6)
Key control of laser sources
Power supply of laser system used for laser confocal scanner system can be turned
on/off by using a key provided with the laser system. When you don’t use the laser
system, please remove the laser key and store it in a safe place so that unauthorized
persons are not able to operate the laser. For details, refer to the user’s manual of
the laser system you are using in combination of the CSU-X1.
Summary of Contents for CSU-X1
Page 1: ...User s Manual Confocal Scanner Unit CSU X1 IM 85A7C25 02E IM 85A7C25 02E 1 Edition...
Page 2: ......
Page 5: ...4 7 4 Control Signal 66 8 Command list 73 9 Warranty 75...
Page 6: ......
Page 15: ...13 Figure 1 3 Positions to attach warning labels to CSU X1 M2 E...
Page 16: ...14 Figure 1 4 Positions to attach warning labels to CSU X1 A2 E...
Page 17: ...15 Figure 1 5 Positions to attach warning labels to CSU X1 A3 E...
Page 18: ...16 Figure 1 6 Positions to attach warning labels 6 CSU X1 M1 CSU X1 A2 CSU X1 A3 CSU X1 FW...
Page 19: ...17 Figure 1 7 Examples of warning labels attached to the microscope...
Page 39: ...37 3 3 4 Connection Diagram CSU X1 A1 CSU X1 A2 Microscope Camera Microscope Camera...
Page 67: ...65 7 3 6 CSU X1CU 7 3 7 CSU X1FW Unit mm Unit mm...
Page 78: ......
Page 79: ...User s Manual CSU Control Unit CSUX1CU IM 85A7C26 02E IM 85A7C26 02E 1st Edition...
Page 80: ......
Page 82: ......
Page 98: ...18 4 Name and Function 1 2 3 4 5 6 7 8 9 10 11 12 13...
Page 117: ...User s Manual Filter Wheel CSUX1FW IM 85A7C27 01E IM 85A7C27 01E 1st Edition...
Page 118: ......
Page 120: ......
Page 132: ...14 4 Name and function 1 2 3 4 5 9 17 18 19...
Page 140: ...22 6 3 Dimension of CSUX1FW...


