<8. PARAMETER SETTINGS>
8-3
IM 11P03A03-01E
6th Edition : Jan. 26, 2022-00
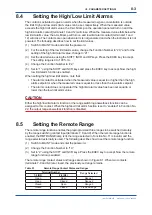
8.4
Setting the High/Low Limit Alarms
The contact is activated to give an alarm when the measured oxygen concentration is outside
the limit. High and low alarm limit values can be set, respectively. When the measured value
exceeds the high limit alarm value, the H-ALM lamp on the operation panel will turn on and the
high limit alarm contact (terminals 10 and 12) will close. When the measured value falls below the
low limit alarm value, the L-ALM lamp will turn on and low limit alarm contact (terminals 11 and
12) will close. The contacts are open when alarm is not generated and when the instrument is not
powered. The following describes how to set the limit values.
(1) Switch to MAINT mode and enter the password.
(2) For the setting of the low limit alarm value, change the Function Number to “20,” and for the
setting of the high limit alarm value, change to “21.”
(3) Set the desired value using the SHIFT, INCR and DP keys. Press the EXEC key to accept.
The setting range is 0 to 100% O
2
.
(4) Change the Function Number to “22.”
(5) Set to “1” using the SHIFT and INCR keys and press the EXEC key to accept. Now the high/
low limit alarm function is enabled.
When setting the high/low limit alarms, note that:
• The alarm contact is activated when the measured value is equal to or higher than the high
alarm setpoint or when the measured value is equal to or less than the low alarm setpoint.
• The alarm contact does not operate if the high limit alarm value has been set equal to or
lower than the low limit alarm value.
CAUTION
Either the high/low limit alarm function or the range switching answerback function can be
assigned to this contact. When the high/low limit alarm function is set to “enabled” in Function No.
22, the output range answerback function is disabled.
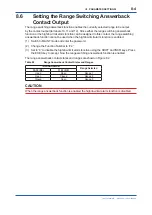
8.5
Setting the Remote Range
The remote range function enables the preprogrammed three ranges to be switched remotely
by the range switching contact input (terminals 7, 8 and 9). When the remote range function is
enabled, the RMT.RANGE lamp is lit, the range selected in Function No. 11 is invalid, and the
range selected externally is used. The following describes how to set the remote range function.
(1) Switch to MAINT mode and enter the password.
(2) Change the Function Number to “10.”
(3) Set to “2” using the SHIFT and INCR keys. Press the EXEC key to accept. Now the remote
range function is enabled.
The remote range contact states and ranges are shown in Figure 8.1. When two contacts
(terminals 7-9 and 8-9) are closed, the previously set range remains.
Table 8.1
Remote Range Contact States and Ranges
Terminal Number
Range Selected
7-9 (R3)
8-9 (R2)
Open
Open
Range 1
Open
Closed
Range 2
Closed
Open
Range 3
Closed
Closed
Previous range
Summary of Contents for MG8E
Page 5: ...Blank Page...
Page 9: ...Blank Page...
Page 13: ...Blank Page...
Page 17: ...Blank Page...
Page 21: ...Blank Page...
Page 27: ...Blank Page...
Page 61: ......
Page 63: ...Blank Page...

