<3. INSTALLATION>
3-2
IM 11P03A03-01E
6th Edition : Jan. 26, 2022-00
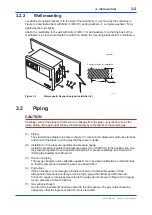
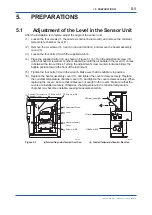
3.2.2
Wall mounting
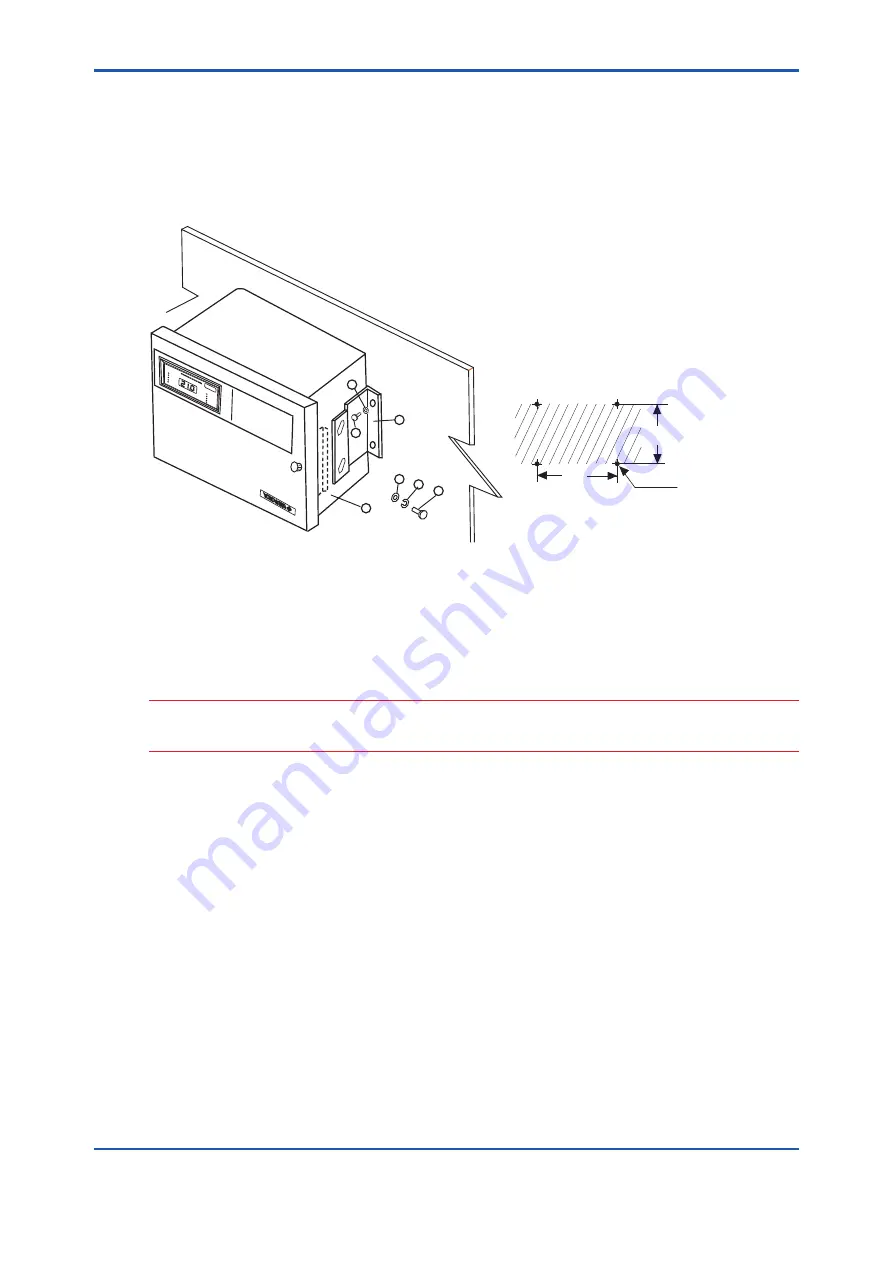
Locate the mounting brackets
to the side of the mainframe
as shown by the solid lines in
Figure 6.2 and fasten them with bolts
(M8×10), spring washers
, and plain washers <5> by
tightening the bolts lightly.
Attach the mainframe to the wall with bolts
(M8 × 14) and washers
so that the back of the
mainframe is in close contact with the wall; then, attach the mounting brackets to the mainframe.
FUNC
HEAT
ER
AUTO
CAL
MRT.R
ANG
E
AUTO
RAN
GE
LCL R
ANG
E
MEAN
S
MAIN
T
H-ALM
L-ALM
FAIL
DATA
OUT
PUT
vol %O
2
PARAMAGNETIC
OXYGEN
ANAL
YZER
F4.2E.ai
Position of holes for installation
100
388
4-M8
Unit:mm
1
2
3
4
5
8
9
Figure 3.2
Paramagnetic Oxygen Analyzer installation (2)
3.3 Piping
CAUTION
Carefully connect the pipes so that there is no leakage from the pipe connections such as
the
joints. Piping of the gas outlet, Please consider safety by components of the sample gas.
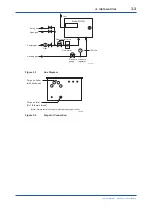
(1) Piping
The standard line diagram is shown in figure 3.3. Use 6/4 mm diameter metal tubes for lines
and connect the tubes in such a way that there are no leaks.
(2) Installation of the pressure regulator and pressure gauge
Install the pressure regulator and pressure gauge (0 to 0.4 MPa G) in the auxiliary line. Use
the pressure regulator to set a specified pressure. For pressure settings, see Section 5.2,
“Setting the Auxiliary Gas Pressure”.
(3) Caution on piping
This oxygen analyzer uses calibration gases for zero and span calibrations. Install the lines
so that the sample and calibration gases can be switched.
(4) Purge lines
If the atmosphere or sample gas contains corrosive or combustible gases or if the
atmospheric temperature is likely to rise too high, purge the instrument with clean air.
Connect a copper or stainless steel tube to the purge air inlet shown in Figure 3.4 to supply
air at a pressure of about 50 kPa G.
(5) Gas outlet (exhaust)
Gas from the instrument should be vented to the atmosphere. The gas outlet should be
designed so that the ingress of wind or rain is prevented.
Summary of Contents for MG8E
Page 5: ...Blank Page...
Page 9: ...Blank Page...
Page 13: ...Blank Page...
Page 17: ...Blank Page...
Page 21: ...Blank Page...
Page 27: ...Blank Page...
Page 61: ......
Page 63: ...Blank Page...


