<Toc>
<3. Programming>
3-7
IM 05E01D02-41E
1st Edition : May 31,2000-00
31.
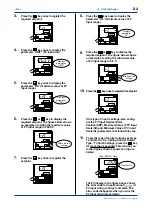
Press the
or
key to display the
required setpoint.
The figure below shows an example of the
parameter set to “1 hr and 20 min”.
PVE1
TME
PVE2
PRG1
HLD
PRG2
SET/ENT
1
PRG
2
PRG
RESET
P V
S P
Blinks during
change.
32.
Press the
SET/ENT
key once to register the
setpoint.
PVE1
TME
PVE2
PRG1
HLD
PRG2
SET/ENT
1
PRG
2
PRG
RESET
P V
S P
33.
Press the
SET/ENT
key once to display the
parameter “1.SP3”.
The setpoint of this parameter is not
changed in this example.
PVE1
TME
PVE2
PRG1
HLD
PRG2
SET/ENT
1
PRG
2
PRG
RESET
P V
S P
Displays
parameter
“1.SP3”.
34.
Press the
SET/ENT
key once to display the
parameter “1.TM3”.
PVE1
TME
PVE2
PRG1
HLD
PRG2
SET/ENT
1
PRG
2
PRG
RESET
P V
S P
Displays
parameter
“1.TM3”.
35.
Press the
or
key to display the
required setpoint.
The figure below shows an example of the
parameter set to “10 min”.
PVE1
TME
PVE2
PRG1
HLD
PRG2
SET/ENT
1
PRG
2
PRG
RESET
P V
S P
Blinks during
change.
36.
Press the
SET/ENT
key once to register the
setpoint.
PVE1
TME
PVE2
PRG1
HLD
PRG2
SET/ENT
1
PRG
2
PRG
RESET
P V
S P
With the steps discussed above, up to
three segments of the controller are pro-
grammed.
To program the controller for a 4th seg-
ment or more, repeat steps 21 to 36.
[TIP]
The parameter “1.JC” (Junction Code) that
follows the “1.TMA” (Segment-10 Time Event)
parameter is used to determine how the control-
ler should behave at the end of program opera-
tion.
If the behavior need not be defined, leave the
parameter set as “1.JC = 0”.
37.
Now programming is complete. Press the
SET/ENT
key for more than 3 seconds.
This returns you to the display shown at
power-on (figure below).
Stop (RESET) state
PVE1
TME
PVE2
PRG1
HLD
PRG2
SET/ENT
1
PRG
2
PRG
RESET
P V
S P
Displays PV.
Summary of Contents for UP350
Page 2: ...Blank Page ...
Page 52: ...Blank Page ...
Page 62: ...Blank Page ...
Page 72: ...Blank Page ...
Page 94: ...Blank Page ...
Page 96: ...Blank Page ...

