3. First start-up
4. Adding divices
1. Control unit should not operate in places with high humidity.
2. To proper operation you need to have permanent access to the WI-Fi network.
Access point network settings:
- no UDP/TCP port block
- DHCP enabled
- firewall disabled
- MAC filtering (white list) disabled while pairing unit with app
3. Do not disassemble or repair the product yourself. This carries the risk of electric shock and loss of warranty.
4. Due to possible interference between the device and the control panel, in exceptional situations, the view in the application
may not correspond to reality.
5. During the motor operation the presented position of roller shutter is only demonstrative, and after stopping the motor its
position may differ by a small value.
6. After changing the end position, you must issue a device motion command to update its position in the application.
7. Pressing and holding the RESET button for 10 seconds restores factory settings.
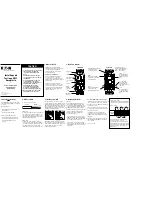
1. Connect the unit control to the power supply.
2. Install YOODA Smart Home 2 application from Google Play Store. After starting the application, create a new account.
Activation will be confirmed by e-mail.
4. After receiving confirmation of account creation, sign into application.
5. Add YOODA Smart Home 2 control unit to the application:
a) Disable mobile data transfer
b) Go to Settings > Hubs > Add / +
c) Enter password of Wi-Fi network, that unit should work in. If network name is not displayed in app or other network name
displays then please verify if your mobile device is connected to desired network. If network name still is not dispayed please
check app permission settings (access to location and/or location service) or enter your network name manually.
d) Press and hold programming button on side of the unit until LED diode starts flashing purple, even if the diode
flashes purple since the unit was powered on.
e) Press PAIR button in application
f) Connect to the Wi-Fi network generated by the control unit and return to the application.
1. You can add to 30 devices to the YOODA Smart Home 2 control unit.
2. Adding two-way devices:
a) Put the device in the programming mode by pressing the programming button for 2 seconds on the device being added or
by pressing the P2 button twice on the programmed transmitter.
b) Press PAIR button in application.
3. Adding one-way devices:
The YOODA Smart Home 2 control unit is compatible with YOODA one-way devices. Control of such devices is done using
application without a feedback signal.
a) Press PAIR button in application.
b) On the programmed transmitter, press and hold the STOP button for about 3 seconds.
5. Groups of devices
1. Each added device can be assigned to only one group.
2. You can create a maximum of 20 groups.
3. After selecting the group, it is possible to open or close all devices of this group.
6. Scenarios
1. Scenarios are used to control several devices in the manner chosen during its creation.
2. You can create maximum 20 scenarios. Scenarios can be started manually or temporarily. The maximum number of time
triggers is 20.
2