background image

www.yorkfitness.com

11

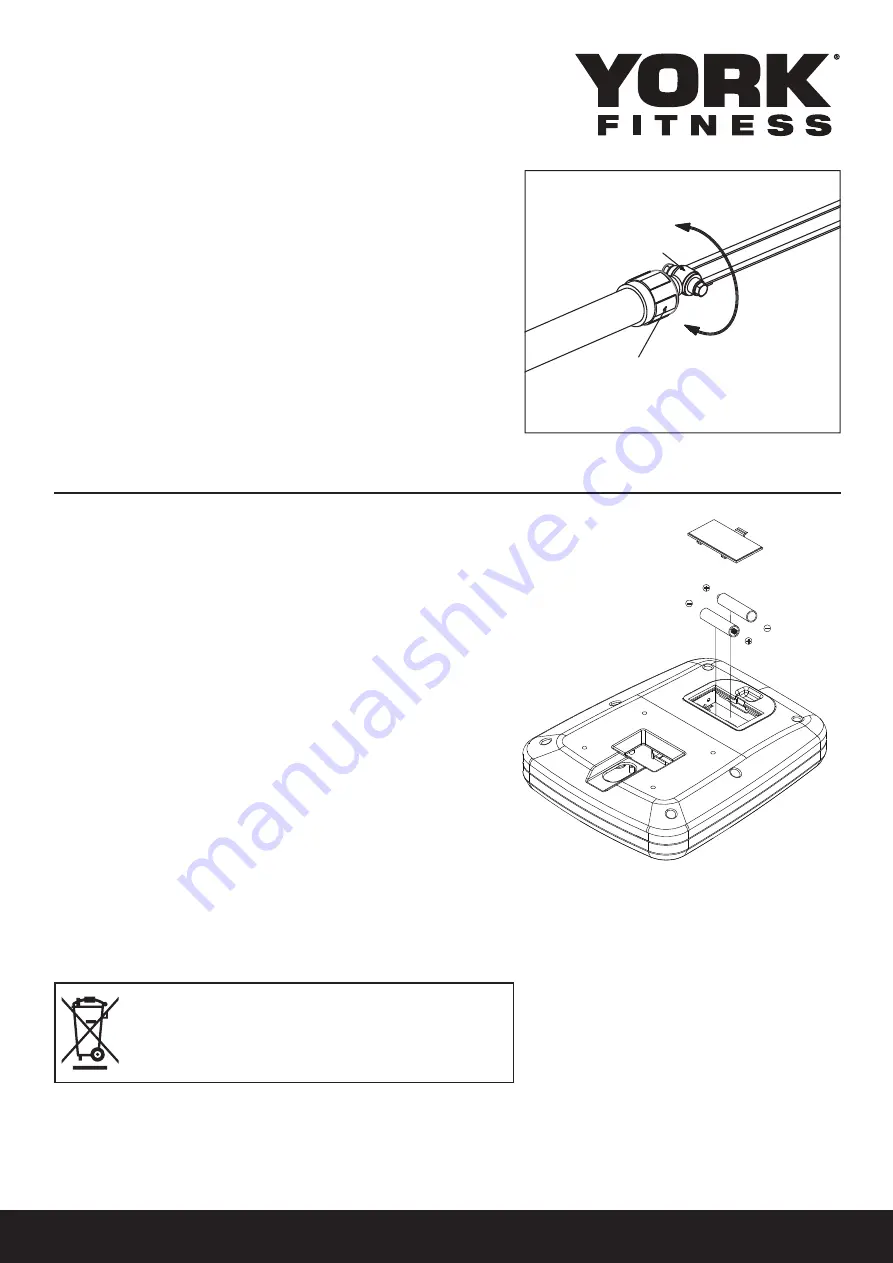
Adjusting the resistance

Hold the cylinder in the correct position while adjusting  
the resistance.

Hold here

Adjusting the resistance here

Batteries Replacement Instructions:

1.  Remove the meter from the exercise equipment.

2.  Open the battery compartment cover.

3.  Remove battery by pulling the battery in direction of spring and 

lift opposite end upwards.

4.  Insert 2 AAA batteries ensuring you match the polarity markings 

(+ and -) on the batteries with the indicators in the battery 

compartment. Push lat end ( - ) against spring and when clear 

push other end into holder. 

5.  Close the battery compartment.

Tips & Warnings

•  Always change both batteries at the same time.

•  Always use the same type of batteries.

•  Never recharge Alkaline batteries.

• 

Do not try to heat, ignite, disassemble or throw batteries into a ire.

•  Do not leave old batteries in the console, and remove batteries from 

the console if you won’t be using it for a long time.

Protect the environment by not disposing of this 
product or batteries with household waste. Check 
your local authority for recycling advice and facilities.

Summary of Contents for 56020

Page 1: ...Owner s Manual Quest Rower 56020 April 8 2014 www yorkfitness com ...

Page 2: ...e the time to read this owner s manual as it will help you to get the most out of your new exercise equipment For more information visit www yorkitness com Contents Safety information 03 Customer support 04 Care Maintenance 05 Assembly instructions 06 Operational instructions 12 Troubleshooting 13 Fitness guide 14 Exploded drawing 18 Part list 20 Protect the environment by not disposing of this pr...

Page 3: ...ny wall chart supplied Injuries to health may result from incorrect or excessive training The equipment is under no circumstances suitable as a children s toy Parents and others in charge of children should be aware of their responsibility because the natural play instinct and the fondness of experimenting of children can lead to situations and behavior for which the training equipment is not inte...

Page 4: ...y Standards EN957 Part 1 7 Class HC Electrical Info 2 x AAA batteries Serial No 56020 XXXXXXXXX Product s Name Serial Number This product label is an example only it is not the real product name and serial number of the item you have bought IMPORTANT Please retain your sales receipt York Fitness Customer Care may request proof of purchase to validate eligibility for warranty service Warranty cover...

Page 5: ...ings are tight before use Always replace damaged worn components with original parts from the manufacturer PREPARE YOUR WORK AREA It is important you assemble the product in a clean and uncluttered space WORK WITH A FRIEND We recommend you have someone assist you with the assembly as some of the components are quite heavy OPEN THE CARTON Check any warnings on the carton and make sure you have it t...

Page 6: ...ge Bolt M8 50MM llen ead olt ylon ut Domed Nut M8 Foot Pedal Spacer Rubber Stopoer Roller Pivot Shaft Flat Washer 8 2 22 T2 0 Flat Washer 8 5 16 T1 5mm ex ocket utton ead crew Truss Head Screw M5 10MM Truss Head Screw M6 40 Aluminum Track End Cap L R Allen Key L6 W Phillip Head Allen KeyL6 Box Spanner13 17 STEP 1 P 2 2pcs P 7 1pc P 16 P 17 P 2 P 2 P 7 ...

Page 7: ...www yorkfitness com 7 STEP 2 P 1 4pcs P 3 4pcs P 9 4pcs P 4 4pcs P 15 P 4 P 3 P 9 P 1 K I STEP 3 P 14 3pcs P 17 R J P 14 ...

Page 8: ...www yorkfitness com 8 Assembly instructions STEP 4 R P 6 P 9 P 10 P 10 2pcs P 9 2pcs P 16 STEP 5 P 12 1pc P 13 1pc P 12 P 13 ...

Page 9: ...www yorkfitness com 9 STEP 6 A 1 A 2 S A 2 4pcs Pre installed screw P 17 STEP 7 P 11 4pcs P 17 P 11 A ...

Page 10: ...y instructions STEP 8 O D D P 5 P 8 P 2 P 2 X2 P 8 X2 P 16 P 17 Final Check Your rower is now assembled Please make the following inal checks Make sure all screws bolts are tightened Make sure the equipment is on a lat level surface ...

Page 11: ...d on the batteries with the indicators in the battery compartment Push lat end against spring and when clear push other end into holder 5 Close the battery compartment Tips Warnings Always change both batteries at the same time Always use the same type of batteries Never recharge Alkaline batteries Do not try to heat ignite disassemble or throw batteries into a ire Do not leave old batteries in th...

Page 12: ...d hold for 3 seconds to reset all function igures besides Total CNT DISPLAY DESCRIPTION SCAN The sequence of display TMR COUNT DISTANCE CALORIES TOTAL CNT In SCAN mode press MODE key to choose other functions Automatically scans through each mode in sequence every 6 seconds TIME Without a target value time will count up With a target value time will count down from your target time to 0 and as 0 i...

Page 13: ...mon and many problems can be solved by making sure the cables are properly connected The following table details the most common problems and how to ix them If you still have a problem after going through the troubleshooting guide please call your local YORK distributor for advice PROBLEM CORRECTION NO DISPLAY Check if batteries are inserted correctly check batteries NO PULSE SIGNAL Verify all wir...

Page 14: ...es The correct form for several basic stretches is shown at the right Move slowly as you stretch never bounce 1 Hamstring Stretch Sit with one leg extended Bring the sole of the opposite foot toward you and rest it against the inner thigh of your extended leg Reach toward your toes as far as possible Hold for 15 counts then relax Repeat 3 times for each leg Stretches Hamstrings lower back and groi...

Page 15: ...itness levels These sessions should be performed at 70 80 of your estimated maximum heart rate and can also involve bouts of interval training that would have your heart rate peaking for short times near your maximum heart rate level These are intense sessions and will require at least a 48 hour rest between sessions Calculating Your Target Heart Rate First you need to ind your estimated maximum h...

Page 16: ...en completing the exercise 2 Hold the handle in your right hand 3 Keep a straight back as shown and pull the handle into the body Release back to the start position 4 Repeat with your other arm Standing Bicep Curl 1 Place balls of both feet onto the rower for stability Hold the handle with both hands with plams facing upwards 2 Keeping the elbows close to the body pull the handle toward your face ...

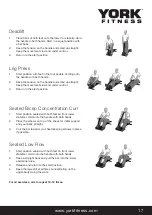
Page 17: ...trol 3 Return to the start position Seated Bicep Concentration Curl 1 Start position seated with both feet on front rower stabilizer Hold onto the handle with both hands 2 Place the elbows on top of the knees for initial support and your back straight 3 Curl the bar towards your head keeping elbows in place if possible Seated Low Row 1 Start position seared with both feet on front rower stabilizer...

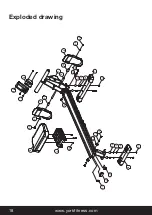
Page 18: ...www yorkfitness com 18 R J P 14 A 1 P 11 T D D I S O P 5 P 5 P 8 P 2 P 2 P 7 P 4 P 3 P 9 P 2 P 2 P 9 P 1 P 4 P 3 P 9 P 1 K P 9 P 10 P 6 P 12 L 10 P 13 Exploded drawing ...

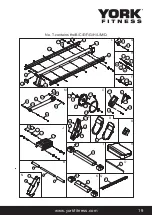
Page 19: ... G H I K M L O Q R A 5 A 1 B 2 A 3 A 2 A 4 B 1 B 2 C J C 5 C 1 C 2 C 3 C 4 C 6 D E 1 E 2 E 2 E 2 I 1 I 2 F 1 F 2 F 3 G 1 G 2 G 3 J 1 J 2 J 3 J 4 J 5 K 1 K 2 M 1 M 2 M 6 M 7 M 4 M 3 M 5 L 1 L 2 L 3 L 6 L 5 L 4 L 7 L 8 L 9 O Q S E 2 L 10 M 8 H 4 H 6 H 5 H 1 H 2 H 3 N 1 N 2 ...

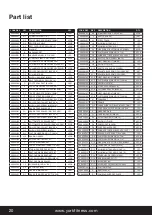
Page 20: ...IAGE ROLLER 4PCS 56020J04 J 4 BUSHING 12 8 1 6 2 4PCS 56020J05 J 5 NYLON NUT M8 4PCS 56020K00 K REAR STABILIZER SET 1SET 56020K01 K 1 REAR STABILIZER 40 80 T1 2 250 1PC YORK REF REF DESCRIPTION QTY 56020K02 K 2 STABILIZER END CAP 40 80 2PCS 56020L00 L SEAT TRACK SET 1SET 56020L01 L 1 STEEL TRACK 1PC 56020L02 L 2 ALUMINUM TRACK L 1PC 56020L03 L 3 ALUMINUM TRACK R 1PC 56020L04 L 4 HEX SOCKET BUTTON ...

Page 21: ...www yorkfitness com 21 ...

Page 22: ...www yorkfitness com 22 Notes ...

Page 23: ...www yorkfitness com 23 ...

Page 24: ...www yorkfitness com ...

Reviews: