background image

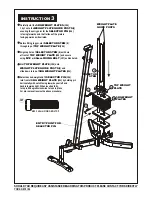
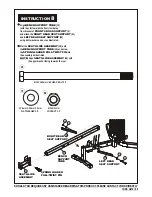
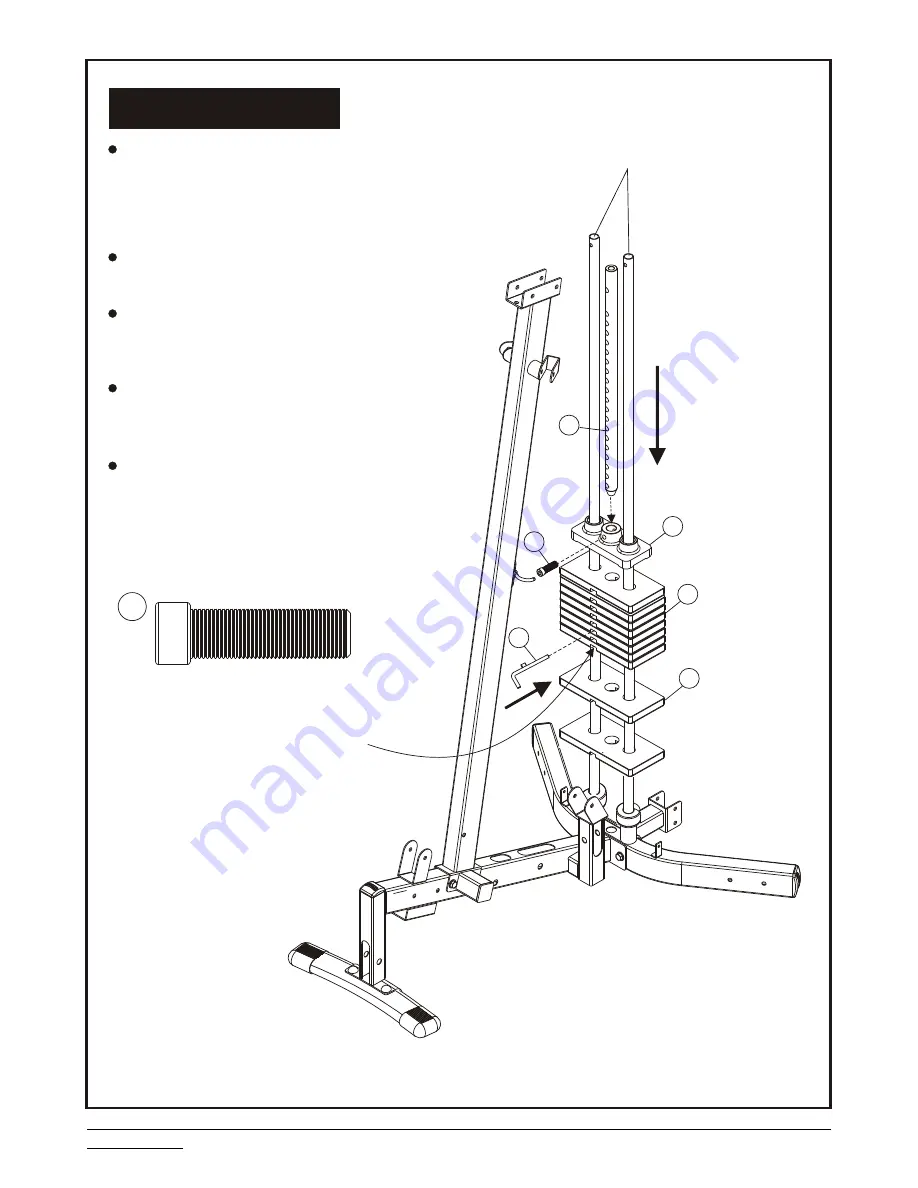
M12 X 40mm FIXING BOLT X 

1

104

106

104

105

107

8

107

SHOULD YOU REQUIRE ANY ASSISTANCE REGARDING THIS PRODUCT PLEASE CONTACT YORK DIRECTLY

INSTRUCTION

 3

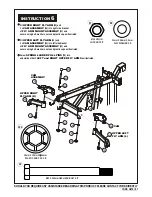
Carefully slot the 

5KG WEIGHT PLATES

 (104) 

1 by 1 onto the 

WEIGHT PLATE GUIDE POSTS

 (5) 

ensuring the entry point for the 

SELECTOR PIN

 (106) 

is facing forwards and the flat face of the plate is 

facing upwards as illustrated.

Before fitting to gym, slot 

SELECTOR STEM

 (8) 

through top of 

TOP WEIGHT PLATE

 (105)

Align top hole of 

SELECTOR STEM

 (8) with hole 

at front of 

TOP WEIGHT PLATE

 (105) and secure 

using 

M12 x 40mm FIXING BOLT

 (107) as illustrated.

Slot 

TOP WEIGHT PLATE

 (105) onto 

WEIGHT PLATE GUIDE POSTS

 (5) and 

slide down to top of 

5KG WEIGHT PLATES

 (104). 

Select desired weight and fit 

SELECTOR PIN

 (106) 

into front of 

5KG WEIGHT PLATE

 (104) by holding pin 

horizontally with notch facing towards your left and 

handle towards right. When inserted fully, 

turn pin 90 degrees clockwise to lock in place

For pin removal reverse the above procedure. 

WEIGHT PLATE 
GUIDE POSTS

SELECTOR 

STEM

TOP WEIGHT 
PLATE

5KG WEIGHT 
PLATES

ENTRY POINT FOR 
SELECTOR PIN

YORK G570 / 04

Summary of Contents for G-570

Page 1: ...G F I T N E S S ...

Page 2: ......

Page 3: ...mental and physical development and above all their temperament should be taken into account They should be controlled and instructed in the correct use of the equipment The equipment is under no circumstances suitable as a children s toy Ensure that adjustment devices are not left projecting as they may interfere with people WARNING Injuries to health may result from incorrect use of this equipme...

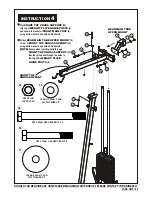
Page 4: ...SS SUPPORT 2 using washers and bolts as illustrated NOTE Ensure the feet of the OVAL STABILIZER 4 are pointing forwards Slot WEIGHT PLATE GUIDE POSTS 5 down into REAR BASE STABILIZER 1 and bolt together with REAR MAIN TUBE LOWER MOUNT 3 and FRONT CROSS SUPPORT 2 using the washers bolts and nuts as illustrated NOTE Ensure when inserting bolts through REAR BASE STABILIZER 1 that they also pass throu...

Page 5: ...ER BUMPERS 99 onto WEIGHT PLATE GUIDE POSTS 5 and slide down to bottom Fix FLY ARM RETAINING BRACKET 7 onto rear of FRONT MAIN POST 6 using Allen head bolts as illustrated Attach FRONT MAIN POST 6 onto FRONT CROSS SUPPORT 2 using washers bolts and nuts as illustrated NOTE Ensure when attaching FRONT MAIN POST 6 that the FLY ARM RETAINING BRACKET 7 is facing towards the rear WEIGHT PLATE GUIDE POST...

Page 6: ...E 105 Align top hole of SELECTOR STEM 8 with hole at front of TOP WEIGHT PLATE 105 and secure using M12 x 40mm FIXING BOLT 107 as illustrated Slot TOP WEIGHT PLATE 105 onto WEIGHT PLATE GUIDE POSTS 5 and slide down to top of 5KG WEIGHT PLATES 104 Select desired weight and fit SELECTOR PIN 106 into front of 5KG WEIGHT PLATE 104 by holding pin horizontally with notch facing towards your left and han...

Page 7: ...o top of WEIGHT PLATE GUIDE POSTS 5 and secure to bracket of FRONT MAIN POST 6 using bolts washers and nuts as illustrated Attach REAR MAIN TUBE UPPER MOUNT 9 to rear of FRONT TOP CROSS SUPPORT 10 using bolts washers and nuts as illustrated NOTE Ensure when inserting bolts through FRONT TOP CROSS SUPPORT 10 that they also pass through the holes in the top of the WEIGHT PLATE GUIDE POSTS 5 REAR MAI...

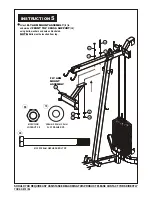
Page 8: ...ECTLY INSTRUCTION 5 Attach FLY ARM MOUNT ASSEMBLY 11 to underside of FRONT TOP CROSS SUPPORT 10 using bolts washers and nuts as illustrated NOTE Bolts must be inserted from top M10 X 100mm HEX HEAD BOLT X 2 48 10 5mm X 23mm X 2mm FLAT WASHER X 4 M10 NYLON LOCKNUT X 2 68 70 FLY ARM MOUNT ASSEMBLY YORK G570 06 ...

Page 9: ...RIGHT FLY ARM 13 and 1 x CAM ASSEMBLY 14 into right side bracket of FLY ARM MOUNT ASSEMBLY 11 and secure using bolt washers nuts and plastic cap as illustrated Fit UPPER LEFT FLY ARM 12 and 1 x CAM ASSEMBLY 14 into left side bracket of FLY ARM MOUNT ASSEMBLY 11 and secure using bolt washers nuts and plastic caps as illustrated Screw SPRING LOADED PULL PINS 79 into underside of both LEFT and RIGHT ...

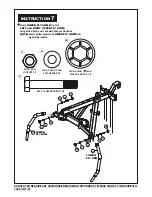
Page 10: ...C END CAP X 4 102 67 69 45 SHOULD YOU REQUIRE ANY ASSISTANCE REGARDING THIS PRODUCT PLEASE CONTACT YORK DIRECTLY INSTRUCTION 7 Attach LOWER FLY ARM 15 to both LEFT and RIGHT UPPER FLY ARMS using bolts washers nuts and plastic caps as illustrated NOTE Ensure bottom handles on LOWER FLY ARMS 15 are pointing inwards LOWER FLY ARM LOWER FLY ARM YORK G570 08 ...

Page 11: ...SUPPORT 20 using bolt washers and nut as illustrated Slot the SEAT GLIDE ASSEMBLY 18 onto the BENCH SUPPORT TUBE 19 and screw the SPRING LOADED PULL TWIST PIN into the assembly as illustrated NOTE Align SEAT GLIDE ASSEMBLY 18 with the upper bracket facing towards the rear M10 X 165mm HEX HEAD BOLT X 1 10 5mm X 23mm X 2mm FLAT WASHER X 2 M10 NYLON LOCKNUT X 1 46 68 70 BENCH SUPPORT TUBE RIGHT REAR ...

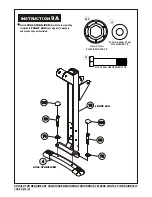
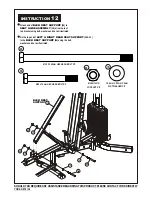
Page 12: ... X 2 17mm X 17mm PLASTIC END CAP X 2 70 58 SHOULD YOU REQUIRE ANY ASSISTANCE REGARDING THIS PRODUCT PLEASE CONTACT YORK DIRECTLY INSTRUCTION 9A Attach OVAL STABILIZER 4 with the feet pointing forwards to FRONT LEG 16 using bolts washers and plastic caps as illustrated FRONT LEG OVAL STABILIZER YORK G570 10 103 ...

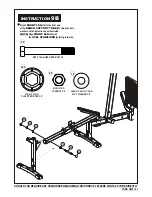
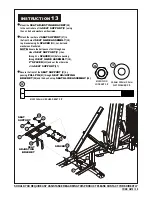
Page 13: ... FRONT LEG 16 to the front end of the BENCH SUPPORT TUBE 19 using the bolt washers nut and plastic cap as illustrated NOTE Align FRONT LEG 16 with the OVAL STABILIZER 4 facing forwards 10 5mm X 23mm X 2mm FLAT WASHER X 2 M10 NYLON LOCKNUT X 1 68 70 17mm X 17mm PLASTIC END CAP X 2 103 M10 X 75mm HEX HEAD BOLT X 1 55 YORK G570 11 ...

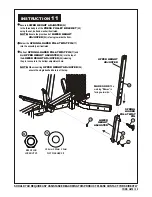
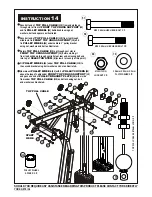
Page 14: ...and washers as illustrated Attach PRESS PULLEY BRACKET 22 to side bracket of the FRONT CROSS SUPPORT 2 using nut washers and bolt as illustrated NOTE Ensure the RUBBER STOP of the PRESS PULLEY BRACKET 22 is facing downwards M10 X 80mm HEX HEAD BOLT X 1 10 5mm X 23mm X 2mm FLAT WASHER X 4 M10 NYLON LOCKNUT X 2 M10 x 75mm HEX HEAD BOLT X 1 53 55 68 70 LEVEL BRACKET PRESS PULLEY BRACKET YORK G570 12 ...

Page 15: ... SPRING LOADED PULL TWIST PIN 77 into the assembly as illustrated Pull out SPRING LOADED PULL TWIST PIN 77 and Slot UPPER HEIGHT ADJUSTER 25 into the top of the LOWER HEIGHT ADJUSTER 24 releasing the pin to secure in the bottom adjustment hole NOTE When inserting UPPER HEIGHT ADJUSTER 25 ensure the single bushed hole is at the top 10 5mm X 23mm X 2mm FLAT WASHER X 2 68 70 M10 NYLON LOCKNUT X 1 UPP...

Page 16: ...LIDE ASSEMBLY 18 at rear hole of top bracket using bolt washers and nut as illustrated Fix the top end of LEFT RIGHT REAR SEAT SUPPORT 20 21 to the BACK REST SUPPORT 26 using the bolt washers and nut as illustrated M10 X 165mm HEX HEAD BOLT X 1 M10 x 75mm HEX HEAD BOLT X 1 10 5mm X 23mm X 2mm FLAT WASHER X 4 68 70 M10 NYLON LOCKNUT X 2 55 46 BACK REST SUPPORT YORK G570 14 ...

Page 17: ... using 2 x SPACER 111 nut bolt and washers as illustrated NOTE Ensure the bolt passes first through one side of SEAT SUPPORT 27 then through 1 x SPACER 111 before passing through SEAT GLIDE ASSEMBLY 18 nd 2 SPACER 111 and out the other side of the SEAT SUPPORT 27 Secure the front of the SEAT SUPPORT 27 by passing PULL PIN 81 through SEAT ADJUSTING BRACKET 28 and the bush on top SEAT GLIDE ASSEMBLY...

Page 18: ...from top back down through centre hole at rear and screwing bolt end into top of SELECTOR STEM 8 screw 5 turns only at this point Fit PULLEY WHEEL 84 under TOP PULL CABLE 119 to the second bracket using bolt washers and nut as illustrated Now mount PULLEY WHEEL 84 with 2 x PULLEY COVERS 85 above the loop of cable under FRONT TOP CROSS SUPPORT 10 and pass one end of PULLEY BRACKET PLATE 38 either s...

Page 19: ...ing the pin to secure in the centre adjustment hole NOTE The PULLEY GLIDE BRACKET 34 has a flat edge inside ensure you align this with the flat side of the HIGH LOW SUPPORT TUBE 33 before attempting to slot in place Attach bottom of HIGH LOW SUPPORT TUBE 33 to front left side of REAR BASE STABILIZER 1 using the bolts washers and nuts as illustrated M10 X 70mm HEX HEAD BOLT X 2 10 5mm X 23mm X 2mm ...

Page 20: ...ch ROTATING PULLEY BRACKET 36 to front of PULLEY GLIDE BRACKET 34 using bolt washers and nut as illustrated NOTE Ensure the metal loop of the ROTATING PULLEY BRACKET 36 is facing upwards as illustrated 36 M10 X 100mm HEX HEAD BOLT X 1 48 M10 X 78mm HEX HEAD BOLT X 2 54 10 5mm X 23mm X 2mm FLAT WASHER X 3 M10 NYLON LOCKNUT X 1 68 70 HIGH LOW CROSS SUPPORT ROTATING PULLEY BRACKET 103 M10 X 65mm HEX ...

Page 21: ...bolt washers and nuts as illustrated Mount 2 x PULLEY WHEELS 84 with PULLEY COVERS 85 under PEC CABLE 120 to the 2 brackets on either side of the FRONT MAIN POST 6 using the bolts and washers as illustrated Now mount PULLEY WHEEL 84 with 2 x PULLEY COVERS 85 above the loop of cable behind FRONT MAIN POST 6 and pass one end of ANGLED DOUBLE PULLEY BRACKET 37 either side from under PEC CABLE 120 and...

Page 22: ... WHEEL 84 before passing under HIGH LOW SUPPORT TUBE 33 Loop HIGH LOW PULLEY CABLE 118 back up over the near side front PULLEY WHEEL 84 followed by the outside PULLEY WHEEL 84 then down and mount the cable end inside the small bracket at top of PULLEY GLIDE BRACKET 34 using bolt washers and nut as illustrated Now mount PULLEY WHEEL 84 with 2 x PULLEY COVERS 85 above the loop of cable under HIGH LO...

Page 23: ...ACT YORK DIRECTLY INSTRUCTION 18 70 101 58 70 85 84 85 39 118 70 68 112 112 72 57 103 72 68 103 84 70 101 113 70 70 58 68 85 84 85 68 47 SINGLE PULLEY BRACKET HIGH LOW PULLEY CABLE START HERE 61 73 73 66 118 103 103 YORK G570 21 HIGH LOW PULLEY CABLE 7210mm LONG X 1 118 ...

Page 24: ... illustrated NOTE Ensure the small bracket at the bottom of the LEG EXTENSION ASSEMBLY 31 is facing towards the rear and the bar of the LEG CURL ASSEMBLY 32 is facing towards the front Slot FOAM ROLLERS 100 onto either end of bar at bottom of LEG CURL ASSEMBLY 32 Secure the LEG CURL ASSEMBLY 32 in position by fitting PULL PIN 80 through centre hole on side through LEG EXTENSION ASSEMBLY 31 and out...

Page 25: ...FRONT CROSS SUPPORT 2 and align the hole in the other end of LOWER SUPPORT TUBE 17 with the hole in FRONT CROSS SUPPORT 2 and securing them all using the same bolt nut washers and spacers as illustrated nd Next thread LEG EXTENSION CABLE 117 up from underneath through the 2 free slot in FRONT CROSS SUPPORT 2 and align 1 x PULLEY WHEEL 84 with PULLEY COVERS 85 in side nd tube and in front of cable ...

Page 26: ...ACT YORK DIRECTLY INSTRUCTION 20 85 84 85 70 68 103 103 68 70 117 70 70 50 50 103 103 LEG EXTENSION CABLE PLUNGER 17 LOWER SUPPORT TUBE 59 0 7 70 68 7 11 112 112 112 112 70 70 58 70 84 VIEW FROM RIGHT SIDE START HERE LEG EXTENSION CABLE 3350mm LONG X 1 117 YORK G570 24 ...

Page 27: ...SHOULD YOU REQUIRE ANY ASSISTANCE REGARDING THIS PRODUCT PLEASE CONTACT YORK DIRECTLY INSTRUCTION 20 85 84 85 70 68 112 49 70 112 FIT INSIDE TUBE YORK G570 25 ...

Page 28: ... rear and secure using bolt washers and nut as illustrated Feed CONNECT CABLE 124 down the left side of the gym and loop from rear under PULLEY WHEEL 84 mounted on the outside of FRONT CROSS SUPPORT 2 Attach another PULLEY WHEEL 84 with PULLEY COVERS 85 to the far side of the PRESS PULLEY BRACKET 22 using the bolt washers and nut as illustrated then feed cable over top st Insert another PULLEY WHE...

Page 29: ...5 84 85 112 112 57 70 70 70 68 85 84 85 58 70 85 84 85 70 68 DOUBLE PULLEY BRACKET PULLEY BRACKET PLATE 29 38 58 70 85 84 85 70 68 70 68 112 48 70 124 70 68 112 85 84 85 VIEW FROM RIGHT SIDE 53 NOTE Over time the cables may stretch move pulley wheels to inner adjustment holes as required to correct the cable length START HERE CONNECT CABLE ...

Page 30: ...IRECTLY INSTRUCTION 22 73 73 61 61 73 61 114 115 73 61 Fit the REAR UPHOLSTERY 115 to BACK REST SUPPORT 26 and SEAT 114 to SEAT SUPPORT 27 using the washers and bolts as illustrated M8 X 37mm HEX HEAD BOLT X 4 8 5mm X 20mm X 2mm WASHER X 4 61 73 REAR UPHOLSTERY SEAT YORK G570 28 ...

Page 31: ...ON 23 Insert the REAR MAIN UPRIGHT 30 top first into REAR MAIN TUBE UPPER MOUNT 9 then swing bottom into REAR MAIN TUBE LOWER MOUNT 3 and secure using bolts washers and nuts as illustrated REAR MAIN UPRIGHT M10 X 80mm HEX HEAD BOLT X 2 53 M10 x 85mm HEX HEAD BOLT X 2 10 5mm X 23mm X 2mm FLAT WASHER X 8 M10 NYLON LOCKNUT X 4 68 70 51 YORK G570 29 ...

Page 32: ...he holes along the long edge are towards the rear Fit the REAR WEIGHT COVER 109 to the SIDE WEIGHT COVER 108 on the right nd followed by the 2 SIDE WEIGHT COVER 108 on the left and secure using screws washers and bolts as illustrated M8 X 15mm ALLEN HEAD BOLT X 4 M6 X 12mm MACHINE SCREW X 8 8 5mm X 20mm X 2mm FLAT WASHER X 4 73 63 62 YORK G570 30 73 62 63 63 63 63 73 62 108 63 108 63 63 63 REAR WE...

Page 33: ...rough the pivot tube mounted on the REAR MAIN UPRIGHT 30 and out flush with the other side of the BENCH PRESS ARM 40 then secure using the bolts washers and plastic caps as illustrated Attach the top hole of the UPPER HEIGHT ADJUSTER 25 to the bracket on the cross bar of the BENCH PRESS ARM 40 using the nut bolt and washers as illustrated BENCH PRESS ARM M10 X 50mm HEX HEAD BOLT X 1 58 M10 X 25mm ...

Page 34: ...UCT PLEASE CONTACT YORK DIRECTLY INSTRUCTION 26 Fit the LAT BAR 41 to the ball end of TOP PULL CABLE 119 using 1 x SNAP LOCK HOOK 76 Attach the SHORT PULLEY BAR 42 to the ball end of HIGH LOW PULLEY CABLE 118 using the CHAIN 78 and 2 x SNAP LOCK HOOKS 76 YORK G570 32 76 ...

Page 35: ...SLIDE SEAT TO FRONT FOLD LEVEL BRACKET UP PULL HOLD PIN OUT LIFT BENCH UP TO VERTICAL AND RELEASE PIN TO LOCK IN PLACE SHOULD YOU REQUIRE ANY ASSISTANCE REGARDING THIS PRODUCT PLEASE CONTACT YORK DIRECTLY YORK G570 33 FOLDED FOR STORAGE INSTRUCTION 27 ...

Page 36: ...N BE STORED IN RETAINING BRACKET FRONT VIEW TO SHOW ADJUSTMENT PIN FLY ARM ADJUSTMENT PULL HOLD PIN OUT SLIDE PULLING GLIDE BRACKET TO DESIRED ADJUSTMENT POSITION RELEASE PIN TO LOCK HIGH LOW PULLING ADJUSTMENT PULL AND HOLD PIN SLIDE SEAT TO DESIRED ADJUSTMENT POSITION RELEASE PIN TO LOCK SEAT ADJUSTMENT PULL AND HOLD PIN MOVE PRESS ARM TO DESIRED START POSITION RELEASE PIN TO LOCK PRESS ARM ADJU...

Page 37: ...SHOULD YOU REQUIRE ANY ASSISTANCE REGARDING THIS PRODUCT PLEASE CONTACT YORK DIRECTLY DESCRIPTION YORK G570 35 ...

Page 38: ...SHOULD YOU REQUIRE ANY ASSISTANCE REGARDING THIS PRODUCT PLEASE CONTACT YORK DIRECTLY DESCRIPTION YORK G570 36 ...

Page 39: ...SHOULD YOU REQUIRE ANY ASSISTANCE REGARDING THIS PRODUCT PLEASE CONTACT YORK DIRECTLY DESCRIPTION YORK G570 37 ...

Page 40: ...SHOULD YOU REQUIRE ANY ASSISTANCE REGARDING THIS PRODUCT PLEASE CONTACT YORK DIRECTLY DESCRIPTION YORK G570 38 ...

Page 41: ...ORT TUBE 18 5643 18 1 SLIDING BRACKET 19 5643 19 1 UPHOLSTERY GUIDE POST 20 5643 20 1 BACK UPHOLSTERY SIDE POST L 21 5643 21 1 BACK UPHOLSTERY SIDE POST R 22 5643 22 1 PRESS ARM BOTTOM CONNECT POST 23 5643 23 1 REAR UPHOLSTERY SUPPORT BRACKET 24 5643 24 1 PRESS ARM SIDE CONNECT POST 25 5643 25 1 PRESS ARM HEIGHT ADJUSTABLE POST 26 5643 26 1 BACK UPHOLSTERY SUPPORT 27 5643 27 1 SEAT UPHOLSTERY SUPP...

Page 42: ... 5643 60 2 M10 X 25mm HEX HEAD BOLT 61 5643 61 5 M8 X 37mm HEX HEAD BOLT 62 5643 62 4 M8 X 15mm ALLEN HEAD BOLT 63 5643 63 10 M6 X 12mm MACHINE SCREW 65 5643 65 2 M4 X 10mm MACHINE SCREW 66 5643 66 1 M8 NYLON LOCKNUT 67 5643 67 5 M12 NYLON LOCKNUT 68 5643 68 49 M10 NYLON LOCKNUT 69 5643 69 10 φ13 X φ25 X 2mm FLAT WASHER 70 5643 70 106 φ10 5 X φ23 X 2mm FLAT WASHER 71 5643 71 3 φ10 5 X φ40 X 3mm FL...

Page 43: ...3 102 10 PLASTIC END CAP 19 X 19 Xφ44 103 5643 103 15 PLASTIC END CAP 17 X 17 Xφ50 8 104 5643 104 19 5KG WEIGHT PLATE 130 X 260 X 25 105 5643 105 1 TOP WEIGHT PLATE 100 X 210 X 55 106 5643 106 1 WEIGHT SELECTOR PIN φ9 X 116 X 35 107 5643 107 1 M12 X 40mm HEXAGON HEAD BOLT 108 5643 108 SET WEIGHT PLATE COVER SIDE L R 109 5643 109 1 WEIGHT PLATE COVER REAR 110 5643 110 2 RUBBER STOP φ25 X 8mm 111 56...

Page 44: ...e unlikely event of a problem occurring please contact your local York Barbell authorised dealer Please have your proof of purchase ready If the problem cannot be fixed by sending parts you will need to arrange to send the goods to a York authorised repair centre You must prepay any shipping charges and you are responsible for insuring any product or part shipped or returned Returns will not be ac...

Page 45: ...se this product tick all that apply Discounted price York brand name Best specification at the price you wanted to pay Word of mouth recommendation Sales staff recommendation Received as a present What prompted you to buy fitness equipment tick all that apply Replacing old equipment Saw an advert with big price savings Medical advice Thought it was about time to get fit Want to look good Did you s...

Page 46: ...PLACE STAMP HERE PLACE STAMP HERE PLACE STAMP HERE F I T N E S S ...

Page 47: ...ate of purchase Name of location where purchased Model number Last name First name Telephone number Address City State Zip Postcode Send your order to YORK BARBELL AUST PTY LTD UNIT 1 LOT 2 SWAFFHAM ROAD MINTO N S W 2566 AUSTRALIA YORK BARBELL U K LTD CHURCHILL WAY DAVENTRY NORTHANTS ENGLAND NN11 4YB YORK BABELL USA LTD 3300 BOARD ROAD YORK PA 17402 USA ...

Page 48: ...PLACE STAMP HERE PLACE STAMP HERE PLACE STAMP HERE F I T N E S S ...

Reviews: