background image

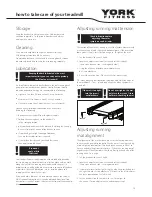
Storage

Keep the treadmill in a dry place with as little temperature 
variation as possible.  Try to protect from dust and always 
unplug when not in use.

Cleaning

Use a warm, damp cloth to wipe the treadmill surfaces. 
Mild detergent may be used if necessary. 
Do not clean between the mat and the running board, silicone 
lubricant is placed here to keep the mat running smoothly.

Lubrication

 
An insufficiently lubricated deck will cause the belt, running deck  
and motor to wear our much quicker.  How often you should 
lubricate depends on usage, we recommend the following:

  Light use (less than 3 hours a week) - every 8 months

  Medium use (3 to 5 hours a week) - every 4 months

  Heavy use (more than 5 hours a week) - every 2 months 

You can check for proper lubrication levels at any time 
by doing the following:

1.  disconnect the treadmill from the power supply

2.  fold up the running deck, so the treadmill is 

in the storage position

3.  put your hand underneath the mat and feel along the running 

deck, as close to the centre of the deck as you can:

  if your hand gets a light coating of lubricant 

then no further lubrication is required

  if the surface feels dry and your hand feels clean, 

then apply more lubricant

 
Your treadmill comes ready supplied with a bottle of lubrication  
oil - to use, apply a liberal amount to a lint free cloth and run cloth 
along the lenth of the running deck (underneath the mat). It’s 
important to try and get the lubricant as close to centre of the deck 
as possible. Check the lubrication level as detailed above and  
re-apply with the cloth if necessary.

If you need more lubricant, we recommend you use the Lube-N-
Walk Treadmill Lubrication Kit, it can be obtained from local York 
distributors - see the Contact Us details at the front of this manual or 
visit www.yorkfitness.com

Adjusting running mat tension


The tension of the mat has been pre-set at the factory; however, with 
use the mat can stretch slightly and become loose.  If the mat is too 
loose you will find it starts to slip during use.  To tighten the mat:

1.   Set the treadmill to run at 3 km/h 

2.   Locate the adjustment screws at the end of the treadmill 

(there’s one on each side - see diagram below) 

3.   Using the allen key provided, adjust both screws 

by ½ turn clockwise 

4.   Re-test the mat tension.  If the mat still slips, repeat step 3

TIP:  when correctly tensioned you should be able to lift the edge of 
the mat about 5 – 7cm – please only check this when the power is 
turned off. 


Adjusting running 
mat alignment

The alignment of the mat has been pre-set at the factory, however, 
the mat can be caused to run out-of-line by a user’s running style (eg, 
more weight on one foot), or if it placed on an uneven surface – so 
it may need adjusting from time to time.  If the mat is running out of 
alignment it will track towards either the left or right hand side of the 
running deck.  To re-align:

1.  Set the treadmill to run at 3 km/h

2.  Locate the adjustment screws at the end of the treadmill 

(there’s one on each side - see diagram above)

3.  If your mat moves to the right, using the allen key provided adjust 

the right screw by ½ turn clockwise (if it tracks to the left, perform 
the same operation on the left screw)

4.  Let the treadmill run for a minute to see if it re-aligns to 

the centre.  If more adjustment is needed repeat step 3

how to take care of your treadmill

image of adjustment screw location

15

Keeping the deck lubricated is the most 

important activity you can carry out to prolong 

the life of your treadmill.  

!

If in doubt 

apply a little 

lubricant

!

Check lubrication before 

adjusting the mat as 

symptoms can be similar

!

If the mat is too tight, 

turn the screws 

anticlockwise

!

Do not over tighten the mat – 

only turn the screws ½ turn 

before re-checking the mat

!

Summary of Contents for Experience

Page 1: ...owner s manual yorkfitness com experience treadmill 16 06 2008 e x p e ri e n c e ...

Page 2: ...ative piece of equipment as your training partner and we are certain it will keep you motivated on the way to achieving your personal fitness goals Please take the time to read this owner s manual as it will help you to get the most out of your new treadmill For more information visit www yorkfitness com 2 ...

Page 3: ...ser instructions 11 quick start console display and feedback button functions using workout programs exercising with your treadmill 13 treadmill features explained 14 how to take care of your treadmill 15 troubleshooting 16 your warranty 17 exploded diagrams and parts list 18 3 ...

Page 4: ...ys wear suitable clothing and footwear e g tracksuit shorts training shoes Remove all personal jewellery before exercising Ensure you warm up well before using the equipment as this will help to prevent muscle strain After eating allow 1 2 hours before exercising as this will help to prevent muscle strain Never overload the equipment the maximum user weight for this treadmill is 110kg Never use th...

Page 5: ...r local authority for recycling advice and facilities Europe only Customer Support Should you require any assistance regarding this product please gather the following information and then contact us using the details below 1 Serial No this can be found on the sticker below located as indicated For future reference please write down your serial number in the space provided below 2 Original purchas...

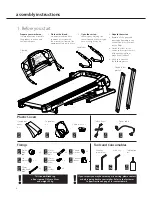
Page 6: ... 6 15mm machine screw 1 Before you start If you suspect you may have some parts missing please contact us before going back to your retailer Refer to the Customer Support section on page 5 for contact details This treadmill takes up a floor space of 142cm x 42cm and weighs 55 kg Allen key Allen key screw driver Safety Key x 1 Handle bar cover x 2 Cup holder x 2 Plastic Covers Fixings Tools and Con...

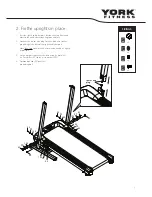
Page 7: ...he sensor wire plug to the middle wire socket protruding at the base of the right handle bar post Note Take Care to ensure the wires are connected as tightly as possible 3 Fix the uprights in place at the base using 8 x bolts 83 8 x flat washers 99 and 8 x star washers 103 4 Position bolt cap 40 over the protruding bolt FIXINGS FIXINGS x 2 Part No 40 x 8 Part No 99 x 8 Part No 83 Part No 103 x 8 s...

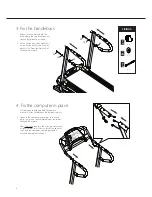
Page 8: ... pulse sensor wire sockets protuding at the top of the handle bar posts Note Take Care to ensure the wires are connected as tightly as possible Slide the rest of the connect wires into the computer console post before the handlebar post attchment 1 Attach the handle bars onto the handle bar post via plastic connect sockets 68 properly as shown 2 Fit the handle bar in position with 2 x allen head b...

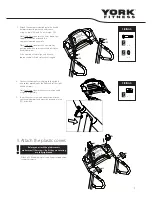
Page 9: ... far then try again 4 Connect the computer wire plug to the middle wire socket protuding at the front end of the right handle bar post Note Take Care to ensure the wires are conneted as tightly as possible 5 Feeds the excess wires and connectors into the right handlebar post and cover by oval cable insert 74 provided Before you attach the plastic covers make sure all the screws bolts they are cove...

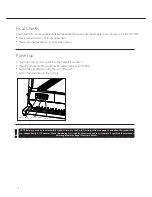
Page 10: ...for more details Final Checks Power up Your treadmill is now assembled Please make the following final checks before you power up for the first time Make sure all screws bolts are tightened Make sure the treadmill is on a flat level surface 1 Plug one end of power cable into the treadmill as shown 2 Plug the other end into a suitable AC outlet 220 240 volt 50Hz 3 Switch the treadmill on using the ...

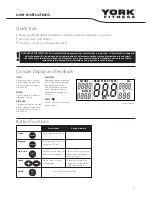
Page 11: ...on Functions NOTE ABOUT THE SAFETY KEY The treadmill will only operate when the safety key is in position if the safety key is removed while the treadmill is in operation it will stop immediately Before every workout session please make sure you attach the safety key to the console and the clip at the other end to your clothing When the treadmill is not in use you should remove the safety key and ...

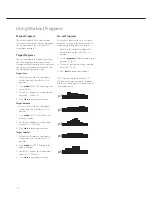
Page 12: ...in position 2 Press mode until 5 0 is flashing in the distance window 3 Use the buttons to set your target distance 1 0 999 0 km 4 Press start to begin your workout Target calories 1 Make sure the treadmill is plugged in switched on and the safety key is in position 2 Press mode until 50 is flashing in the calories window 3 Use the buttons to set your target calories 10 9990 cal 4 Press start to b...

Page 13: ...or following exercise End each workout with a Warm Down session a few minutes of stretching to help prevent strains pulls and cramps Heart Rate Training To get the most out of your new piece of fitness equipment and see the best results from your training you should exercise at the right level of effort and that means listening to your heart Working out to a target heart rate means you can direct ...

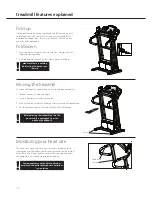
Page 14: ...heels to help manoeuvrability 1 Fold up the deck as explained above 2 Stand in front of the treadmill square on 3 Put one hand on each of the handrails and tilt the treadmill towards you 4 Use the handrails to push the treadmill to the desired location Before moving the treadmill ensure the power cable is unplugged from the wall and the treadmill Monitoring your heart rate This treadmill is fitted...

Page 15: ...ual or visit www yorkfitness com Adjusting running mat tension The tension of the mat has been pre set at the factory however with use the mat can stretch slightly and become loose If the mat is too loose you will find it starts to slip during use To tighten the mat 1 Set the treadmill to run at 3 km h 2 Locate the adjustment screws at the end of the treadmill there s one on each side see diagram ...

Page 16: ...Turn the switch on 5 Un plug and re plug electrical cord The table below details the most common problems and how to fix them If you still have a problem after going through the troubleshooting guide please call your local York distributor for advice 16 In the event of an electrical failure the treadmill will automatically shut off To restart the treadmill 1 Unplug the power cable from the treadmi...

Page 17: ...rk Barbell will at no additional charge provide replacement part s or repair the product at York Barbell s option if it becomes defective malfunctions or otherwise fails to conform with this warranty under normal non commercial personal family or household use In repairing the product York Barbell may replace defective parts or at the option of York Barbell use serviceable used parts that are equi...

Page 18: ...exploded diagram 18 113 ...

Page 19: ...0342b5 Bottle Holder T 85 3 YKF10389b6 Cap Allen Head Bolt M8 x50mm 6mm Allen 29 2 YKF30045b1 double side tape 350 x35x 1 5mm 86 2 YKF10375b6 Hex HeadBolt M8 x15mm 30 12 YKF30046b1 Foam Pad 35x 25x T 2mm 87 8 YKF10390b6 Countersunk Philips Head Self Drilling Screw 10 x30mm 31 2 YKF20320b5 Foot Rail 1016mm 88 8 YKF10391b6 Round Flange Philips Head Self Tapping Screw 4 x25mm 32 1 YKF20321w5 Top Moto...

Reviews: