SECTION 4 – INSTALLATION
FORM 201.26-NM1
ISSUE DATE: 1/19/2018
JOHNSON CONTROLS
39
4
ELECTRICAL CONNECTION
The following connection recommendations are in-
tended to ensure safe and satisfactory operation of the
unit. Failure to follow these recommendations could
cause harm to persons, or damage to the unit, and may
invalidate the warranty.
No additional controls (relays, etc.)
should be mounted in the control panel.
Power and control wiring not connected
to the control panel should not be run
through the control panel. If these pre-
cautions are not followed it could lead to
a risk of electrocution. In addition, elec-
trical noise could cause malfunctions or
damage the unit and its controls.
Remote Emergency Stop Device (QRRSB)
A remote emergency stop device may be wired into the
unit. This device should be rated at 8 amps, 230V.
The emergency stop device should be wired into termi-
nals L and 5 of CTB2.
Chilled Liquid Pump (Evaporator Pump Start
Contacts)
Terminals 23 and 24 on CTB1 close to start the chilled
liquid pump. These terminals can be used as a master
start/stop for the pump in conjunction with the daily
start/stop schedule. If no schedule is set, and the cus-
tomer has master control of the pump, the terminals
must be used to override the customer master start/stop
so that the unit can start the pump in the event of a low
liquid temperature condition.
System Run Contacts
Terminals 25 and 26 (system 1) and 27 and 28 (system
2) on CTB2 close to indicate that a system is running.
These terminals may be used to start the cooling liquid
pump(s) for the condenser.
Alarm
Contacts
Each refrigerant system has a voltage-free normally
open contact that will close when control power is
applied to the panel, if no fault conditions are present.
When a fault occurs which locks a system out, or there
is a power failure the contacts opens. To obtain a system
alarm signal, connect the alarm circuit to terminals 29
and 30 for No. 1 system and terminals 31 and 32 for
No. 2 system.
FIELD WIRING
All field wiring must comply with the National Elec-
tric Code and all applicable local codes. YORK liquid
chiller units are factory wired for optimum reliability.
Therefore the unit controls must not be modified with-
out expressed written consent by Johnson Controls.
The use of a simple switch or timer from a remote point
is permitted; but it must be connected to the YORK
unit panel at points expressly indicated for that pur-
pose.
Copper power wiring only should be used for supply-
ing power to the chiller. This is recommended to avoid
safety and reliability issues resulting from connection
failure at the power connections to the chiller. Alumi-
num wiring is not recommended due to thermal char-
acteristics that may cause loose terminations result-
ing from the contraction and expansion of the wiring.
Aluminum oxide may also build up at the termination
causing hot spots and eventual failure. If aluminum
wiring is used to supply power to the chiller, AL-CU
compression fittings should be used to transition from
aluminum to copper. This transition should be done in
an external box separate to the power panel. Copper
conductors can then be run from the box to the chiller.
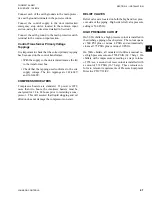
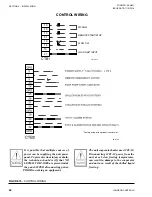
A 120-1-60, 15 amp source must be supplied for the
control panel through a fused disconnect when a con-
trol panel transformer (optional) is not provided
(refer
to Control Wiring).
See unit wiring diagrams for field and power wir-
ing connections, chilled water pump starter contacts,
alarm contacts, compressor run status contacts, PWM
input, and load limit input. Refer to SECTION 8 – UNIT
OPERATION for a detailed description of operation
concerning aforementioned contacts and inputs.
CONTROL PANEL WIRING
All wiring to the control panel terminal block (CTB1)
(nominal 30VDC) must be run in screened cable, with
the screen earthed at the panel end only. Run screened
cable separately from mains cable to avoid electrical
noise pick-up.
Summary of Contents for YCWL0056SE
Page 4: ...FORM 201 26 NM1 ISSUE DATE 1 19 2018 JOHNSON CONTROLS 4 THIS PAGE INTENTIONALLY LEFT BLANK...
Page 30: ...FORM 201 26 NM1 ISSUE DATE 1 19 2018 JOHNSON CONTROLS 30 THIS PAGE INTENTIONALLY LEFT BLANK...
Page 146: ...FORM 201 26 NM1 ISSUE DATE 1 19 2018 JOHNSON CONTROLS 146 THIS PAGE INTENTIONALLY LEFT BLANK...
Page 154: ...FORM 201 26 NM1 ISSUE DATE 1 19 2018 JOHNSON CONTROLS 154 THIS PAGE INTENTIONALLY LEFT BLANK...
Page 168: ...FORM 201 26 NM1 ISSUE DATE 1 19 2018 JOHNSON CONTROLS 168 THIS PAGE INTENTIONALLY LEFT BLANK...
Page 186: ...FORM 201 26 NM1 ISSUE DATE 1 19 2018 JOHNSON CONTROLS 186 NOTES...

