background image

IMPORTANT SAFETY INSTRUCTIONS

safety-4v3.eps • Oct. 26/05

CAUTION

:

TO REDUCE THE RISK OF ELECTRIC SHOCK, DO

NOT REMOVE COVER (OR BACK).

NO USER SERVICEABLE PARTS INSIDE.

REFER SERVICING TO QUALIFIED

SERVICE PERSONNEL.

INSTRUCTIONS PERTAINING TO A

RISK OF FIRE, ELECTRIC SHOCK,

OR INJURY TO PERSONS

Read Instructions

The Owner’s Manualshould be read and understood 
before operation of your unit. Please, save these instruc-
tions for future reference.

Packaging

Keep the box and packaging materials, in case the unit 
needs to be returned for service.

Warning

When using electric products, basic precautions should 
always be followed, including the following:

Power Sources

Your unit should be connected to a power source only of the voltage 
specified in the owners manual or as marked on the unit. This unit has a 
polarized plug. Do not use with an extension cord or receptacle unless 
the plug can be fully inserted. Precautions should be taken so that the 
grounding scheme on the unit is not defeated.

Hazards

Do not place this product on an unstable cart, stand, tripod, bracket or 
table. The product may fall, causing serious personal injury and serious 
damage to the product. Use only with cart, stand, tripod, bracket, or 
table recommended by the manufacturer or sold with the product. 
Follow the manufacturer’s instructions when installing the product and 
use mounting accessories recommended by the manufacturer.

The apparatus should not be exposed to dripping or splashing water; 

no objects filled with liquids should be placed on the apparatus.

Terminals marked with the “lightning bolt” are hazardous live; the 

external wiring connected to these terminals require installation by an 
instructed person or the use of ready made leads or cords.

Ensure that proper ventilation is provided around the appliance.
No naked flame sources, such as lighted candles, should be 

placed on the apparatus.

Power Cord

The AC supply cord should be routed so that it is unlikely that it will be 
damaged. If the AC supply cord is damaged DO NOT OPERATE THE UNIT.

Service

The unit should be serviced only by qualified service personnel.

AVIS:

AFIN DE REDUIRE LES RISQUE DE CHOC ELECTRIQUE,

N’ENLEVEZ PAS LE COUVERT (OU LE PANNEAU ARRIERE)


NE CONTIENT AUCUNE PIECE

REPARABLE PAR L’UTILISATEUR.

CONSULTEZ UN TECHNICIEN QUALIFIE

POUR L’ENTRETIENT

INSTRUCTIONS RELATIVES AU RISQUE

DE FEU, CHOC ÉLECTRIQUE, OU

BLESSURES AUX PERSONNES

Veuillez Lire le Manuel

Il contient des informations qui devraient êtres comprises 
avant l’opération de votre appareil. Conservez S.V.P. ces 
instructions pour consultations ultérieures.

Emballage

Conservez la boite au cas ou l’appareil devait être 
retourner pour réparation.

Attention:

Lors de l’utilisation de produits électrique, assurez-
vous d’adhérer à des précautions de bases incluant 
celle qui suivent:

Alimentation

L’appareil ne doit être branché qu’à une source d’alimentation 
correspondant au voltage spécifié dans le manuel ou tel qu’indiqué sur 
l’appareil. Cet appareil est équipé d’une prise d’alimentation polarisée. 
Ne pas utiliser cet appareil avec un cordon de raccordement à moins 
qu’il soit possible d’insérer complètement les trois lames. Des 
précautions doivent êtres prises afin d’eviter que le système de mise à 
la terre de l’appareil ne soit désengagé.

Risque

Ne pas placer cet appareil sur un chariot, un support, un trépied ou une 
table instables. L’appareil pourrait tomber et blesser quelqu’un ou subir 
des dommages importants. Utiliser seulement un chariot, un support, 
un trépied ou une table recommandés par le fabricant ou vendus avec 
le produit. Suivre les instructions du fabricant pour installer l’appareil et 
utiliser les accessoires recommandés par le fabricant.

Il convient de ne pas placer sur l’appareil de sources de flammes 

nues, telles que des bougies allumées.

L’appeil ne doit pas être exposé à des égouttements d’eau ou des 

éclaboussures et qu’aucun objet rempli de liquide tel que des vases 
ne doit être placé sur l’appareil.

Assurez que lappareil est fourni de la propre ventilation.
Les dispositifs marqués d’une symbole “d’éclair” sont des parties 

dangereuses au toucher et que les câblages extérieurs connectés à 
ces dispositifs de connection extérieure doivent être effectivés par un 
opérateur formé ou en utilisant des cordons déjà préparés.

Cordon d’Alimentation

Évitez d’endommager le cordon d’alimentation. N’UTILISEZ PAS 
L’APPAREIL si le cordon d’alimentation est endommagé.

Service

Consultez un technicien qualifié pour l’entretien de votre appareil.

Summary of Contents for XS800H

Page 1: ...e tight B a ss Reso n a n c e Driv e M i x 400 Hz 0 0 0 0 5 5 5 5 5 5 10 10 10 10 10 10 0 5 5 10 10 32 21 14 11 8 6 4 2 0 2 4 6 6 dB 0 dB 400 0 4 6 1 3 7 9 2 8 5 10 MAX MIN MAX MIN OFF MAX 800 U S A Yorkville Sound Inc 4625 Witmer Industrial Estate Niagara Falls New York 14305 USA Voice 716 297 2920 Fax 716 297 3689 WORLD HEADQUARTERS WEB ACCESS http www yorkville com CANADA Yorkville Sound 550 Gr...

Page 2: ...CTRIQUE N ENLEVEZ PAS LE COUVERT OU LE PANNEAU ARRIERE NE CONTIENT AUCUNE PIECE REPARABLE PAR L UTILISATEUR CONSULTEZ UN TECHNICIEN QUALIFIE POUR L ENTRETIENT INSTRUCTIONS RELATIVES AU RISQUE DE FEU CHOC ÉLECTRIQUE OU BLESSURES AUX PERSONNES Veuillez Lire le Manuel Il contient des informations qui devraient êtres comprises avant l opération de votre appareil Conservez S V P ces instructions pour c...

Page 3: ...or their combined attributes of low noise high gain and no microphonic feedback The following chart demonstrates a sampling of 1000 tubes tested and the percentage deemed acceptable Distribution of 12AX7 Gain Measurement N 1000 Tubes used in the DynaBass 400 800H XS400 and XS800H are extracted from the upper quartile of the tube population w w w y o r k v i l l e c o m REAL Gear REAL People Yorkvi...

Page 4: ...lon un ensemble de propriétés com binées incluant bas niveau de bruit gain élevé et aucun feedback micropho nique La charte suivante démontre un échantillon de 1000 lampes éprouvées ainsi que le pourcentage de lampe considéré convenable Distribution of 12AX7 Gain Measurement N 1000 Tubes used in the DynaBass 400 800H XS400 and XS800H are extracted from the upper quartile of the tube population w w...

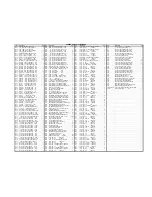
Page 5: ...20 PNP TRAN TE 1 3450 1 4 JCK PCB MT ALL GOLD SKT 2 4943 1 4W 4K7 5 2 U T R RES 1 CH1189 XS800H 120V 60HZ T RD 1 6873 MJE340 TO126 NPN TRAN TG 1 3449 NEUTRIK JACK NUT RED 2 4982 1 4W 4K7 5 MINI T R RES 7 6874 MJE350 TO126 PNP TRAN TG 1 3498 1 4 JCK PCB MT HORZ 3 4639 1 4W 4K99 1 T R RES 9 6916 TIP107 TO220 PNP TRAN DARL TE 1 3523 1 4 JCK PCB MT HORZ GOLD UGT 3450 4 6128 1 4W 4K99 1 MINI MF T R RES...

Page 6: ...TACLE WITH 0 250 11 2408 8 0 AMP CIRCUIT BREAKER 12 3923 XLR MALE PCB MT HORZ MTHOLE V SNAP 13 6956 SPKON 4C PCB MT HORZ GRY 4 14 3449 REAN JACK NUT RED 15 3426 8 3 16 SJT AC LINE CORD REMOVB 16 12AX7 12AX7 DUAL TRIODE PREAMP TUBE 17 18 19 20 21 22 NOTE Replacement grills HF Driver supports are Special Order and are only available while the model is in production Grilles Support replacements are f...

Page 7: ...or Threshold Adjust Gain Off Full Tuner Out Tube Solid State Select Switch 0 dB Mono 1 4 inch Stereo 1 4 inch 6 dB Low Mid Hi EQ Param Mid Freq Gain Hi Mid EQ BLOCK DIAG xs800h 1v1 ai Bal D I Out Ground Lift Limiter Mute D I Post EQ Select Master Amp LP AG Bass Resonance Limiter Buffer Drive Enable Circuit Effects Enable Circuit Scoop Effects Send balanaced Effects Return Amp In Effects Return Ena...

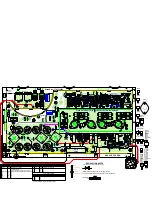
Page 8: ... R38 1 4W MINI 220K TO92 2N5551 Q8 5107 E B C 2N5551 E B C 2N5401 BAV21 D15 1 4W 2R2 R42 BAV21 D28 R59 1 8W FLMP 220R0 1 8W 1K R43 FLMP TO92 MPSA06 Q10 5103 E B C MPSA63 1 8W 22R1 R55 FLMP C B E BAT85 D17 R120 1 8W FLMP 100R0 R47 1 8W FLMP 100R0 5 0W 0R1 R54 G D S MR854 D22 5 0W 0R1 R94 MR854 D44 3722 K1 A 1 4W 4K7 R95 20 W 0R2 R65 2 2_ SPEAKON 4C H output J1 B 1 1_ output J1 A 63V C46 680N C68 10...

Page 9: ...TL072CP 8 V 4 V U1A C C38 63V 470N C39 63V 470N VCC LM13600N Dual VCA 6745 U2 D 1 4W 15K R110 MINI 1 4W 4K7 R107 MINI NTC 10K Q36 6467 R21 1 4W MINI 2K R124 1 4W MINI 100K 1 4W 4K7 R2 MINI 1 4W 27K R1 MINI 63V C27 2U2 4148 D35 4148 D56 1 0W 1R R114 FLMP 4148 D32 R86 1 4W MINI 10K0 C30 100V 22N FAN1 R12 1 4W MINI 15K R6 1 4W MINI 47K R11 1 4W 22M R84 1 4W MINI 10K0 C B E BC560C E B C MPSA06 BC560C ...

Page 10: ... YEL LOV 16AWG W22 R97 1 0W FLMP 1R S1 ETA Thermal Breaker SCH_ETA_BREAKER WHT W34 AC BLK W31 SW 250V 680N C3 YEL W13 50V C26 100N OUT IN GND MC7915CT 6871 Watts U7 TO220 R286 1 2W 15K YEL 16AWG W22_ 80V C56 4700U 35V C32 12000U 16V C41 100U GRY LOV 16AWG W19_ R98 1 0W FLMP 1R AC BLK PLUG UNUSED PRIMARY WIRE TO DUMMY TAB C50 100V 100N RED W6 sec LOW YEL W8 XFMR W30 CHASSIS GND GRN 275V C2 22N GRY ...

Page 11: ...V0 15K 1 2W 15K 1 2W 1 0W 10R 10R 1 0W 16V 100U 100U 16V 1R 1 0W 2U2 63V 15K MR854 MR854 TL072CP BC550C 470N 2K 0R1 5 0W 10K0 2 0W 3R9 4148 3K16 1K21 MPSA13 4148 MJE340 3K9 16V 100U 16V 100U BC550C 22R1 BAT85 100R0 2R2 2R2 2N5551 47 0U 25 V MPSA06 10K 4148 5 0W 0R1 0R1 5 0W 1R 1 0W 1R 1 0W 1 0W 10K0 BAV21 100R0 16V0 16V0 16V0 16V0 6K19 4K7 47K 47K 22N 400V 47K 4K7 8V2 470R 1 0W 10K0 1 0W 10K0 3K 1...

Page 12: ...W 10K C15 100V 100P R41 1 4W MINI 2K R35 1 4W 220R R113 1 4W 10K C66 63V 4U7 R69 1 4W MINI 10K U3 B NE5532N M 4469 P19 A 100K 1B MID FREQ PAR M 4471 P15 A 50K 1B HI MID TL072CP U11 B R122 1 4W 10K0 R145 1 4W MINI 10K TL072CP U13 B W8 M W11 M U13 A TL072CP 50V C3 680P R107 1 4W 2K2 2X_TRIODE_HCT V1 B R131 1 4W 10K0 C58 275V 22N 1 4W 113K R23 R96 1 4W 1K C21 63V 330N W42 WHT 4 V 11 V U4 E R129 1 4W ...

Page 13: ... 47R BLU LD9 BLU LD13 BLK W31 100V 100N C32 100V 100N C67 100V 100N C85 W26 B TO92 Q11 5104 MPSA56 100V 100N C51 100V 100N C5 100V C19 100N 1 4W 4K7 R187 Copper Tie Here Tie net Name 63V C88 1U 1 4W 1K5 R140 T0 M1204 POWER BOARD M B P5 A 4467 10K RESONANCE R25 1 4W MINI 20K0 DOWN UP S9 B LD3 MUTE YEL 63V 4U7 C74 M 1B P3 A 4472 10K MASTER U5 C MC33079P 1 4W 100K R43 1 4W 100K R109 R196 1 4W MINI 10...

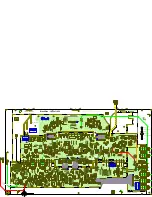
Page 14: ...LU YEL 8in 12C 10K 100N 1K 2K2 50V 22U 100U 16V 160V 10U 6N8 100R MC14007 16V 10U 47R 1 0W 1B 10K 1B 10K GRN 10R DPDT PUSH 5C 100K 2 4 3V10 1 4 3V10 3 4 4 4 3V10 3V10 X25 R24 C64 R5 C1 X16 R79 X188 C29 R71 X117 X92 X24 C21 X166 X22 C9 R136 X97 X57 X159 R137 R76 D19 X35 R69 X42 X113 X115 R163 R164 R88 R41 X40 R73 D10 X108 X99 X110 X58 R43 X64 Copper Tie Here X173 X112 X144 X75 D38 X29 X126 X172 X63...

Page 15: ......

Page 16: ......

Reviews: