background image

9

TIME SETTING

The unit automatically set itself accordingly to the Radio Controlled Clock signal it received. To set the clock/

calendar manually, first disable the reception by holding the RCC key for 8 seconds.

TO MANUALLY SET THE CLOCK / TIME ZONE SELECTION

1.  Press and hold 

[ TIME ] 

key


for 2 seconds until 

12

 or 

24 Hr

 flashes.

2.  Use 

[ UP ] 

or [ 

DOWN ] key

 to adjust, and press 

[ TIME ] 

key


to proceed to the next setting.

3.  Press 

[ TIME ] 

key


again to step the setting items in this sequence: Hour format 

 Hour 

Minute 


Second 

 Year 

 Month 

 Day 

 Hour offset 

 Weekday Language 

 DST AUTO / OFF.

NOTE:

 - The unit will automatically exit setting mode if no key was pressed in 60 seconds.

 - The hour offset is for MSF version. Its range is between -23 and +23 hours.


-

DST

 (Daylight Saving Time) feature is set to Auto (factory set).The clock has been programmed to 

automatically switch when the daylight saving time is in effect. User can set the 

DST

 to

 OFF

 to disable the 

feature.

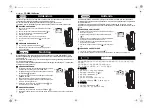
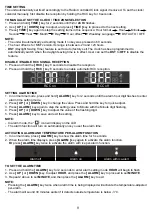
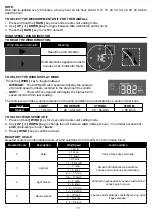
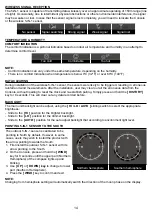
DISABLE / ENABLE RCC SIGNAL RECEPTION

1.  Press and hold the 

[ RCC ]

 key 8 seconds to disable the reception.

2.  Press and hold the 

[ RCC ]

 key 8 seconds to enable automatic RCC reception.

RCC on

RCC off

SETTING ALARM TIME

1.  In normal time mode, press and hold 

[ ALARM ]

 key for 2 seconds until the alarm hour digit flashes to enter 

alarm time setting mode.

2.  Press 

[ UP ]

 or 

[ DOWN ]

 key to change the value. Press and hold the key for quick-adjust.

3.  Press 

[ ALARM ]

 key again to step the setting value to Minute with the Minute digit flashing.

4.  Press 

[ UP ]

 or 

[ DOWN ]

 key to adjust the value of the flashing digit.

5.  Press 

[ ALARM ]

 key to save and exit the setting.

NOTE: 

 - In alarm mode, the “   ” icon will display on the LCD.
 - The alarm function will turn on automatically once you set the alarm time.

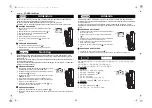
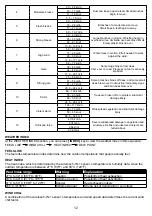
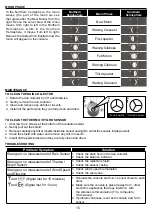
ACTIVATING ALARM AND TEMPERATURE PER-ALARM FUNCTION

1.  In normal mode, press 

[ ALARM ]

 key to show the alarm time for 5 seconds.

2.  When the alarm time displays, press 

[ ALARM ]

 key again to activate the alarm function.


Or

 press 

[ ALARM ]

 key twice to activate the alarm with ice per-alarm function.

Alarm off

Alarm on

Alarm with ice-alert

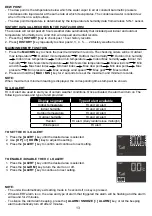
TO SET THE ALARM TIME

1.  Press and hold the 

[ ALARM ]

 key for 2 seconds to enter alarm setting mode 

HOUR

 will begin to flash.

2.  Use 

[ UP ]

 or 

[ DOWN ]

 key to adjust 

HOUR

, and press the 

[ ALARM ]

 key to proceed to set 

MINUTE

.

3.  Repeat 2 above to set 

MINUTE

, and then press the 

[ ALARM ]

 key to exit.

NOTE: 

 - Pressing the 

[ ALARM ]

 key twice when alarm time is being displayed will activate the temperature-adjusted 

per-alarm.

 - The alarm will sound 30 minutes earlier if it detects outside temperature is below -3°C.

Summary of Contents for YC9465

Page 1: ...COLOR WEATHER STATION WITH 5 IN 1 SENSOR Model YC9465 USER MANUAL...

Page 2: ...ccessories specified by the manufacturer Images shown in this manual may differ from the actual display Placement of this product on certain types of wood may result in damage to its finishing for whi...

Page 3: ...ximum and minimum records for each weather details The system also analyzes the records for your convenient viewing such as the display of rainfall in terms of rain rate daily weekly and monthly recor...

Page 4: ...Mounting clamp screws 1 2 3 5 8 9 4 7 6 12 10 11 13 RAIN GAUGE 1 Rain collector 2 Tipping bucket 3 Rain sensor 4 Drain holes TEMPERATURE AND HUMIDITY SENSOR 1 Radiation shield Sensor casing 2 Tempera...

Page 5: ...ge record indicator 4 Day records indicator 5 History graph 6 Current Daily rainfall 7 Rainfall unit inch mm 7 1 4 2 3 5 6 WIND SPEED DIRECTION 1 WIND indicator 2 Current wind direction reading 3 Wind...

Page 6: ...nt 2 The red LED will begin flashing every 12 seconds ASSEMBLY THE STAND AND POLE Step 1 Insert the top side of the pole to the square hole of the weather sensor NOTE Ensure the pole and sensor s indi...

Page 7: ...e pole Point to NORTH MOUNTING GUIDELINES 1 Install the wireless 5 IN 1 sensor at least 1 5m off the ground for better and more accurate wind measurements 2 Choose an open area within 150 meters from...

Page 8: ...NGING BATTERIES AND MANUAL PAIRING OF SENSOR Whenever you changed the batteries of the wireless 5 IN 1 sensor pairing must be done manually 1 Change all the batteries to new ones 2 Press SENSOR key on...

Page 9: ...normal time mode press and hold ALARM key for 2 seconds until the alarm hour digit flashes to enter alarm time setting mode 2 Press UP or DOWN key to change the value Press and hold the key for quick...

Page 10: ...of your home area through the local weather service internet and other weather channels 2 Press and hold the BARO key for 2 seconds until ABS or REL icon flashes 3 Press UP or DOWN key to switch to re...

Page 11: ...rovides a quick reference on the wind condition and is indicated by a series of text icons Level LIGHT MODERATE STRONG STORM Speed 1 19 km h 20 49 km h 50 88 km h 88 km h TO SELECT WIND SPEED UNIT 1 P...

Page 12: ...48 55 knot 24 5 28 4 m s 11 Violent storm 103 117 km h Widespread vegetation and structural damage likely 64 73 mph 56 63 knot 28 5 32 6 m s 12 Hurricane force 118 km h Severe widespread damage to veg...

Page 13: ...re Max average wind speed Max gust Max rainfall 2 Press and hold the MAX MIN key for 2 seconds to reset the maximum and minimum records NOTE When maximum or minimum reading is displayed the correspond...

Page 14: ...y clear out all the erroneous data from the Console without needing to reset the clock and re establish pairing Simply press and hold the HISTORY key for 8 seconds This will clear out any data recorde...

Page 15: ...nscrew the 2 screws at the bottom of the radiation shield 2 Gently pull out the shield 3 Remove carefully any dirt or insects inside the sensor casing Do not let the sensors inside get wet 4 Clean the...

Page 16: ...modes Max Min from last memory reset with time stamp Historical data of past 24 hours INDOOR TEMPERATURE Temperature unit C or F Resolution C F 1 decimal place Accuracy 0 C or 40 C 2 C 32 F or 104 F 3...

Page 17: ...esolution 0 1mph or 0 1knot or 0 1m s Speed accuracy 5m s 0 5m s 5m s 6 Direction resolutions 16 Memory modes Max average wind speed gust with time stamp Historical data for last 24hrs WIRELESS 5 IN 1...

Reviews: