41
4.12 Establish a WiFi Connection on a Laptop
To connect to the EcoMapper, you must use a wireless connection tool. After you power on the vehicle and
Communications Box (section 4.1), proceed to connect wirelessly with the vehicle.
Ensure that your computer’s wireless card is activated.
1. Right-click the wireless icon in the bottom, right-hand corner of the Windows® task bar and click ‘View
Available Wireless Networks.’
2. Click the wireless network beginning with EM, this is the wireless network associated with the EcoMapper.
3. Click ‘Connect.’
4. Windows will prompt you to enter a network key. Enter 087480366 and click okay. (This number is also
listed inside the Comm Box).
5. Open an internet browser (Microsoft® Internet Explorer, Mozilla Firefox, etc.).
6. In the URL line of your browser, input the router address 192.168.1.1 (This number is also listed inside
the Comm Box.)
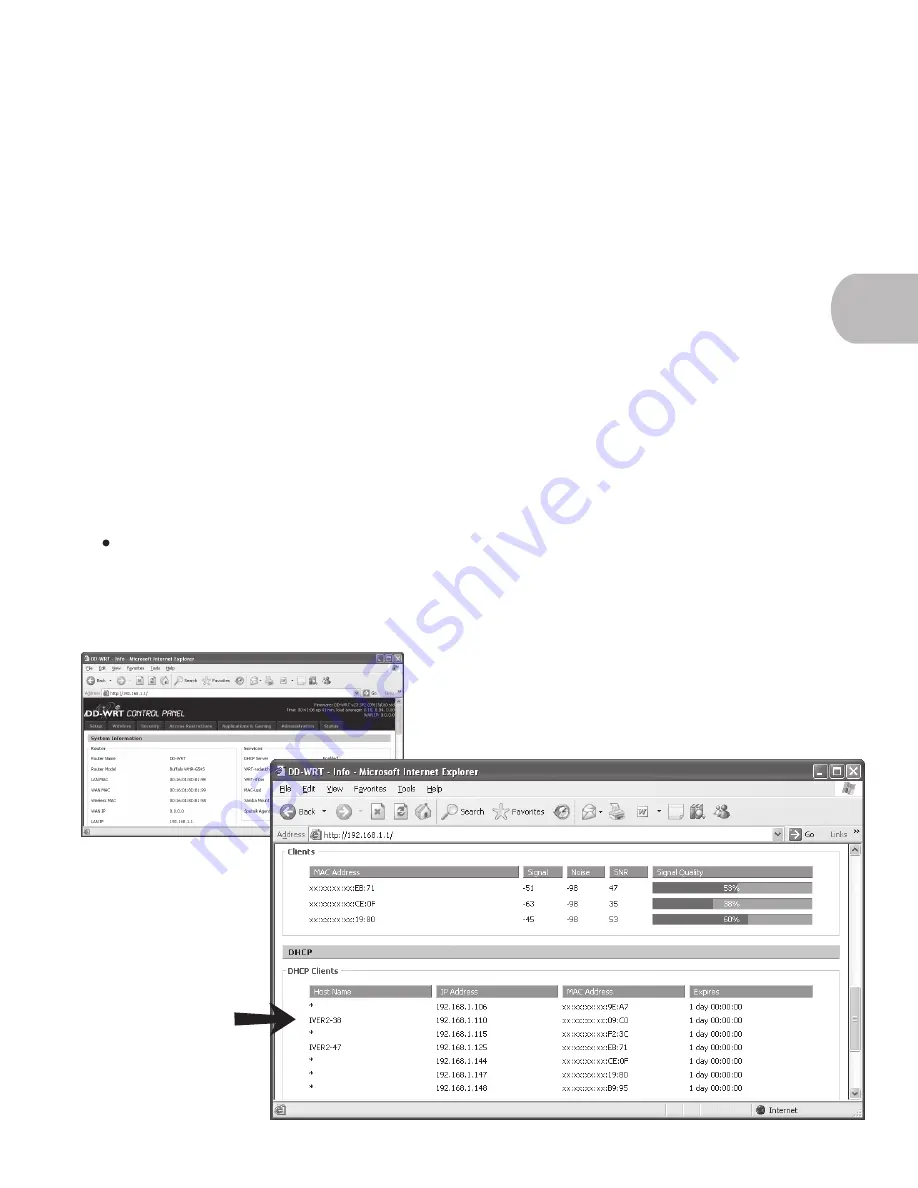
This action displays the router main page. You now must find the specific IP address of your vehicle(s) in order to
connect with Remote Desktop. Scroll down the page to the ‘Clients List’ section and find your EcoMapper (e.g. EM 38
in the ‘Host Name’ column) and its IP address (beginning with 192.168.1.1. followed by three additional numbers in
the IP Address column).
Record the 11-digit IP address for your vehicle(s), you will need this number to connect to the UVC through
Windows® Remote Desktop in the following section.
You can also check your laptop’s and vehicle’s WiFi signal quality in the router main page by associating
the MAC Address in the ‘Clients List’ section with the MAC Address in the ‘Clients’ section in the ‘Wireless’ area.
Signal quality is designated on the percentage bar located on the right. Signal quality less than 10% to the EcoMapper
indicates that you should position the Comm Box closer to the vehicle.
4.1
NOTE

