background image

MONTAGE WERKZEUG

ASSEMBLY TOOLS

OUTILS DE MONTAGE

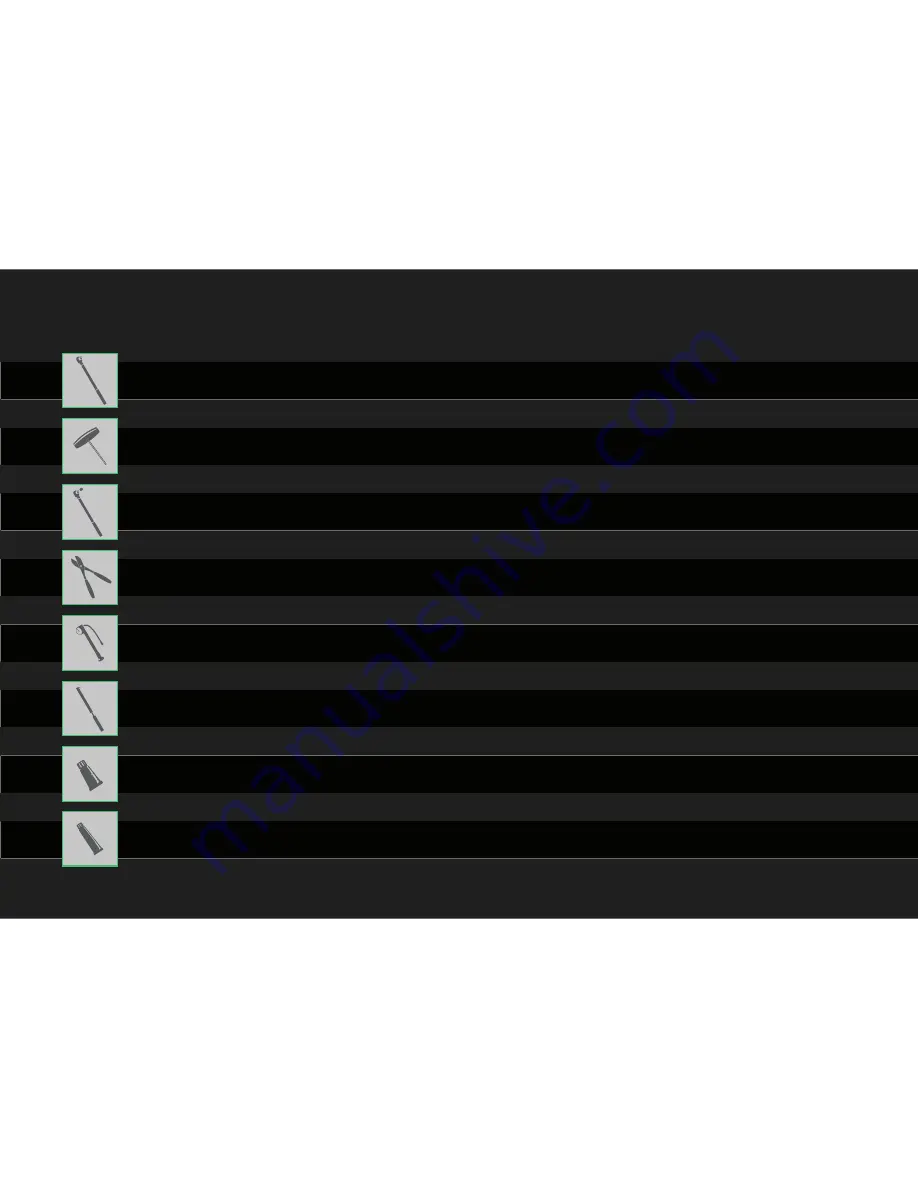
Inbusaufsatz Größe 4, 5 und 6mm

Inbusschlüssel Größe 4, 5 und 6mm

Drehmomentschlüssel mit 17er Nussaufsatz

Seitenschneider

Dämpferpumpe (Modelle mit Luftfeder)

Reifenpumpe

Montagefett

Carbon-Montagepaste

Torque wrench with Allen key adapter size 4, 5 and 6

Allen key size 4, 5 and 6

Torque wrench with socket key 17 mm

Wire cutter

Shock pump (models with air suspension)

Tire pump

Assembly grease

Carbon Paste

Clé dynamométrique avec insert Clé Allen, taille 4, 5 et 6

Clé Allen, taille 4, 5 et 6

Clé dynamométrique avec douille 17 mm

Pince coupante

Pompe amortisseur (modèles avec amortisseur à air)

Pompe de gonfl age des pneus

Graisse de montage

Graisse spéciale carbone

FEDERGABEL / 

SUSPENSION FORK / 

FOURCHE

Summary of Contents for TUES

Page 1: ...rtfm read first then unpack Zuerst Lesen dAnn AusPAcKen d ABord Lire ensuite deBALLer BiKe mAnuAL ...

Page 2: ...yt industries com Welcome to good times ...

Page 3: ...nt brake Frein avant Bremsscheibe Disc Disque LAUFRAD WHEEL ROUE Schnellspanner Steckachse Quickrelease Blocage de Roue Nabe Hub Moyeu Speiche Spoke Rayon Felge Rim Jante Reifen Tire Pneu Ventil Valve Valve Bremse hinten Rear brake Frein arrière Bremsscheibe Disc Disque Zahnkranz Cassette Cassette Kettenführung Chain Guide Guide Chaîne Kettenblatt Chainring Plateau Schaltwerk Rear Derailleur Dérai...

Page 4: ...que wrench with Allen key adapter size 4 5 and 6 Allen key size 4 5 and 6 Torque wrench with socket key 17 mm Wire cutter Shock pump models with air suspension Tire pump Assembly grease Carbon Paste Clé dynamométrique avec insert Clé Allen taille 4 5 et 6 Clé Allen taille 4 5 et 6 Clé dynamométrique avec douille 17 mm Pince coupante Pompe amortisseur modèles avec amortisseur à air Pompe de gonflage...

Page 5: ...d that in case of self executed repairs and or on professional maintenance warranty on components shall be void and we shall not accept liability for consequential accidents or damages TIP Please save the YT Industries BikeBox including the packaging material This way you can repack your bike if you need to have it transported ATTENTION If you don t feel confident in your abilities to perform the n...

Page 6: ...tter Just make sure that you do not damage the BikeBox b b Now you can pull out the flaps and open the BikeBox a a Lift the wheels upwards out of the box b b b Place the wheels in a safe place on their side a a Now you can pull your bike upwards out of the BikeBox b b b Place the frame on the front rear axle stand Make sure the bike is standing properly a a a b b b ...

Page 7: ... of the stem and or handlebar when torqueing the screws Make sure that the clamp gap is even and that the handlebar is centered and inserted correctly The adjustment lines will help you with this Adjust the handlebar to your preferred position by using a 5 mm Allen wrench a c e b d eng During assembly please adhere to the torque specifications of the manufacturers RaceFace Atlas Direct Mount RaceFa...

Page 8: ...idge 5 mm Allen wrench b b Install the 2 lower bolts of the stem but do not tighten them at this point Remove the bolts holding the top clamps in place c Remove the bolts holding the top clamps in place c Slide the clamps sideways over the handlebar into the mounting position Attach the handlebar and the top clamps to the base of the stem on the top crown of the fork d d Start to tighten the four ...

Page 9: ... in an X pattern This is the only way to achieve even clamping of the handlebar in the stem f f Adhere to the guidelines of the manufacturer of the stem and or handlebar when torqueing the screws Make sure that the clamp gap is even and that the handlebar is centered and inserted correctly The adjustment lines will help you with this During assembly please adhere to the torque specifications of the...

Page 10: ...nd b b The rear derailleur cage is locked by pressing and holding the small button with the lock symbol The rear derailleur will then stay open c c Mount the derailleur using the Torx T25 7 speed or 5 mm Allen wrench 10 speed on the derailleur hanger Please make sure the bolt is perpendicular to the hanger to avoid damaging the thread ASSEMBLY INSTRUCTIONS STEP STEP 06 STEP STEP 05 During assembly...

Page 11: ...rake cylinder straight downwards Please store this in a secure location It keep the brakes from engaging when transporting the bike by car d in a secure location It keep the brakes from engaging when transporting the bike by car d Place the rear wheel into the frame and place the chain on the smallest cog use the shifter to shift into the smallest gear first Check that the rear wheel is inserted co...

Page 12: ...TE STATE If your bike looks like the image then you have done everything correctly so far Well done a a Remove the front axle stand and turn the bike upside down a ASSEMBLY INSTRUCTIONS STEP STEP 08 STEP STEP 09A ...

Page 13: ... be used to prevent the brakes engaging and pushing the brake pads out when transporting the bike without its wheels d d Now insert the front wheel in the fork dropouts Ensure that the hub is sitting correctly in the dropouts and that the brake rotor is positioned between the brake pads e e Now the front axle can be inserted f f Slide the lightly greased axle through the hub until the thread engag...

Page 14: ...ng the brake pads out when transporting the bike without its wheels d d Now insert the front wheel in the fork dropouts Ensure that the hub is sitting correctly in the dropouts and that the brake rotor is positioned between the brake pads e e Ensure that the brake rotor sits correctly between the brake pads Now the front axle can be inserted f f Slide the lightly greased axle through the hub until...

Page 15: ...len wrench INSTALLING PEDALS a c b a a Place the pedal washer on the pedal axle b b b Apply sufficient grease to the pedal thread Excess grease can be wiped away after the pedals have been installed c c Install the pedals using an Allen wrench the size will vary by pedal manufacturer The drive side pedal has standard threading and the non drive side pedal has reverse thread ing Therefore the non dr...

Page 16: ...You re finished Congratulations You re bike is now fully assembled Please note the following information for adjusting your bike FULLYASSEMBLED BIKE STEP STEP 11 ASSEMBLY INSTRUCTIONS ...

Page 17: ...GERMANY The German Road Traffic Licensing Regulations Straßenverkehrs Zulassungs Ordnung StVZO prescribes the following safety devices when operating bicycles on public roads A braking and lighting system and a bright sounding bell Furthermore every cyclist is obligated to maintain his vehicle in a roadworthy condition and a state that safe for riding We would like to expressly point out that our b...

Page 18: ...e lubricated Only carbon assembly paste can be used Aluminum seat posts may only be installed when carbon assembly paste is used The seat clamp must not be closed when the seat post has been removed Carbon Handlebar Installing carbon handlebars requires great care and precision Do not exceed the specified torque under any circumstances and make sure that the stem does not have any sharp edges or ri...

Page 19: ...Crank bolts Chain ring bolts Pedals Lock on grip bolts 33 41 Nm 9 5 Nm 2 5 4 Nm 6 Nm 8 10 Nm 4 5 Nm 2 8 3 4 Nm 40 Nm 6 Nm Carbon Aluminium 9 5 Nm 48 54 Nm 12 14 Nm Steel 8 9 Nm Alu 38 Nm 2 5 4 Nm TORQUE CHART eng CAUTION These specifications are only guidelines As a rule you should always observe the manufacturers instructions These have also been included or can be found on the website of the resp...

Page 20: ...M GERMANY GERMANY yt industries GmbH 49 0 9191 73 63 05 0 49 0 9191 73 63 05 0 49 0 9191 73 63 05 55 49 0 9191 73 63 05 55 service yt industries com service yt industries com service yt industries com yt industries com yt industries com yt industries com PHONE FAX MAIL WEB ...

Reviews: