14
YRL3V2 Series User Guide
4.4 Installing the Product
4.4.1 Choosing the installation location
In order to achieve optimal performance, we recommend you install the LiDAR in a place that meets the
requirements below.
•
For efficient heat dissipation, install the product on materials with high thermal conductivity
(aluminum alloys are recommended).
•
To reduce noise from vibration, install the product on a clean surface without debris. When installing
the product on an uneven surface, use a bracket (provided by the customer) under the LiDAR.
•
Protect the sensor from sunlight.
4.4.2 Installing the LiDAR
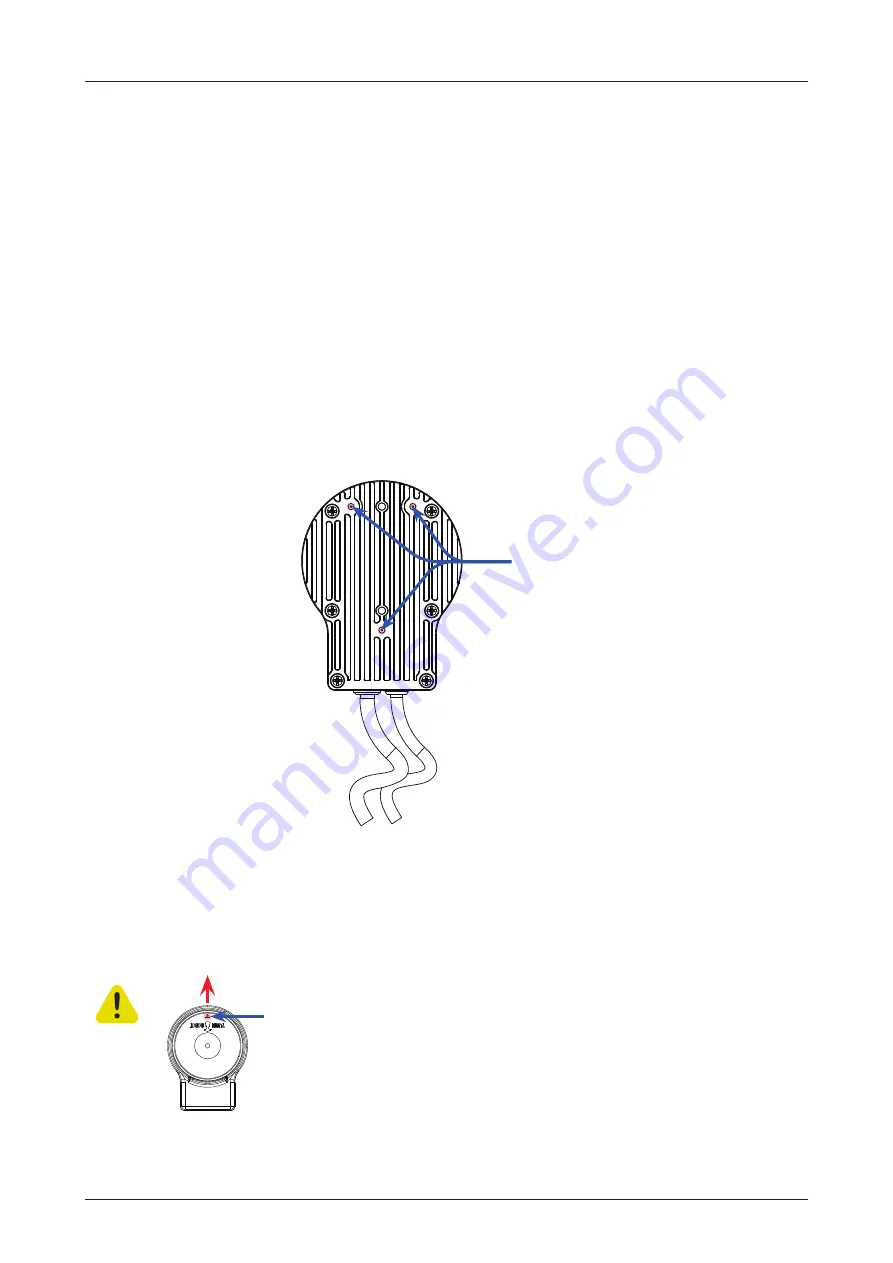
The LiDAR has three bolt holes for fixing the unit on the bottom. Install the LiDAR in the desired location
with appropriate bolts (3ea). When fixing the LiDAR's bottom surface, do not tighten the bolt excessively.
Doing so may damage the bottom surface of the LiDAR.
Bolt holes
M3 x 4 mm
Fig. 5: Bolt holes at the bottom of YRL3V2
Caution
Align the horizontal 0° axis of the lidar sensor (as indicated by the arrow on the lidar cover) to
the center of the area to be monitored.
Horizontal 0° axis
(See the arrow)


