background image

-

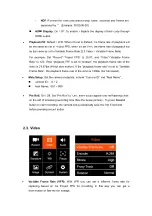
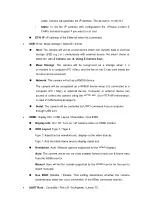
NDF

: Records the time code without drop frame.

Seconds and frames are

separated by “:”. (Example: 00:00:00:00)

HDMI Display

: On / Off. To enable / disable the display of time code through

HDMI output.

Playback FR

: Default / VFR. When it’s set to Default, the frame rate of playback will

be the same as set in Project FPS, when it’s set VFR, the frame rate of playback will

be the same as set in Variable Frame Rate (2.3 Video – Variable Frame Rate)

For example: Set “Record”-“Project FPS” to 29.97, and “Video”-“Variable Frame

Rate” to 120. If the "playback FR" is set to “Default”, the playback frame rate of the

video is 29.97fps (4-fold slow motion). If the "playback frame rate" is set to ‘’Variable

Frame Rate’’, the playback frame rate of the video is 120fps (normal speed).

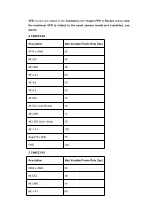
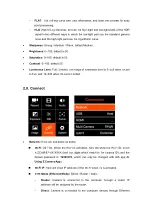
Meta Setup

: Set the camera metadata, include “Camera ID” and “Reel Name”.

Camera ID

A ~ Z

Reel Name

001 ~ 999

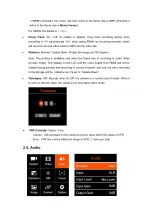
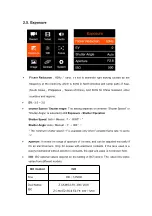
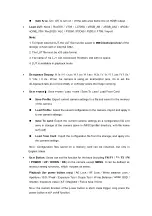
Pre Roll:

On / Off. Set “Pre Roll” to “ON”, there would appear one red flashing circle

on the left of remaining recording time (See the below picture) . To press

Record

button to start recording, the camera will automatically save the first 5 seconds

before pressing record button.

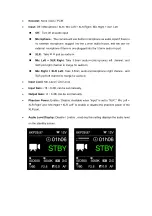
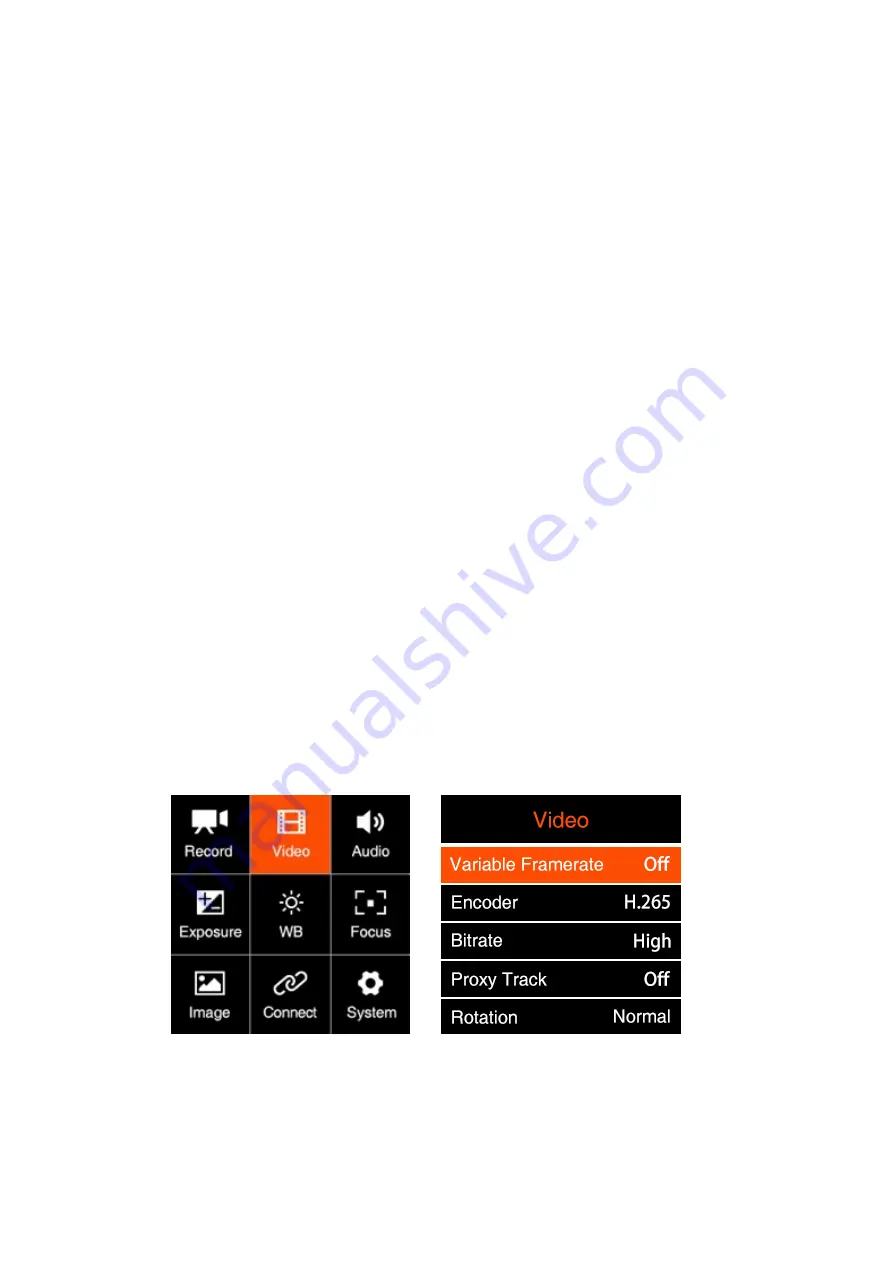
2.3. Video

Variable Frame Rate (VFR)

: With VFR you can set a different frame rate for

capturing based on the Project FPS for recording, in this way you can get a

slow-motion or fast-motion footage.

Summary of Contents for E2

Page 1: ...Z CAM E2 Flagship Series Z CAM E2 S6 E2 F6 E2 F8 E2 M4 Product Name Model Name Z CAM E2 S6 E1701 Z CAM E2 F6 E1901 Z CAM E2 F8 E1902 Z CAM E2 M4 E1511 User Manual v0 2 Firmware 0 93...

Page 2: ...e are EF or PL lens mount options for Z CAM E2 flagship series and MFT lens mount for Z CAM E2 S6 only It s interchangeable and you can purchase additional lens mount module to change it with professi...

Page 3: ...the manufacturer s designated agent dealer or under professional guidance The failure of the camera may be appearing due to changing the lens mount by the user MFT lens mount EF lens mount PL lens mo...

Page 4: ...ode it will switch to Preview mode Press FN OK again to come back to Standby mode Playback Short press Power button when the camera is in Standby Preview mode it will switch to Playback mode Short pre...

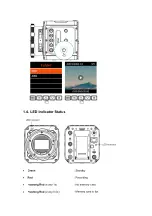
Page 5: ...1 4 LED Indicator Status Green Standby Red Recording Flashing Red every 1s No memory card Flashing Red every 0 5s Memory card is full...

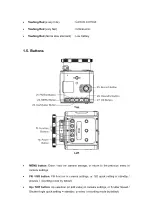
Page 6: ...ton Enter exit the camera settings or return to the previous menu in camera settings FN ISO button FN function in camera settings or ISO quick setting in standby preview recording mode by default Up S...

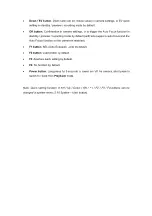
Page 7: ...with lens supports auto focus and the Auto Focus function on the camera is enabled F1 button AEL Auto Exposure Lock by default F2 button Load profile by default F3 Aperture quick setting by default F4...

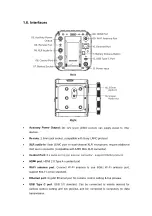
Page 8: ...Mini XLR connector Control Port 2 x serial port 4 pin aviation connector support RS232 protocol HDMI port HDMI 2 0 Type A standard port Wi Fi antenna port Connect Wi Fi antenna to use 5GHz Wi Fi anten...

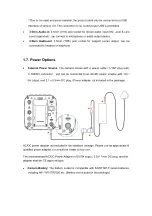
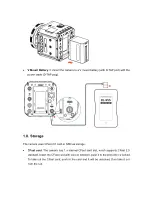
Page 9: ...xternal Power Source The camera comes with a power cable D TAP plug end D TAP DC connector and can be connected to an AC DC power adapter with 12V 5A output and 2 1 x 5 5mm DC plug Power adapter not i...

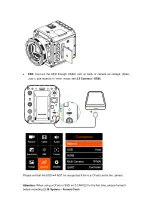
Page 10: ...he camera uses CFast 2 0 card or SSD as storage CFast card The camera has 1 x internal CFast card slot which supports CFast 2 0 standard Insert the CFast card with correct direction push it to the end...

Page 11: ...e Note USB C port must be in Host mode see 2 9 Connect USB Please not that the SSD will NOT be recognized if there is CFast card in the camera Attention When using a CFast or SSD on Z CAM E2 for the f...

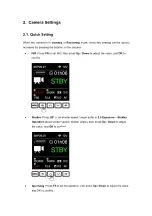
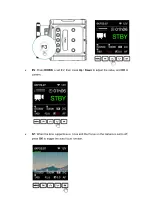
Page 12: ...camera ISO Press FN to set ISO then press Up Down to adjust the value and OK to confirm Shutter Press UP to set shutter speed angle refer to 2 5 Exposure Shutter Operation about shutter speed shutter...

Page 13: ...V Press DOWN to set EV then press Up Down to adjust the value and OK to confirm AF When the lens supports auto focus and the Focus on the camera is set to AF press OK to trigger the auto focus functio...

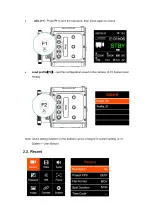
Page 14: ...xposure then press again to unlock Load profile F2 Load the configuration saved in the camera 2 10 System User Profile Note Quick setting function on the buttons can be changed in system setting 2 10...

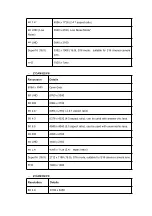
Page 15: ...Super 16 2704 x 1600 FHD 1920 x 1080 Z CAM E2 S6 Resolution Details 6244 x 4168 Open Gate 6K UHD 5760 x 3240 6K DCI 6144 x 3240 6K 2 4 1 6144 x 2592 2 4 1 aspect ratio 5K 4 3 5552 x 4164 4 3 aspect ra...

Page 16: ...Gate 6K UHD 5760 x 3240 6K DCI 6064 x 3196 6K 2 4 1 6064 x 2560 2 4 1 aspect ratio 5K 4 3 5376 x 4032 4 3 aspect ratio can be used with anamorphic lens 5K 6 5 4848 x 4040 6 5 aspect ratio can be used...

Page 17: ...each camera when the resolution is set to different values Z CAM E2 M4 Resolution Frame Rate fps 4096 x 2160 4K DCI 3840 x 2160 4K UHD 4096 x 1728 4K DCI 2 4 1 3840 x 1620 4K UHD 2 4 1 3696 x 2772 4 3...

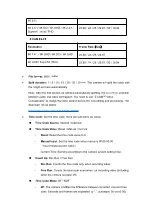
Page 18: ...the post editing and processing The download link as below http www z cam com cn software update Time Code Set the time code there are sub items as below Time Code Source Internal External Time Code V...

Page 19: ...he playback frame rate of the video is 29 97fps 4 fold slow motion If the playback frame rate is set to Variable Frame Rate the playback frame rate of the video is 120fps normal speed Meta Setup Set t...

Page 20: ...d resolution see below Z CAM E2 S6 Resolution Max Variable Frame Rate fps 6244 x 4148 30 6K DCI 48 6K UHD 48 6K 2 4 1 60 5K 4 3 30 5K 6 5 30 4K DCI 75 4K DCI Low Noise 30 4K UHD 75 4K UHD Low Noise 30...

Page 21: ...fps 8K 2 4 1 30 8K UHD 30 6K DCI 30 6K UHD 30 4K UHD 60 Super16 16 9 60 Each resolution to the highest variable frame rate subject to H 265 encoder standard Encoder H 264 H 265 ZRAW The corresponding...

Page 22: ...e rate Resolution Frame Rate Range fps Bitrate Mbps H M L 8K 8K 2 4 1 8K UHD FR 30 500 400 200 6K Open Gate 6K DCI 6K UHD 6K 2 4 1 30 FR 60 300 190 130 FR 30 250 160 100 5K 5K 4 3 5K 6 5 FR 30 250 160...

Page 23: ...ees Note This setting is available only when the frame rate of recording is under 30fps include 30fps The display on the LCD and the video output from HDMI will not be rotated during preview and recor...

Page 24: ...ight Take 3 5mm audio in microphone left channel and XLR port right channel to merge for audio in Mic Right XLR Left Take 3 5mm audio in microphone right channel and XLR port left channel to merge for...

Page 25: ...ion Shutter Speed Auto Manual 1 1 8000 Shutter Angle Auto Manual 1 360 The minimum shutter speed 1 is available only when variable frame rate is set to 1 Aperture It shows the range of aperture of the...

Page 26: ...Shutter Angle Auto Manual 1 360 Minimum shutter speed 1 is optional only when variable frame rate is set to 1 Metering Mode Center Average Spot it sets the metering mode of exposure Shutter Operation...

Page 27: ...ast when shooting a tungsten light scene White To reduce the intensity of the image s warm color cast when shooting a tungsten light scene Lock In Record Off On Enable this function it will automatica...

Page 28: ...ff This will only be enabled when CAF is set to On Active continuous focus in real time according to the scene CAF Sensitivity High Medium Low This will only be enabled when CAF is activated MF Assist...

Page 29: ...The range of luminance level is 0 255 when it s set to Full and 16 235 when it s set to Limited 2 9 Connect Network there are sub items as below Wi Fi Off On When the Wi Fi is activated here will sho...

Page 30: ...a computer PC Mac or external device Computer or external device can access or control the camera using the HTTP API for HTTP API information contact Z CAM technical support Serial The camera will be...

Page 31: ...d Format the CFast card or the external SSD connected through USB Type C port if there is no CFast card in the camera Please note that formatting will erase ALL DATA in the storage Assist Tools There...

Page 32: ...Tool Zebra1 Setting Zebra2 Setting Tool Disable False Color Zebra Monochrome Select the appropriate exposure assist tool or turn it off The False Color Waveform Vectorscope are only displayed on the H...

Page 33: ...save it in the memory of the camera Load Profile Select the saved configuration in the camera import and apply it to the camera settings Save To Card Export the current camera settings as a configura...

Page 34: ...ow Alarm NP F series battery V Mount battery Low alarm voltage value for camera can be set for the different batteries NP F series battery 6 6V 7 0V Default as 6 8V V Mount Battery 13 1V 13 5V Default...

Page 35: ...for recording depends on the capacity of the storage would appear on the LCD display 3 2 Variable Frame Rate VFR Video Recording VFR will enable you to record a footage with higher lower frame rate in...

Page 36: ...as follows 1 Set Video Variable Framerate to off otherwise it is not able to enable Timelapse setting 2 In Video Timelapse setting set the Timelapse interval value the interval is the time between ea...

Page 37: ...l time x frame rate x time length of video file For example if the timelapse interval is set to 0 5s and the recording frame rate is 25fps then as to record 1 minute of timelapse video the time requir...

Page 38: ...Press OK button to play the selected footage When the footage is being played press the Up Down button to speed up slow down 2x faster slower Press OK button to pause and press MENU button to stop it...

Page 39: ...Playback mode long press FN button when the video is not playing there will be a pop up confirmation message Delete the file select Confirm and then press OK to delete the file Note The deleted file i...

Page 40: ...Connect the camera to a computer with an USB Type C cable an USB icon would show up on LCD screen then it s connected successfully 4 PC will detect the camera and shows it as external storage device...

Page 41: ...k setting menu set the Wi Fi to On go back to Network setting there will show the Wi Fi ID ZCAM E2 XX XXXX last 4 digits match to camera ID on the Wi Fi item 3 Press MENU to go back to Standby screen...

Page 42: ...ollow the steps below to set up direct Ethernet connection between the camera and the computer 1 Set the Network ETH Mode to Direct in Connect Network setting default 2 Connect the camera to a compute...

Page 43: ...r with following steps 1 Set the Network ETH Mode to Router in Connect Network setting 2 10 Connect Network ETH mode 2 Connect the camera to a router with an Ethernet cable then connect the router to...

Page 44: ...item e g 192 168 1 101 if the connection is OK 4 Open a browser on the PC Mac type in the address http 192 168 1 101 www index html 192 168 1 101 is the IP address example on step 3 above please use...

Page 45: ...nection refer to the section 5 1 The steps of USB connection are as follows 1 Connect the device to the camera via USB cable 2 If it s the 1st time to connect the device to the camera there will be a...

Page 46: ...load the latest version of firmware E2_FX_FW_0 93 zip for Z CAM E2 from Z CAM s website http www z cam com e2 updates 2 Put the firmware file to the root directory of the CFast card DO NOT unzip it 3...

Page 47: ...g press OK button and you will see the pop up message for firmware update Select OK and press OK button to update the firmware Please make sure the camera will not power off during the firmware upgrad...

Page 48: ...cloth to clean the camera body regularly Please do not disassemble the camera by yourself Please do not place the camera in a darkroom a lab or other places where corrosive chemicals are stored Adapto...

Page 49: ...part 15 of the FCC Rules These limits are designed to provide reasonable protection against harmful interference in a residential installation This equipment generates uses and can radiate radio freq...

Reviews: