13
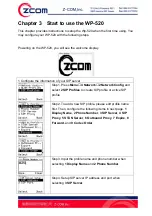
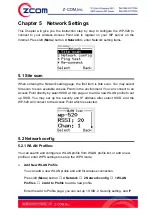
2 Connect to a wireless network
Step1. Press
Left
button (Menu) to enter main menu.
Step2. Select
4.Network
to enter network setting.
Step3. Select
1.Site Scan
to choose AP that you want to
connect from scan list,
2. Network Config
to create WLAN
profile.
Step4. When entering
2
Network Config
, please select
1
WLAN Profiles
to configure profile settings.
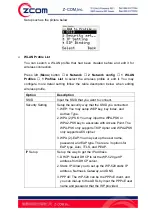
Step5. To add a new profile, please select
3 Add to Profile
and setup
1 SSID
,
2 Security Setup
,
3 IP Setup
, and
4
SIP Binding
in the next page.
Step6. After editing SSID, please select
2 Security Setup
to establish the wireless security. There are six items for
selection,
1 Open
,
2 WEP
,
3
WPA PSK/TKIP
,
4 WPA2
PSK/AES
,
5 WPA-EAP
,
6 WPA2-EAP
.
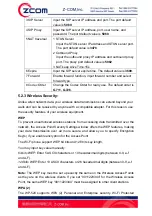
Step7. After setting the wireless security, please select
3 IP
Setup
to set up the IP address for the WP-520. There are
three items for selection,
1 Use
DHCP
,
2 Use Static IP
,
and
3 Use PPPOE
.
Step8. When select
3 WPS
, you may choose 1 PBC mode
or 2 PIN mode which use default PIN to connect to WPS
AP.
After setting up the WLAN profile and SIP profile, the WP-520 will start to register on
SIP server. If registration successes, the WP-520 screen will display phone number
that you set in SIP profile.


