18
Chapter 5
Network Settings
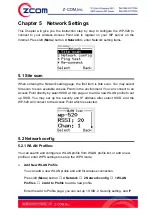
This Chapter will give you the instruction step by step to configure the WP-520 to
connect to your wireless Access Point and to register on your SIP server on the
Internet. Press left (
Menu
) button,
4 Network
to enter Network setting items.
5.1 Site scan
When entering the Network setting page, the first item is Site scan. You may select
Site scan to scan available Access Points in the environment. You can connect to an
Access Point directly by select SSID at this page or to add a new WLAN profile to set
up SSID. You may set up the security and IP address after select SSID, and the
WP-520 will connect to the Access Point which is selected.
5.2 Network config
5.2.1 WLAN Profiles:
You can search and configure a WLAN profile from WLAN profile list, or add a new
profile or enter WPS settings to set up the WPS mode.
¾
Add New WLAN Profile
You can add a new WLAN profile and edit for wireless connection.
Press left (
Menu
) butto
n →
4 Network
→
2 Network config
→
1 WLAN
Profiles
→
2 Add to Profile
to add a new profile.
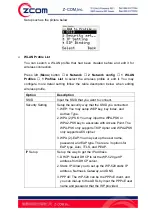
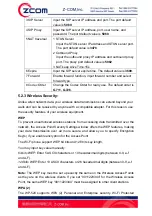
Enter the Add to Profile page; you can set up 1 SSID, 2 Security setting, and IP


