Electronic Loads
-
12-
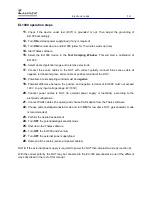
EL1000 operation steps
11.
Check if the device under test (DUT) is grounded or not. Then adjust the grounding of
EL1000 accordingly.
12.
Turn
ON
external power supply/load (if any is required)
13.
Turn
ON
Zennium device and EL1000 (allow for 15 minutes warm up time)
14.
Start Thales software
15.
Select the EL1000 device in the
Test Sampling Window
. This will start a calibration of
EL1000
16.
Select desired potential range and reference electrode
17.
Connect the sense cables to the DUT with correct polarity -connect blue sense cable at
negative terminal and green sense cable at positive terminal of the DUT -
18.
Potentials in test sampling window must be
negative
19.
Potential difference between the positive and negative terminal of EL1000 must not exceed
100 V (in any input voltage range: 4V/100V)
20.
Connect power cables to DUT (to external power supply or load/sink) -according to the
preferred configuration-
21.
Connect PAD4 cables (if required) and choose PAD4 option from the Thales software.
22.
Choose potentiostat/galvanostat mode and turn
ON
(for low ohmic DUT, galvanostatic mode
is recommended)
23.
Perform the desired experiment
24.
Turn
OFF
the potentiostat/galvanostat mode
25.
Shut down the Thales software
26.
Turn
OFF
the EL1000 and Zennium
27.
Turn
OFF
the external power supply/load
28.
Remove all the cables (sense and power cables).
NOTE: If the external power supply is required to power the DUT then skip last two steps (section 6).
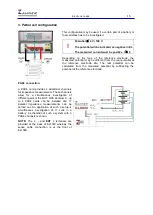
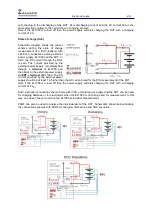
With the correct polarity, the DUT may be connected to the
EL1000
potentiostat in one of the different
ways described in the rest of this manual.


