background image

PARTS & FEATURES

PARTS & FEATURES

PARTS & FEATURES

 9

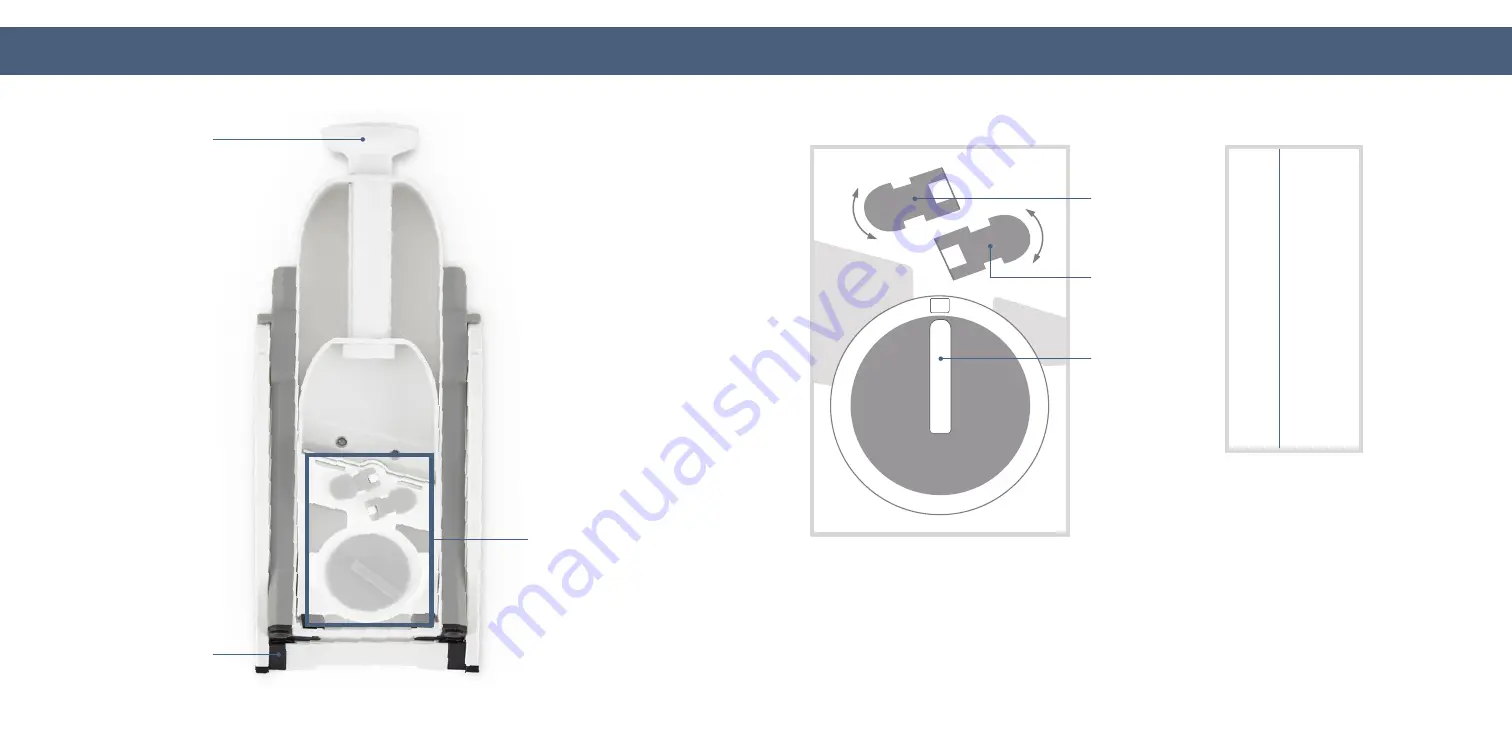
Handle

See next page 

for Settings

Thickness  

Adjuster

Non-Skid Feet

0
1
2
3
4
5
6
7
8

1mm

<1mm

2mm
3mm
4mm
5mm
6mm
7mm
8mm

Knob 1

Knob 2

0

4

3

5

6

2

7

1

8

360

°

360

°

SETTINGS DETAIL

THICKNESS CHART

NOTE: 

The Thickness Adjuster ranges from  

0-8 mm and makes thick/thin slices, julienne, 

matchstick and dice cuts.

NOTE:

 Higher numbers  

correspond to thicker slices. 

Summary of Contents for K48986

Page 1: ...SAFE SLICE MANDOLINE K48986...

Page 2: ...are a few recipes that I use at home and in my restaurants I hope you enjoy them as much as I do Cheers For more recipes cooking tips and products follow me geoffreyzakarian and visit geoffreyzakaria...

Page 3: ...utilisation d appareils lectriques des pr cautions l mentaires de s curit doivent tre respect es notamment Lisez toutes les instructions Retirez tous les sacs et emballages de l appareil avant utilis...

Page 4: ...PARTS FEATURES PARTS FEATURES PARTS FEATURES Ingredient Chute Ingredient Chute Ingredient Pusher Ingredient Pusher Main Stand Ingredient Container Ingredient Container Cleaning Brush 7 6...

Page 5: ...Non Skid Feet 0 1 2 3 4 5 6 7 8 1mm 1mm 2mm 3mm 4mm 5mm 6mm 7mm 8mm Knob 1 Knob 2 0 4 3 5 6 2 7 1 8 3 6 0 3 6 0 SETTINGS DETAIL THICKNESS CHART NOTE The Thickness Adjuster ranges from 0 8 mm and makes...

Page 6: ...me larger ingredients like sweet potatoes may require that you slice them in half before placing in the Ingredient Chute With the Chute Release lifted you can insert the Ingredient Chute with the roun...

Page 7: ...ticks Common foods that are julienned include carrots and zucchini Larger Dice 7 8mm Small Dice 6mm Dicing vegetables involves cutting your ingredient into small blocks or dice Dicing allows for bette...

Page 8: ...for your preferred slice size Note Higher numbers correspond to thicker slices photo A Place your chosen ingredient in the Ingredient Chute and use the Ingredient Pusher to push your ingredient agains...

Page 9: ...ts are cut to your liking A C B D 0 4 3 5 6 2 7 1 8 Start by setting up your mandoline according to the instructions on pages 10 and 11 Set your Thickness Adjuster to 7 photo A Unsnap Knob 1 the Knob...

Page 10: ...nap the Knob back into place You should see a full set of blade teeth come into place at the top of the Blade Runway Unsnap Knob 2 and rotate the Knob a full 360 You should see a SECOND set of blade t...

Page 11: ...ccording to the instructions for making Matchstick cuts page 16 17 photo A HELPFUL HINT For smaller dicing when cutting matchstick slices rotate both Knobs 360 then snap them both back into place Plac...

Page 12: ...aning Brush when you clean the appliance Never put your fingers near the Blade Colorful juicy foods like beets may cause staining on the appliance To clean wipe down gently with oil to remove the stai...

Page 13: ...n Stand click into place My mandoline keeps bumping against the Ingredient Container when I try to slice Ensure that the Main Stand of your mandoline is pushed all the way out You will feel the Main S...

Page 14: ...70 for further assistance and instruction A Customer Support agent will assist you by troubleshooting minor problems If troubleshooting fails to fix the problem a return authorization will be issued P...

Page 15: ...1 800 898 6970 zakarian bydash com...

Reviews: