background image

3

.COM

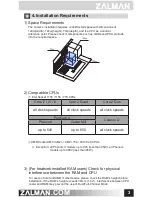
4. Installation Requirements

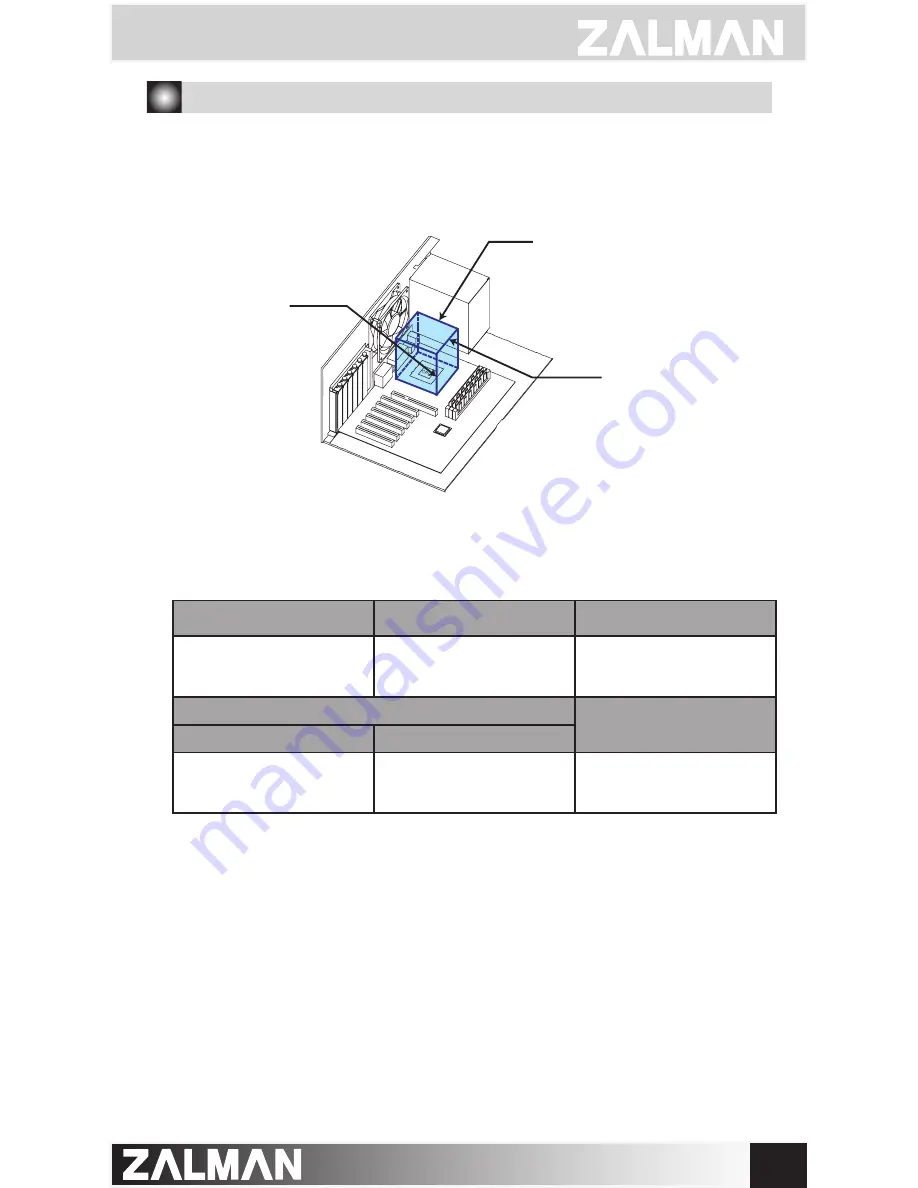
1) Space Requirements

2) Compatible CPUs

The cooler

s installation requires unobstructed space with dimensions of

124

(width), 124

(height), 70

(depth), and the CPU as a central

reference point. Please check if components such as ODDs and PSU protrude

into the required space.

 Intel Socket 1155 / 1156 / 775 CPUs

  AMD Socket AM3 / AM2+ / AM2 / 754 / 939 / 940 CPUs

124

70

124

Core i7 / i5 / i3

Core 2 Quad

Core 2 Duo

all clock speeds

all clock speeds

all clock speeds

Pentium 4

Celeron D

Prescott

Cedar Mill

up to 540

up to 650

all clock speeds

3)  (For heatsink-installed RAM users) Check for physical 

interference between the RAM and CPU

For users of Intel and AMD motherboards, please check the RAM

s height before 

installation. If the RAM

s height exceeds 36mm (1.42

), interference between CPU 

cooler and RAM may prevent the use of Dual/Full-Channel Mode.

  Exception:  all Phenom II models up to 945 (less than 95W), all Phenom 

models up to 9650 (less than 95W)

Summary of Contents for CNPS7500-Cu LED

Page 1: ...i7 Core i5 Core i3 Core 2 Quad Core 2 Duo Pentium Dual Core Pentium D Pentium 4 Celeron D AMD Socket AM3 AM2 AM2 754 939 940 CPUs Phenom II Phenom Athlon II Athlon X2 Athlon FX Athlon Opteron Dual Cor...

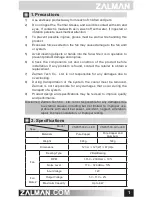
Page 2: ...ce exerted on the fan may cause damage to the fan and or system 5 Avoid inserting objects or hands into the fan while it is in operation to prevent product damage and injuries 6 Check the components l...

Page 3: ...2 COM 3 Components Clip Support Cooler User s Manual Clip Lever Thermal Grease Clip Support Fixing Bolts Washers Nuts Fan Mate 2 Cable Fan Mate 2 Double Sided Tape...

Page 4: ...70 124 Core i7 i5 i3 Core 2 Quad Core 2 Duo all clock speeds all clock speeds all clock speeds Pentium 4 Celeron D Prescott Cedar Mill up to 540 up to 650 all clock speeds 3 For heatsink installed RAM...

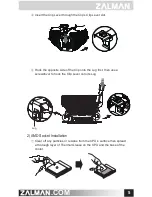
Page 5: ...ation Clear off any particles or residue from the CPU s surface then spread a thorough layer of Thermal Grease on the CPU and the base of the cooler Please make note of the Lever Slot s direction when...

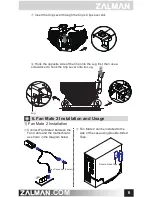
Page 6: ...lip Lever slot Hook the opposite side of the Clip onto the Lug first then use a screwdriver to hook the Clip Lever onto its Lug Clear off any particles or residue from the CPU s surface then spread a...

Page 7: ...the Clip Lever through the Clip s Clip Lever slot Connect Fan Mate 2 between the Fan Cable and the motherboard as shown in the diagram below Fan Mate 2 can be installed to the side of the case using D...

Page 8: ...ate the Fan Speed Control Knob clockwise to the maximum setting Disable CPU Fan Detected in BIOS setting or set the system monitoring program s CPU Fan RPM to the lowest setting Certain motherboards w...

Reviews: