5
Press
BATTERY TYPE button
and hold for 3 seconds to go into your battery type
selection mode, the battery type you select will be shown on the LCD meter, the
default setting is AGM Battery; the controller will automatically memorize your battery
type setting.
Caution: Incorrect battery type setting may damage your battery.
When the controller powers on, the unit will run self -qualify mode and automatically
show below items on LCD before going into charging process
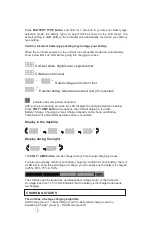
Self-test starts, digital meter segments test
Software version test
V
A
Rated voltage and current test
º
C
External battery temperature sensor test (if connected)
Indicates the solar panel connected.
After going into charging process, the LCD displays the charging statues as below:
Press
VOLT / AMP button
in sequence, the LCD will display in turn with
Battery Voltage, Charging Current, Charged capacity (Amp-hour) and Battery
Temperature (if external temperature sensor connected)
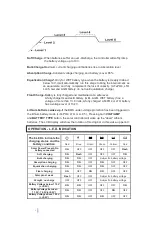
Display in the daytime
-
V
A
V
º
C
Display during the night
-
V
º
C
The
VOLT / AMP button
can be changed at any time during charging process.
You also can visually monitor your battery charging condition for each battery; there is
a LCD bar to show the percentage of charge, you can easily see the battery is charged
to 25%, 50%, 75% or 100%.
The LCD also can be treated as an independent voltage meter or thermometer.
A voltage less than 11.5V Volts indicates that the battery is discharged and needs
re-charging.
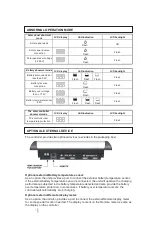
The unit has a 5-stage charging algorithm.
Soft Charge (Level 1) –Bulk Charge (Level 2)-Absorption charge (Level 3) –
Equalizing Charge* (Level 4) - Float Mode (Level 5)
CHARGING STAGES


