background image

General information

• The appliance has four shelf positions. Count the

shelf positions from the bottom of the appliance

floor.

• The appliance has a special system which circulates

the air and constantly recycles the steam. With this

system you can cook in a steamy environment and

keep the food soft inside and crusty outside. It

decreases the cooking time and energy

consumption to a minimum.

• Moisture can condense in the appliance or on the

door glass panels. This is normal. Always stand

back from the appliance when you open the

appliance door while cooking. To decrease the

condensation, operate the appliance for 10 minutes

before cooking.

• Clean the moisture after each use of the appliance.

• Do not put the objects directly on the appliance floor

and do not put aluminium foil on the components

when you cook. This can change the baking results

and cause damage to the enamel.

Baking cakes

• Do not open the oven door before 3/4 of the set

cooking time is up.

• If you use two baking trays at the same time, keep

one empty level between them.

Cooking meat and fish

• Use a deep pan for very fatty food to prevent the

oven from stains that can be permanent.

• Leave the meat for approximately 15 minutes before

carving so that the juice does not seep out.

• To prevent too much smoke in the oven during

roasting, add some water into the deep pan. To

prevent the smoke condensation, add water each

time after it dries up.

Cooking times

Cooking times depend on the type of food, its

consistency, and volume.
Initially, monitor the performance when you cook. Find

the best settings (heat setting, cooking time, etc.) for

your cookware, recipes and quantities when you use

this appliance.

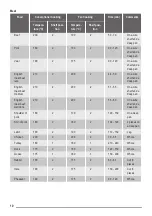
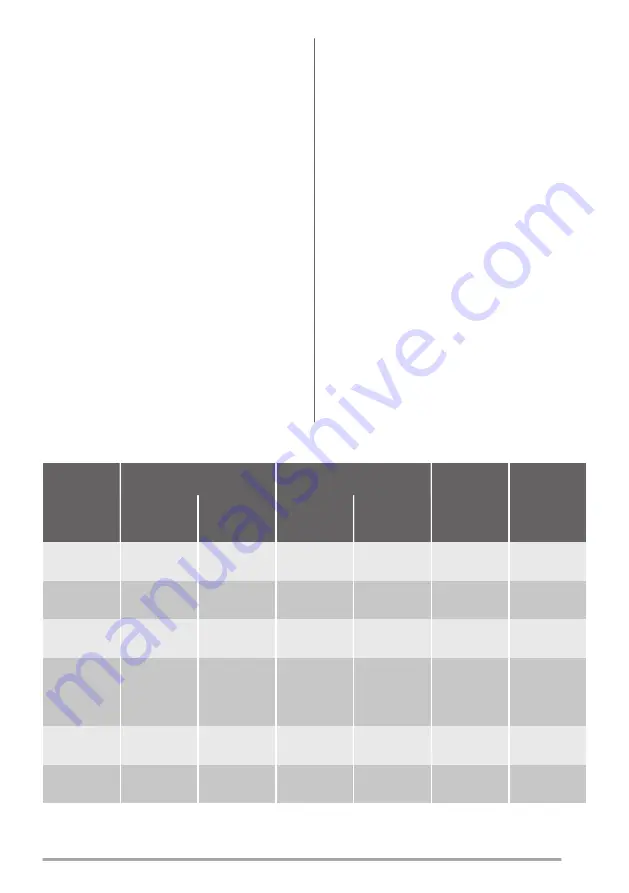
Baking and roasting table

Cakes

Food

Conventional Cooking

Fan Cooking

Time (min)

Comments

Tempera-

ture (°C)

Shelf posi-

tion

Tempera-

ture (°C)

Shelf posi-

tion

Whisked
recipes

170

2

165

2 (1 and 3)

45 - 60

In a cake
mould

Shortbread
dough

170

2

160

2 (1 and 3)

20 - 30

In a cake
mould

Butter-milk
cheese cake

170

1

165

2

70 - 80

In a 26 cm
cake mould

Apple cake
(Apple pie)

170

1

160

2 (1 and 3)

80 - 100

In two 20
cm cake
moulds on a
wire shelf

Strudel

175

2

150

2

60 - 80

In a baking
tray

Jam-tart

170

2

160

2 (1 and 3)

30 - 40

In a 26 cm
cake mould

7

Summary of Contents for KOB20601

Page 1: ...KOB20601 User Manual Oven Notice d utili sation Four...

Page 2: ...lack of experience and knowledge if they have been given supervision or instruction concerning use of the appliance in a safe way and understand the hazards involved Do not let children play with the...

Page 3: ...sure not to cause damage to the mains plug and to the mains cable Should the mains cable need to be replaced this must be carried out by our Authorised Service Centre Do not let mains cables touch or...

Page 4: ...not close the furniture panel until the appliance has cooled down completely after use Care and cleaning Warning Risk of injury fire or damage to the appliance Before maintenance deactivate the applia...

Page 5: ...Initial Cleaning Remove all accessories from the appliance Refer to Care and cleaning chapter Clean the appliance before first use Put the accessories back to their initial position Preheating Preheat...

Page 6: ...1 shelf position Bottom Heat To bake cakes with crispy bottom and to preserve food Turbo Grilling To roast larger meat joints or poultry with bones on 1 shelf position Also to make gratins and to brow...

Page 7: ...same time keep one empty level between them Cooking meat and fish Use a deep pan for very fatty food to prevent the oven from stains that can be permanent Leave the meat for approximately 15 minutes b...

Page 8: ...0 In a bread tin Small cakes 170 3 166 3 1 and 3 25 35 In a baking tray Biscuits1 150 3 140 3 1 and 3 30 35 In a baking tray Meringues 100 3 115 3 35 40 In a baking tray Buns1 190 3 180 3 80 100 In a...

Page 9: ...190 1 20 30 On a deep pan Scones1 200 3 190 2 10 20 In a baking tray 1 Preheat the oven for 10 minutes Flans Food Conventional Cooking Fan Cooking Time min Comments Tempera ture C Shelf posi tion Tem...

Page 10: ...nd a deep pan English roast beef medium 210 2 200 2 51 55 On a wire shelf and a deep pan English roast beef well done 210 2 200 2 55 60 On a wire shelf and a deep pan Shoulder of pork 180 2 170 2 120...

Page 11: ...es 8 250 12 15 10 12 3 Pork chops 4 600 250 12 16 12 14 3 Chicken cut in 2 2 1000 250 30 35 25 30 3 Kebabs 4 250 10 15 10 12 3 Breast of chicken 4 400 250 12 15 12 14 3 Hamburger 6 600 250 20 30 3 Fis...

Page 12: ...nel to clean it The oven door can close if you try to remove the internal glass panel before you remove the oven door Caution Do not use the appliance without the internal glass panel 1 Open the door...

Page 13: ...medy The oven does not heat up The oven is deactivated Activate the oven The oven does not heat up The fuse is released Make sure that the fuse is the cause of the malfunction If the fuse relea ses ag...

Page 14: ...esponsible if you do not follow the safety precautions from the Safety chapters This appliance is supplied with a main plug and a main cable Cable Cable types applicable for installation or replacemen...

Page 15: ...e cooking Use metal dishes to improve the energy saving When possible put the food inside the oven without heating it up When the cooking duration is longer than 30 minutes reduce the oven temperature...

Page 16: ...et par des personnes ayant des capacit s physiques sensorielles ou mentales r duites ou d nu es d exp rience ou de connaissance s ils si elles sont correctement surveill e s ou si des instructions re...

Page 17: ...appareil est install sous et proximit de structures s res Les c t s de l appareil doivent rester c t d appareils ou d l ments ayant la m me hauteur Branchement lectrique AVERTISSEMENT Risque d incendi...

Page 18: ...faites attention lorsque vous retirez ou remettez en place les accessoires La d coloration de l mail est sans effet sur les performances de l appareil Il ne s agit pas d un d faut dans le cadre de la...

Page 19: ...ctions du four 5 Voyant symbole indicateur de puissance 6 Orifices d a ration du ventilateur de refroidissement 7 R sistance 8 clairage 9 Ventilateur 10 Position des grilles Accessoires Grille m talli...

Page 20: ...fonctions du four et celle de temp rature en position ARRET Fonctions du four Fonction du four Utilisation Position Arr t L appareil est teint Chaleur tournante Pour cuire ou r tir simultan ment sur...

Page 21: ...er vos aliments Essuyez la vapeur apr s chaque utilisation de l appareil Ne placez jamais d aluminium ou tout autre ustensile plat et accessoire directement en contact avec la sole de votre four Cela...

Page 22: ...les g teau de 20 cm sur une grille m tallique Strudel 175 2 150 2 60 80 Sur un pla teau multi usages Tarte la confiture 170 2 160 2 1 et 3 30 40 Dans un moule g teau de 26 cm Cake aux fruits 170 2 155...

Page 23: ...pla teau multi usages Petits pains1 190 3 180 3 80 100 Sur un pla teau multi usages Choux1 190 3 180 3 1 et 3 15 20 Sur un pla teau multi usages Tourtes 180 3 170 2 25 35 Dans un moule g teau de 20 c...

Page 24: ...Scones1 200 3 190 2 10 20 Sur un pla teau multi usages 1 Pr chauffez le four pendant 10 minutes Pr parations base d ufs Plat Convection naturelle Chaleur tournante Dur e min Commen taires Temp ra tur...

Page 25: ...uf saig nant 210 2 200 2 44 50 Sur la grille m tallique et dans un plat r tir R ti de b uf point 210 2 200 2 51 55 Sur la grille m tallique et dans un plat r tir R ti de b uf bien cuit 210 2 200 2 55...

Page 26: ...es Truite daur ade 190 2 175 2 1 et 3 40 55 3 4 pois sons Thon saumon 190 2 175 2 1 et 3 35 60 4 6 filets Gril Pr chauffez votre four vide pendant 10 minutes avant la cuisson Plat Quantit Temp ra ture...

Page 27: ...e ou en aluminium Nettoyez la porte uniquement avec une ponge humidifi e S chez la avec un chiffon doux N utilisez jamais de produits abrasifs ou acides ni d ponges m talliques car ils peuvent endomma...

Page 28: ...ation v rifiez que la surface du panneau en verre o se trouve la zone imprim e est lisse au toucher le relief doit tre de l autre c t Veillez installer correctement le panneau de verre int rieur dans...

Page 29: ...Le plat est rest trop longtemps dans le four Ne laissez pas les plats dans le four pendant plus de 15 20 minutes apr s la fin de la cuisson Informations de maintenance Si vous ne trouvez pas de solut...

Page 30: ...urit Cet appareil est fourni avec une fiche d alimentation et un c ble d alimentation C ble Types de c bles compatibles pour l installation ou le remplacement H07 RN F H05 RN F H05 RRF H05 VV F H05 V2...

Page 31: ...z des plats en m tal pour am liorer l conomie d nergie Si possible placez les aliments l int rieur du four sans les r chauffer Quand la dur e de cuisson est sup rieure 30 minutes diminuez la temp ratu...

Page 32: ...www electrolux com shop 867304760 B 452014...

Reviews: