30
Levelling the appliance
Adjustment to suit floor conditions or height
is obtained by rotating clockwise or anti
clockwise the feet at the front and rear of the
appliance. A spirit level should be placed on
one of the shelves to confirm the appliance
is correctly levelled.
Grill assembly
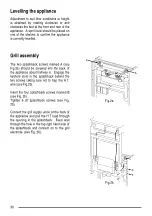
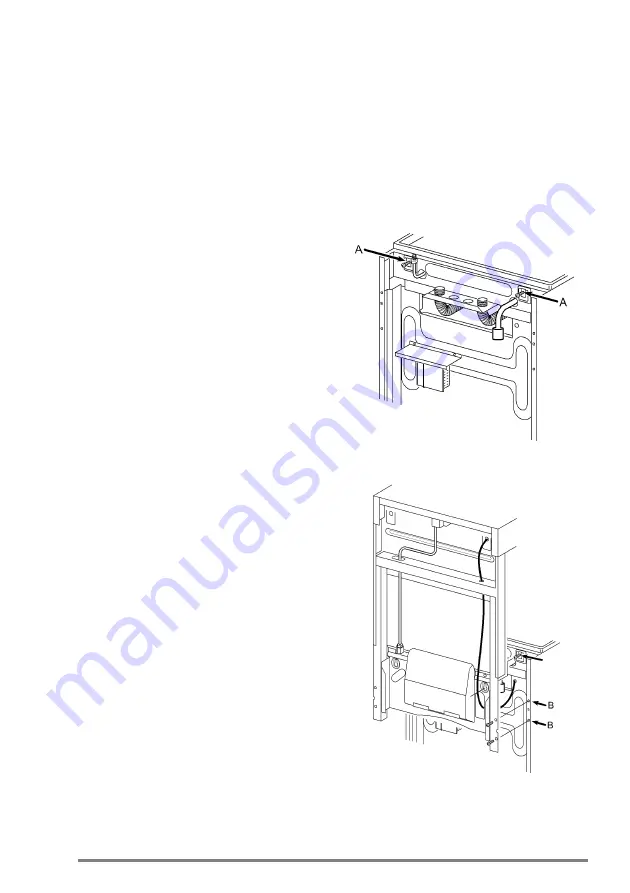
The two splashback screws marked A (see
Fig.2a) should be screwed into the back of
the appliance about halfway in. Engage the
keyhole slots in the splashback behind the
two screws taking care not to trap the H.T.
wire (see Fig.2b).
Insert the four splashback screws marked B
(see Fig. 2b).
Tighten 6 off splashback screws (see Fig.
2b).
Connect the grill supply union at the back of
the appliance and pull the H.T lead through
the opening in the splashback. Feed lead
through the hole in the top right hand side of
the splashback and connect on to the grill
electrode. (see Fig. 2b).
Fig.2b
Fig.2a
Summary of Contents for CLASSIC/1
Page 1: ...User Manual Gas Cooker CLASSIC 1 RAPID OVEN NORMAL GRILL SIMMER NORMAL Classic...
Page 34: ...Notes 34...
Page 35: ...Notes 35...


