background image

11

Something not Working

Before:

contacting your local Service Force Centre check the following point.

IMPORTANT:

If you call out an engineer to a fault listed below, or to repair a fault caused by incorrect use or installation,

a charge will be made even if the appliance is under guarantee.

If after all above checks there is still a fault, call your local Service Force Centre.

In-guarantee customers should ensure that the above checks have been made, as the engineer will make a
charge if the fault is not a mechanical or electrical breakdown.

Please note that proof of purchase is required for any in-guarantee service calls.

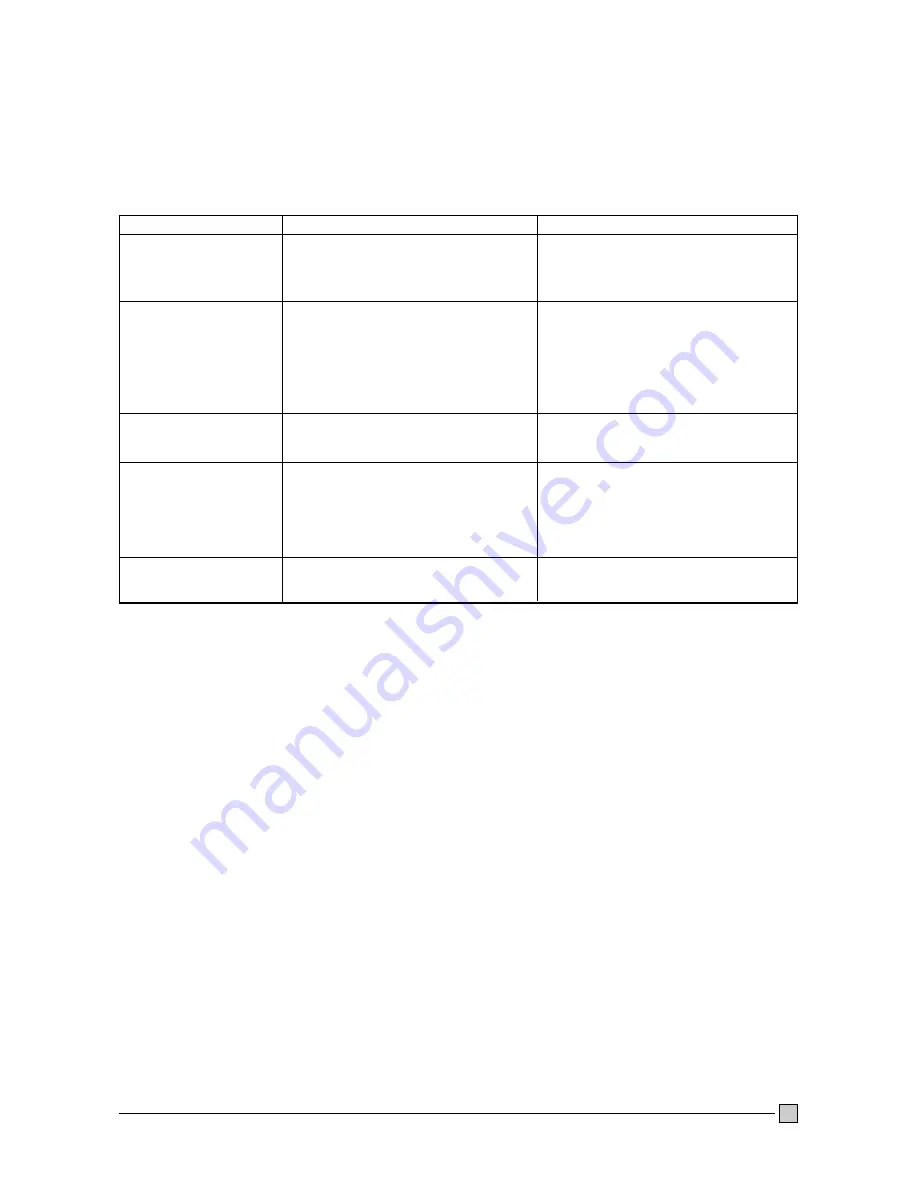
Symptom

No power to the appliance .

The temperature in the
freezer is too warm.(red light
on)

The lid will not open.

Excessive frost and ice has
built up.

The pressure equalisation
valve does not close
appropriately.

Check if....

Plug not connected properly.

Faulty fuse in the plug.

There is a power failure.

The thermostat control knob is set correctly
relevant to the ambient conditions.

Check that the ambient conditions.

Check that the ambient temperature is within the
appliance’s operating limits of 10°C - 32°C.

Fresh food has recently been placed in the
freezer.

The lid has recently been opened.

The thermostat control knob is set correctly
relevant to the ambient conditions.

The lid closes correctly.

There is a large amount of moisture from the
packaging of stored food.

Some pollution has got into the valve.

Solution

Connect plug to the power supply.

Replace the fuse if necessary.

Leave the lid closed and wait for the power
supply to be restored.

Turn the thermostat control knob to the
appropriate setting (colder).

Relocate the appliance.

If it has wait a few minutes for the pressure inside
the freezer to the equalise and then open the lid.

Do not put excessive force on the handle.

Turn the thermostat control knob to the
appropriate setting (warmer).

Rearrange the stored food so that the lid can be
closed correctly.

Ensure that all food placed in the freezer is
wrapped in airlight dry packaging.

The valve must be blown through from the airing
outlet in the rear wall.

Summary of Contents for U28059 ZFC 177 C

Page 1: ...820 41 82 94 GB CHEST FREEZER ZFC 177 C Z ZA AN NU US SS SI I OPERATING AND INSTALLATION MANUAL ...

Page 2: ...o not use other electrical appliances such as ice cream makers inside of refrigerating appliances During Use This appliance is designed for domestic use only specifically for the storage of edible foodstuffs It is not intended for commercial or industrial use Containers with flammable gases or liquids can leak at low temperatures Do not store any containers with flammable materials such as spray c...

Page 3: ... Specifications 16 Installation Positioning 16 Electrical Connections 17 The following symbols will be found in the text to guide you throughout the instructions Safety instructions Step by step instructions for an operation Hints and Tips Contents The symbol on the product or on its packaging indicates that this product may not be treated as household waste Instead it shall be handed over to the ...

Page 4: ...Compartment for frozen food storage B Freezer calendar recommended storage times for frozen foods C Compartment for freezing fresh foods D Dividing wall E Control panel F Defrost water drain Thermostat button Green light Red light Yellow light SUPER ...

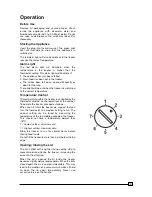
Page 5: ...ol The temperature within the freezer is controlled by the thermostat situated on the lower front of the cabinet To operate the freezer proceed as follows When you first start the freezer we suggest that you turn the thermostat to a medium setting ie 3 4 The correct setting can be found by measuring the temperature of the top middle package in the freezer This should not have a temperature warmer ...

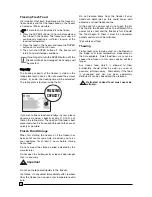
Page 6: ...orage When first starting the freezer or if the freezer has been out of use for some time we advise you to run your appliance for at least 2 hours before storing frozen food Do not exceed the storage period indicated by the manufacturer Do not open the lid frequently or leave it open longer than is necessary Important Do not put carbonated liquids in the freezer Ice lollies if consumed immediately...

Page 7: ...r or hung on the edge of the casing The following spare parts can be ordered from your local Service Force Centre Please note that 2 handles must be ordered for each basket Basket 291274248 7 Handle 291340008 6 2 required The following illustrations show how many baskets can be placed in various freezer models The number above each illustration shows the width of the freezer in millimetres ...

Page 8: ...onsumed within 24 hours Never exceed the storage times indicated by the manufacturer Energy Saving Advice Do not install the appliance close to sources of heat such as a boiler or radiator Locate the appliance in a cool well ventilated room and make sure that the air openings of the appliance are not obstructed Avoid unnecessary frosting in the cabinet by packing all foodstuffs into airtight packa...

Page 9: ...rap in several layers of newspaper and store in a cool place 3 Leave the lid open 4 Remove the plug from the defrost water drain 5 To accelerate the defrosting process place a bowl of hot not boiling water inside the freezer and close the lid 6 The defrost water can be collected in a bowl as shown 7 When defrosting is completed dry the interior thoroughly and replace the plug on the defrost water ...

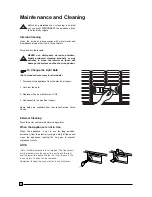
Page 10: ...cal supply 2 Unscrew the bulb 3 Replace with a new bulb max 15W 4 Reconnect to the electrical supply Spare bulbs are available from your local Service Force Centre External Cleaning Wash the outer cabinet with warm soapy water When the Appliance is not in Use When the appliance is not in use for long periods disconnect from the electricity supply empty all foods and clean the appliance leaving the...

Page 11: ...ol knob is set correctly relevant to the ambient conditions Check that the ambient conditions Check that the ambient temperature is within the appliance s operating limits of 10 C 32 C Fresh food has recently been placed in the freezer The lid has recently been opened The thermostat control knob is set correctly relevant to the ambient conditions The lid closes correctly There is a large amount of...

Page 12: ...r the heading Something Not Working When you contact the Service Force Centre you will need to give the following details 1 Your name address and post code 2 Your telephone number 3 Clear and concise details of the fault 4 The model and serial number of the appliance found on the rating plate 5 The purchase date Customer Care Department For general enquiries concerning your Zanussi appliance or fo...

Page 13: ...c Costs incurred for calls to put right an appliance improperly installed or calls to appliances outside the United Kingdom Appliances found to be in use within a commercial environment plus those which are the subject of rental agreements Products of Zanussi manufacture which are not marketed by Zanussi ZANUSSI EUROPEAN GUARANTEE If you should move to another country within Europe then your guara...

Page 14: ...owed to stand in the normal position for about 12 hours before switching it on Ensure that the appliance is installed where it is easily accessible for the engineer in the event of a breakdown Technical Specifications Installation Model Volume gross litres Volume net litres Height with rollers cm Width cm Depth cm Weight kg Energy consumpt 24h kWh Freezing capacity kg 24h Hold over time hours Rate...

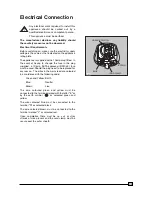
Page 15: ...approved BS1362 fuse must be used Should the plug need to be replaced for any reason The wires in the mains lead are coloured in accordance with the following code Green and Yellow Earth Blue Neutral Brown Live The wire coloured green and yellow must be connected to the terminal marked with the letter E or by the earth symbol or coloured green and yellow The wire coloured blue must be connected to...

Page 16: ...Printed by Océ Hungária Kft 2006 01 24 ...

Reviews: