background image

15

Ins

Ins

tr

tr

uctions f

uctions f

or the Ins

or the Ins

t

t

aller

aller

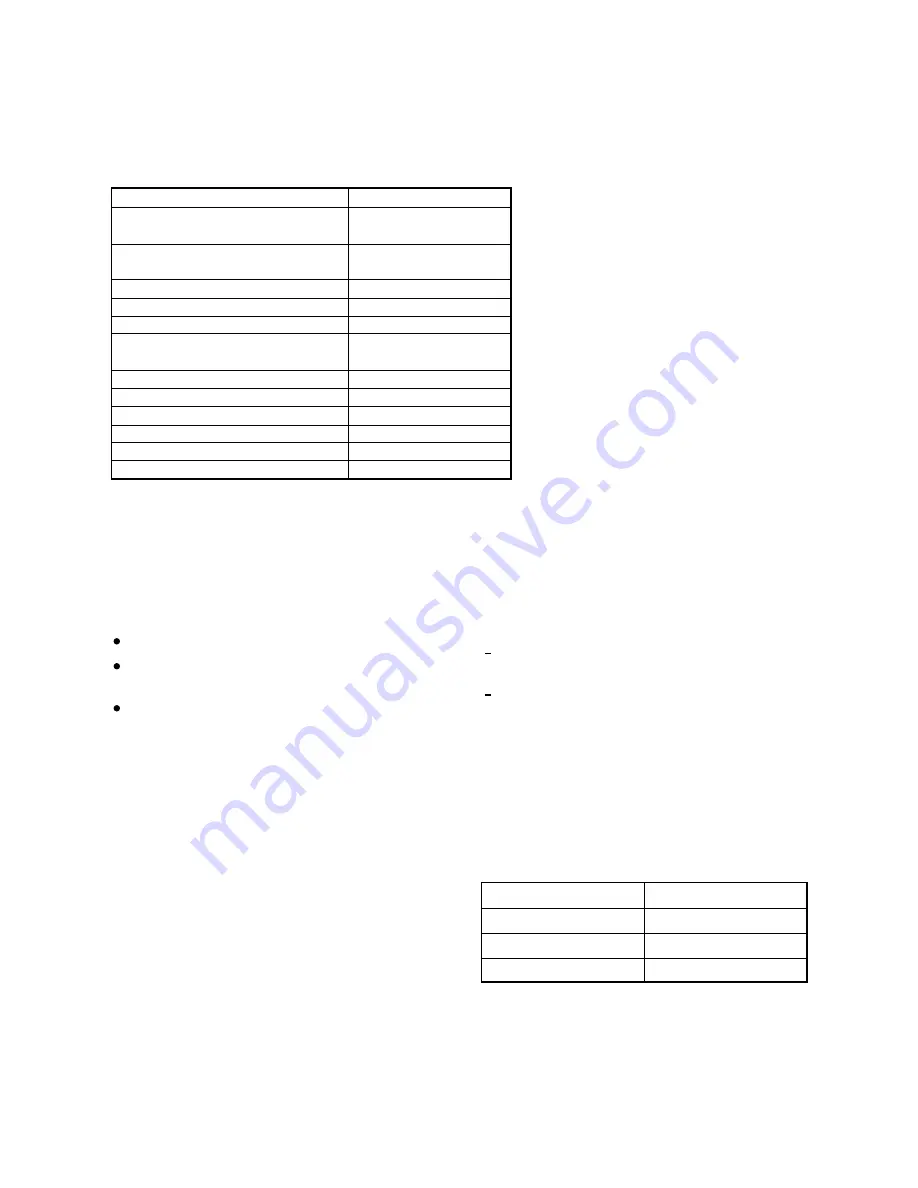
Technical data

Model

Gross capacity (l)

Net capacity (l)

Width (mm)
Height (mm)
Depth (mm)
Energy consumption (kWh/24h)

(kWh/year)

Energy class, according to EU standards
Freezing capacity (kg/24h)
Rising time (h)
Rated power (W)
Weight (kg)
Number of compressors

ZEBF 351 W

Freezer:       105

Refrigerator: 245

Freezer:         90

Refrigerator: 242

600

2000

600

0,94

343

A
5

18

150

73

1

Installing the appliance

Transportation, unpacking

The appliance and the interior fittings are protected for

transport.

Remove all packaging and any adhesive tape.
Any  remnants  of  adhesive  can  be  removed  using

white spirit.
After  transportation  the  appliance  must  not  be

switched  on  for  2  hours.  This  is  to  allow  the

refrigerant to settle.

Cleaning

Clean the accessories and the inside of the appliance

with  warm  water  and  bicarbonate  of  soda  (5  ml 

to 0.5 litres of water). Rinse and dry thoroughly.

Do  not  use  detergents,  abrasive  powders,  highly

perfumed  cleaning  products,  wax  polishes  or

cleaning products containing bleach or alcohol.

Location

The  appliance  should  be  positioned  in  a  well

ventilated, dry room.
Energy use is affected by the ambient temperature.
The appliance should therefore:

not  be  installed  next  to  radiators,  cookers  or

other sources of heat
only be installed at a location where the ambient

temperature  corresponds  to  the  climate

classification,  for  which  the  appliance  is

designed.

The  climate  classification  can  be  found  on  the

rating plate.
The  following  table  shows  which  ambient

temperature  is  correct  for  each  climate

classification:

Climate Classification Ambient Temperature

SN

+10 to +32 °C

N

+16 to +32 °C

ST

+18 to +38 °C

Summary of Contents for ZEBF 351 W

Page 1: ...A ZE 10 03 200364821 GB FRIDGE FREEZER ZEBF 351 W Z ZA AN NU US SS SI I INSTRUCTION BOOK...

Page 2: ...e this appliance effectively and safely please read this instruction book carefully before installing or using this appliance and retain for future reference The symbols below help you to find things...

Page 3: ...paramount importance If you are unsure about any of the meanings or these warnings contact the Customer Care Department Prior to installation Check the appliance for transport damage Under no circumst...

Page 4: ...Storage 9 Energy Saving Advice 9 In the Event of a Power Failure 9 Maintenance and Cleaning 10 Internal Cleaning 10 External Cleaning 10 When the Appliance is Not in Use 10 Defrosting 10 Refrigerator...

Page 5: ...Refrigerator B Freezer 1 Top Panel 2 Thermostat control light 3 Glass shelves 4 Defrost water drain 5 Glass shelf 6 Salad drawers 7 Rating plate 8 Freezing fresh food compartment 9 Frozen food storage...

Page 6: ...asive powders highly perfumed cleaning products wax polishes or products containing alcohol F FTo Start the Appliance 1 Allow the appliance to stand for 2 hrs after installation 2 Plug in the applianc...

Page 7: ...ves in the refrigerator compartment are adjustable to allow for the storage of large items To re arrange the shelves open the door to 90 Storage Times The storage chart at the end of the instruction b...

Page 8: ...will not be affected if the power cut is short and the freezer is full Do not open the door Should the food begin to thaw it must be consumed quickly and must not be re frozen See Hints and Tips Do n...

Page 9: ...n it must be consumed within 24 hours Never exceed the storage times indicated by the manufacturer Energy Saving Advice Do not install the appliance close to sources of heat such as a boiler or radiat...

Page 10: ...with a brush or vacuum cleaner as an accumulation of dust will affect the performance of the appliance and cause excessive electricity consumption When the Appliance is not in Use When the appliance i...

Page 11: ...to protect the food in the refrigerator while defrosting the freezer 3 When defrosting is complete dry the interior thoroughly 4 Reconnect the appliance to the mains set the thermostat control knob to...

Page 12: ...sition The thermostat control knob is set too low The thermostat kontrol knob is set at the wrong temperature The door is open Large quantities of food have been placed in the cabinet The door has bee...

Page 13: ...e you have read the details under the heading Something Not Working When you contact the Service Force Centre you will need to give the following details 1 Your name address and post code 2 Your telep...

Page 14: ...led or calls to appliances outside the United Kingdom Appliances found to be in use within a commercial environment plus those which are the subject of rental agreements Products of Zanussi Electrolux...

Page 15: ...ow the refrigerant to settle Cleaning Clean the accessories and the inside of the appliance with warm water and bicarbonate of soda 5 ml to 0 5 litres of water Rinse and dry thoroughly Do not use dete...

Page 16: ...he appliance If required the washers 2 that are accessories of the feet can be removed Do not stand the appliance next to a source of heat such as a radiator or cooker Ventilation Requirements The app...

Page 17: ...side 9 Refit the fridge door on the opposite side and replace the middle hinge to the left hand side 10 Replace the door and bottom hinge on the opposite side 11 Remove the plug from the ventilation...

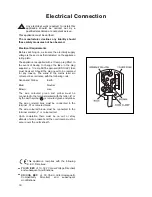
Page 18: ...d to be replaced for any reason The wires in the mains lead are coloured in accordance with the following code Green and Yellow Earth Blue Neutral Brown Live The wire coloured green and yellow must be...

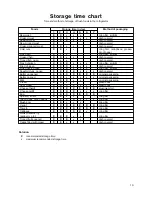
Page 19: ...duck goose X X X x x x cling film airtight Roasted duck goose X X X X x x x dish covered Butter unopened X X X X X X X original packaging Butter opened X X x x x x x original packaging Milk X X X x x...

Page 20: ...red appliances for kitchen cleaning and outdoor use More than 55 million Electrolux Group products such as refrigerators cookers washing machines vacuum cleaners chain saws and lawn mowers are sold ea...

Reviews: