12
Grilling must be carried out with the oven door
closed.
The grill pan handles must be removed from the
pan during grilling. Always use oven gloves to
remove and replace the grill pan handles.
Ensure that you
support
the grill pan when
removing it from the oven.
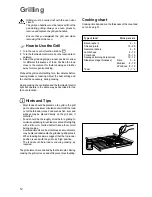
How to Use the Grill
1. Turn the oven control function knob on
.
2. Turn the thermostat control knob on the required tem-
perature.
3. Adjust the grid and grill pan runner position to allow
for different thicknesses of food. Position the food
close to the element for faster cooking and further
away for more gentle cooking.
Preheat the grill on a full setting for a few minutes before
sealing steaks or toasting. Adjust the heat setting and
the shelf as necessary, during cooking
During cooking, the cooling fan and the thermostat control
light will operate in the same way as described for the
fan oven function.
Hints and Tips
- Most foods should be placed on the grid in the grill
pan to allow maximum circulation of air to lift the food
out of the fats and juices. Food such as fish, liver and
kidneys may be placed directly on the grill pan, if
preferred.
- Food should be thoroughly dried before grilling to
minimise splashing. Brush lean meats and fish lightly
with a little oil or melted butter to keep them moist
during cooking.
- Accompaniments such as tomatoes and mushrooms
may be placed underneath the grid when grilling meats
- When toasting bread, we suggest that the top runner
position is used with the grid in its 'high' position.
- The food should be turned over during cooking, as
required.
The grill element is controlled by the thermostat. During
cooking, the grill cycles on and off to prevent overheating.
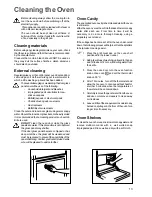
Cooking chart
Cooking time depends on the thickness of the meat and
not on its weight.
Type of food
Mins per side
Bacon rashers
2 - 5
Chicken joints
15 - 20
Gammon rashers
5 - 8
Lamb chops
6 - 12
Pork chops
10 - 15
Sausages (turning as required)
10 - 12
Steaks (average thickness)
Rare
3 - 6
Medium
6 - 10
Well done 8 - 12
Toast
1 - 1
1
/
2
OIL
Grilling
F
Summary of Contents for BUILT IN OVEN ZBF 360
Page 19: ......

