background image

15

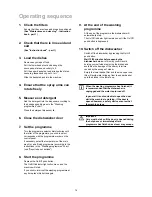
Loading your appliance

Before placing dishes in the machine, remove any scraps of
food, to avoid clogging the filters and consequently reducing
the performance. 

Do not load very small items which can fall 
through the baskets. 

The lower basket

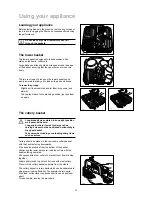
The lower basket is designed to take saucepans, lids,
plates, salad bowls, cutlery etc.

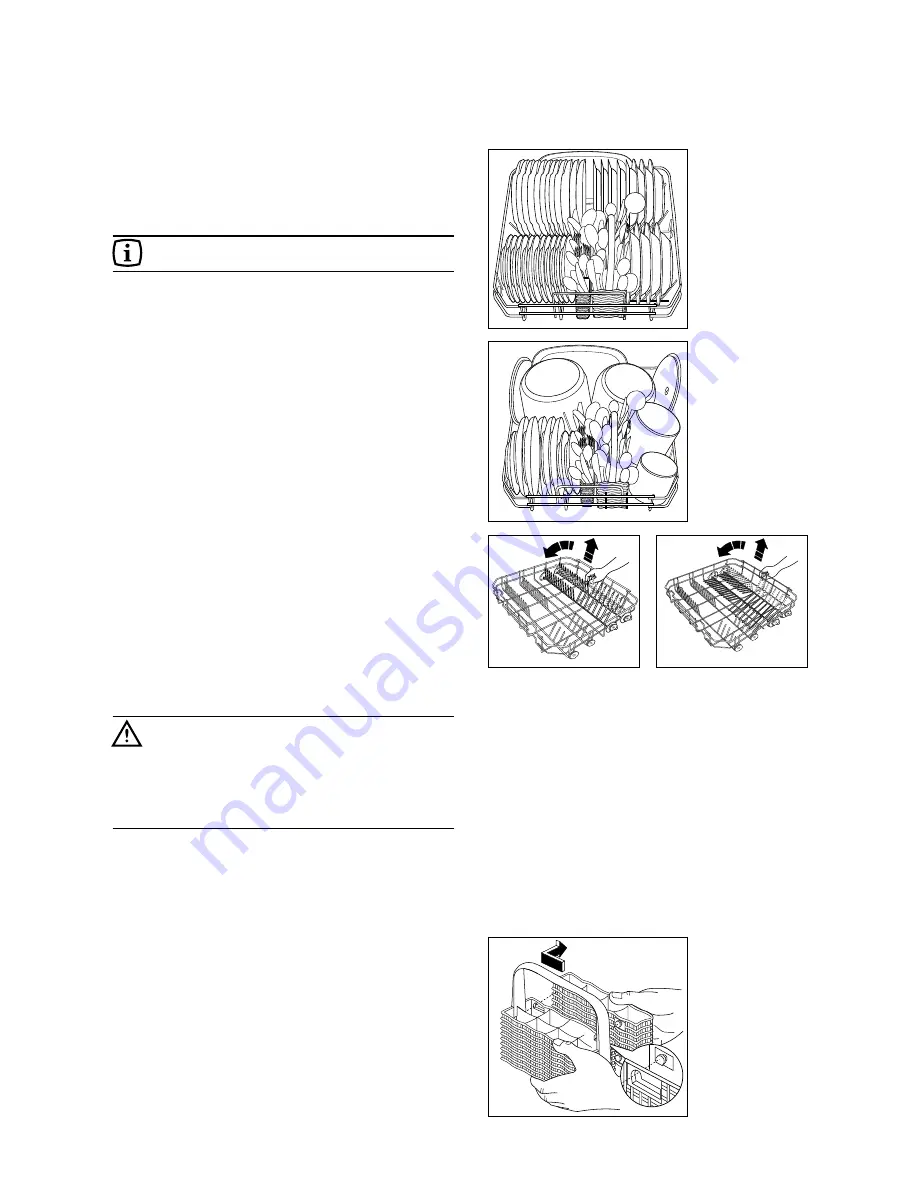
Large dishes and lids should be arranged around the edge
of the basket, ensuring that the upper spray arm can turn
freely.

The two rear rows of prongs on the lower basket can be
easily lowered to allow you to load pots, pans and bowls.

To lower the prongs:

- Slightly pull them upwards and let them drop down (see 

picture).

- To bring them back to the standing position, just pull them 

up again.

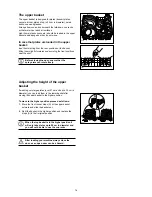
The cutlery basket

Long bladed knives stored in an upright position 
are a potential hazard.
Long and/or sharp items of cutlery such as 
carving knives must be positioned horizontally in 
the upper basket.
Take care when loading or unloading sharp items 
such as knives.

Cutlery should be placed in the removable cutlery basket
with the handles facing downwards.

If the handles protrude from the bottom of the basket,
obstructing the lower spray arm, load the cutlery with the
handles facing upwards.

Mix spoons with other cutlery to prevent them from sticking
together.

Silver cutlery tends to go black if mixed with steel cutlery.
Place it in the cutlery basket separate from the others.

The cutlery basket is in two parts which can be separated to
give greater loading flexibility. To separate the two parts,
slide them horizontally in opposite directions and pull them
apart. 
To reassemble, reverse the procedure.

Using your appliance

UI48

UI21

UI85

UI18

UI62

Summary of Contents for DA6252

Page 1: ...LAVAVAJILLAS DISHWASHER MÁQUINA DE LAVAR LOIÇA DA 6252 Manual de instrucciones parte 2 2 Instruction book part 2 11 Instruções de utilização parte 2 19 E GB P ...

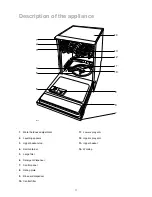
Page 2: ...evelling spacers 3 Upper basket stop 4 Salt container 5 Large filter 6 Detergent dispenser 7 Control panel 8 Rating plate 9 Rinse aid dispenser 10 Central filter 11 Lower spray arm 12 Upper spray arm 13 Upper basket 14 Worktop 1 2 3 4 5 6 7 8 9 10 11 12 13 14 IN68 ...

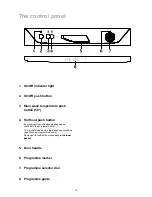
Page 3: ...lf load push button By pressing this push button washing can be confined to the only lower basket This is useful when only a few dishes need washing see Washing programmes chart Remember to load all the dishes only in the lower basket 5 Door handle 6 Programme marker 7 Programme selector dial 8 Programme guide ...

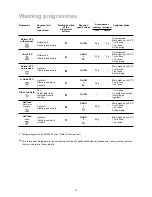
Page 4: ...inse 1 hot rinse Active drying Cold prewash Main wash up to 50 C 1 cold rinse 1 hot rinse Active drying Main wash up to 50 C 1 cold rinse 1 hot rinse Main wash up to 50 C 1 cold rinse 1 hot rinse Active drying Main wash up to 50 C 1 cold rinse 1 hot rinse 1 cold rinse to avoid food scraps from sticking together Testing programme for EN 50242 see Hints for test centres This is a special programme f...

Page 5: ...rogramme Depress the On Off push button The On Off indicator light will come on and the machine will start If you wish to interrupt the washing programme at any time press this button again 9 At the end of the washing programme At the end of the programme the dishwasher will automatically stop The On Off indicator light remains on until the On Off push button is depressed 10 Switch off the dishwas...

Page 6: ... Long bladed knives stored in an upright position are a potential hazard Long and or sharp items of cutlery such as carving knives must be positioned horizontally in the upper basket Take care when loading or unloading sharp items such as knives Cutlery should be placed in the removable cutlery basket with the handles facing downwards If the handles protrude from the bottom of the basket obstructi...

Page 7: ...efore closing the door ensure that the spray arms can rotate freely Adjusting the height of the upper basket If washing very large plates over 27 cm and up to 32 cm in diameter you can load them in the lower basket after moving the upper basket to the higher position To move to the higher position proceed as follows 1 Move the front runner stops A of the upper basket outward and slide the basket o...

Page 8: ...e dispenser lid 17 Dimensions Width 60 cm Height with worktop 85 cm Height without worktop 82 cm Max depth 63 5 cm Max depth with open door 115 2 cm Electrical connection Voltage 230 V 50 Hz Motor rating during wash 200 W Power of heating element 2100 W Overall power 2300 W Water supply pressure Minimum 50 kPa 0 5 bar Maximum 800 kPa 8 bar Water supply connection Water cold hot max 60 C Capacity 1...

Page 9: ...lide out the rear slots lifting the worktop Insert the machine after adjusting height and levelling with the adjustable feet When inserting the machine ensure that the water inlet and drain hoses are not kinked or squashed Levelling Good levelling is essential for correct closure and sealing of the door When the appliance is correctly levelled the door will not catch on the levelling spacers on ei...

Page 10: ...argest producer of powered appliances for kitchen cleaning and outdoor use More than 55 million Electrolux Group products such as refrigerators cookers vacuum cleaners chain saws and lawn mowers are sold each year to a value of approx 14 billion USD in more than 150 countries around the world 0 07 01 ...

Reviews: