

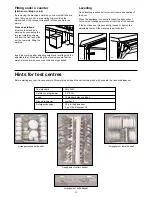
Before using your dishwasher for the
first time:
1. Ensure that the electrical and water connections comply
with the installation instructions
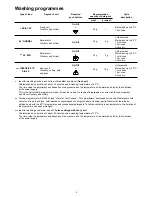
2. Remove all packaging from inside the appliance
3. Set the water softener
4. Pour 1 litre of water inside the salt container and then fill
with salt
5. Fill the rinse aid dispenser.
Setting the water softener
T
he dishwasher is equipped with a water softener designed to
remove minerals and salts from the water supply, which would
have a detrimental or adverse effect on the operation of the
appliance.
The higher the content of these salts, the harder your water is.
Water hardness is measured in equivalent scales, Clarke
degrees, French degrees and PPM (parts per Million).
The softener should be adjusted according to the hardness of
the water in your area. Your local Water Authority can advise
you on the hardness of the water in your area.
The dishwasher is factory set at level 3.
If this level is not suitable for your area the softener should be
adjusted.
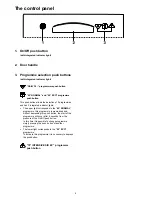
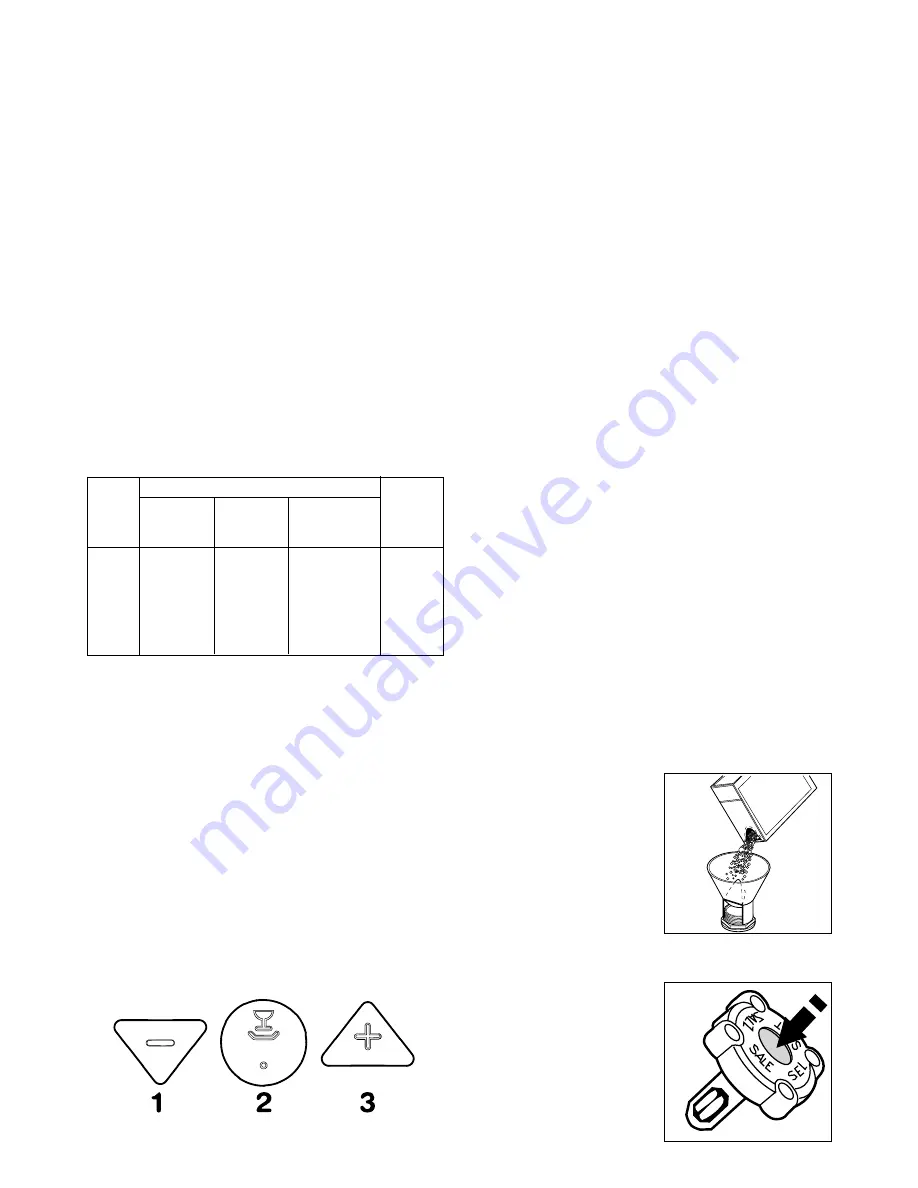
To select a different level be sure that
the dishwasher is off and then proceed
as follows:
1. Press 1 and 3 programme push buttons simultaneously.
2. While keeping the programme push buttons 1 and 3
pressed switch on the dishwasher by pressing the On/Off
push button .The On/Off indicator light comes on.
At the same time the programme push buttons 1 and 3
start flashing.
3. Press the push button 1, the indicator light of the push
button 3 turns off, while the indicator light of the push
button 1 remains fixed for about 5 seconds and then starts
flashing indicating the current level of the water softener.
The current level is indicated by the number of flashes
made by the push button 1 indicator light, that alternates 5
seconds off with a number of flashes, this for about 60
seconds.
Example:
1 flash
=
level 1
2 flashes
=
level 2
3 flashes
=
level 3
4 flashes
=
level 4
5 flashes
=
level 5
4. To change the level, press the programme push button 1.
Each time the push button is pressed the level changes.
Example:
If the current level is 3, by pressing the programme push
button 1 once, level 4 is selected.
If the current level is 5, by pressing the programme push
button 1 once, level 1 is selected.
The push button 1 indicator light remains off for about
5 seconds after which it starts flashing indicating the
new level selected.
5. To memorise the new level, switch off the dishwasher by
pressing the On/Off push button.
Filling with salt
Only use salt specifically designed for use in
dishwashers.
All other types of salt not specifically designed for use in
a dishwasher, especially table salt, will damage the water
softener.
Only fill with salt just before starting one of the complete
washing programmes. This will prevent any grains of salt
or salty water, which may have been spilled, remaining on
the bottom of the machine for any period of time, which
may cause corrosion.
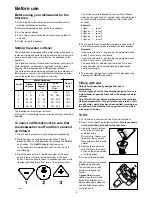
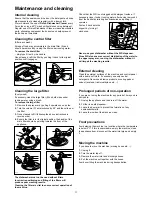
To fill:
1. To fill with salt, unscrew the cap of the salt container.
2. Pour 1 litre of water inside the container (this is necessary
only before filling with salt for the first time).
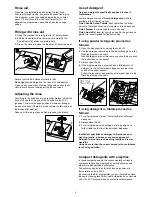
3. Using the funnel provided,
pour in the salt until the
container is full.
Do not worry if water over
flows from the unit when
filling with salt, this is quite
normal.
4. Replace the cap making
sure that there is no trace
of salt on the screw thread
or on the gasket.
5. Screw on the cap tightly.
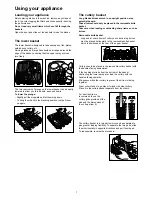
The salt container will require
topping up periodically.
The salt cap has a refill
indicator window in the
centre.
A green float is clearly
visible when there is salt
inside the container, and
almost disappears when the
salt has finished reminding
you to add salt.
5
Before use
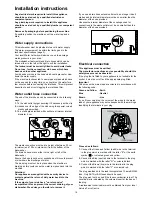
Level
Use of
salt
French
degrees
(°TH)
PPM
(Parts per
Million)
Clarke
degrees
1
2
3
4
5
NO
YES
YES
YES
YES
< 6
6 - 21
22 - 35
36 - 49
50 - 63
< 8
8 - 30
31 - 50
51 - 70
71 - 90
< 80
81 - 300
301 - 500
501 - 700
701 - 900
Water hardness
SO462
SR11
SALE
SAL
T
SALZ
SEL
SR14


