


8
Advice for use of the oven
Traditional cooking
Heat derives from the top and the bottom, it is therefore
preferable to use the central guides. If cooking requires
more heat from the bottom or the top, use the upper or
lower guides.
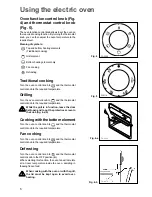
Fan cooking
Heat is transmitted to food through pre-heated air and is
forcibly circulated inside the oven by a fan positioned on
the back of the oven itself. In this way heat quickly and
uniformly reaches all parts of the oven thus cooking various
foods placed on more than one shelf (fig. 9).
With this type of cooking the elimination of humidity from
the air and a drier environment prevent the transmission and
mixture of smells and tastes.
The possibility of cooking on more than one shelf allows
many various dishes to be prepared at the same time, and
up to three trays of biscuits or mini-pizzas to be consumed
immediately or to be frozen. The oven can, however, be
used for cooking on only one shelf. In such case use the
lower guides in order to observe cooking better.
Furthermore, this oven is especially convenient for quick
defreezing, sterilizing preserves, homemade fruit in syrup
and finally to dry mushrooms or fruit.
For the cooking of cakes
Pre-heat the oven , unless indicated differently, for at least
10 minutes before use. Do not open the oven door when
cooking dishes which must raise (e.g. raised pastries and
soufflés); the jet of cold air would block the raising process.
To check if cakes are cooked, insert a toothpick into the
mixture; if it comes out clean the cake is ready. Wait until
at least 3/4 of the cooking time has passed before doing
this check.
As a general rule remember that:
a dish which is well-cooked on the outside but not
sufficiently cooked inside would have required a lower tem-
perature and longer cooking time. On the contrary, a dry
texture would have required a shorter time and higher
cooking temperature.
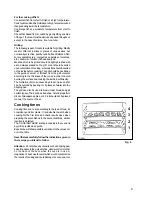
For the cooking of meat
Meat to be cooked in the oven should weigh at least 1 kilo
to avoid its becoming too dry. If you want roasts with a
good colour, use very little oil. If the piece is lean, use oil
or butter or a little of both. Butter or oil are on the other hand
unnecessary if the piece has a strip of fat. If the piece has
a strip of fat on one side only, put it in the oven with this
side upwards; when melting the fat will grease the lower
side sufficiently.
Red meat should be removed from the fridge one hour
before cooking otherwise the sudden change of tempera-
ture could cause it to become tough. A roast, especially if
of red meat, must not be salted at the beginning of cooking
as salt causes juices and blood to seep out of the òmeat,
thus preventing the formation of a well-browned crust.
It is advisable to salt the outside of the meat after just over
half the cooking time.
Place the roast in the oven in a dish having a low rim; a
deep dish shields heat. Meat can be placed on an
ovenproof dish or directly on the grill, under which the
dripping pan will be inserted to collect juice. Ingredients
for gravy should only be put in the dish immediately if
cooking time is brief, otherwise they should be added
during the last half hour. Begin cooking rare meat at a high
temperature, reducing the temperature to finish cooking the
inside. The cooking temperature for white meat can be mo-
derate throughout.
The degree of cooking can be checked by pressing the
meat with a fork; if it does not give the meat is cooked.
At the end of cooking it is advisable to wait at least 15
minutes before cutting the meat in order that the juices are
not lost. Before serving plates can be kept warm in the oven
at minimum temperature.
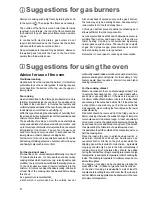
Suggestions for using the oven
Start your cooking with a big flame by turning the knob
to the symbol . Then adjust the flame as necessary.
The outside of the flame is much hotter than its inside
(nucleus). Accordingly , the top of the flame should lick
the bottom of the pan. Excessive flames mean a waste
of gas.
In contrast with electric plates, gas burners do not
require flat-bottomed pans: the flames lick the bottom
and spread the heat all over the surface.
No special pans are required for gas burners. However,
thinwalled pans transmit the heat to the food more
quickly than thick-walled ones.
Suggestions for gas burners
Since heat doesn't spread evenly on the pan's bottom,
the food may only be partially heated. Consequently it
is advisable to stir the food many times.
A thick pan bottom prevents partial overheating as it
allows sufficient thermic compensation.
Avoid very small pans. Wide and shallow pans are more
suitable than narrow and deep ones as they allow a
faster heating. Cooking is not quickened by placing
narrow pans on wide burners. The result is just a waste
of gas. For a proper usage, place small pans on small
burners and large pans on large burners.
Remember to cover pans to reduce gas consumption.


