background image

10

The technical data is indicated in the rating plate on the left side inside the appliance.

Height 850 mm
Width

545 mm

Depth

600 mm

INSTALLATION

lf this appliance featuring magnetic door seals is
to replace an older appliance having a spring lock
(latch) on the door or lid, be sure to make that
spring lock unusable before you discard the old
appliance. This will prevent it from becoming a
death-trap for a child.

Positioning

The appliance should be installed well away from
sources of heat such as radiators, boilers, direct
sunlight etc.
Best performance is obtained with ambient
temperature b18°C and +43°C (class T);
+18°C and +38°C (class ST); +16°C and +32°C
(class N); +10°C and +32°C (class SN). The class of
your appliance is shown on its rating plate.

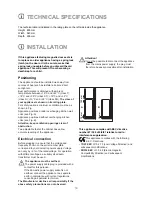
For safety reasons, minimum ventilation must be as
shown in Fig.:
Appliance positioned under overhanging kitchen wall
units (see Fig.-A).
Appliance positioned without overhanging kitchen
units (see Fig.-B).
Attention: keep ventilation openings clear of
obstruction.

Two adjustable feet at the cabinet base allow
accurate levelling of the appliance.

Electrical connection

Before plugging in, ensure that the voltage and
frequency shown on the serial number plate
correspond to your domestic power supply. Voltage
can vary by +6% of the rated voltage. For operation
with different voltages, a suitably sized auto-
transformer must be used.

The appliance must be earthed.

The power supply cable plug is provided with a

contact for this purpose.
If the domestic power supply socket is not
earthed, connect the appliance to a separate
earth in compliance with current regulations,
consulting a specialist technician.

The Manufacturer declines all responsibility if the
above safety precautions are not observed.

Attention!

It must be possible to disconnect the appliance

from the mains power supply; the plug must
therefore be easily accessible after installation.

100 mm

10 mm

10 mm

A

B

NP006

TECHNICAL SPECIFICATIONS

This appliance complies with EEC directive
number 87/ 308 of 2/6/87 relative to radio
interference suppression.

This appliance complies with the following
E.E.C. Directives:

- 73/23 EEC of 19.2.73 (Low Voltage Directive) and

subsequent modifications;

- 89/336 EEC of 3.5.89 (Electromagnetic

Compatibility Directive) and subsequent
modifications.

Summary of Contents for Z 130 F

Page 1: ...FREEZER ZV 130 E 2222687 78 INSTRUCTION BOOKLET t ...

Page 2: ...ing calendar 6 Freezing of fresh food 6 Storage of commercially frozen food 6 Thawing 6 Ice cube production 6 Tips 7 Tips for freezing fresh foods 7 Tips for storage of commercially frozen food 7 Maintenance 8 Defrosting 8 Periodical cleaning 8 Periods of non operation 9 Something not Working 9 Malfunctions 9 For the Installer Technical Specifications 10 Installation 10 Positioning 10 Electrical c...

Page 3: ...rs are designed to be used specifically for the storage of edible foodstuffs only Frozen food must not be re frozen once it has been thawed out Manufacturers storage recommendations should be strictly adhered to Refer to relevant instructions The inner lining of the appliance consists of channels through which the refrigerant passes If these should be punctured this would damage the appliance beyo...

Page 4: ...n as a failure to do this will result in component failure and possible food loss See installation instructions Parts which heat up should not be exposed Wherever possible the back of the product should be against a wall If the appliance has been transported horizontally it is possible that the oil contained in the compressor flows in the refrigerant circuit It is advisable to wait at least two ho...

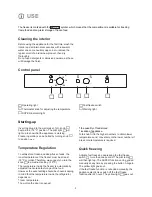
Page 5: ...ries with lukewarm water and some neutral soap so as to remove the typical smell of a brand new product then dry thoroughly Do not use detergents or abrasive powders as these will damage the finish The freezer is marked with the symbol which means that the compartment is suitable for freezing fresie food and long term storage of frozen food Control panel Starting up Insert the plug into the wall s...

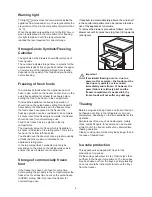
Page 6: ...rtment for freezing this light remains on until the temperature has reached the level required for correct storage Storage Goods Symbols Freezing Calendar The symbols on the drawers show different types of frozen goods The numbers indicate storage times in months for the appropriate types of frozen goods Whether the upper or lower value of the indicated storage time is valid depends on the quality...

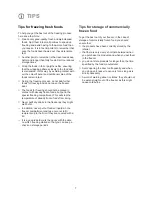
Page 7: ... in the special freezing compartment This will stop the temperature of already frozen foods from rising Never put fizzy drinks in the freezer as they might well burst In addition never put hot foods or liquids in the freezer compartment and take care not to fill recipients up to the brim if they are covered with a lid It is a good idea to mark the packs with the date on which freezing started so t...

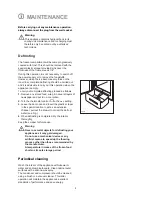
Page 8: ...od wrap it in several layers of newspaper and put it in a cool place 2 Turn the thermostat control to the setting 3 Leave the door open and insert the plastic scraper in the special location to act as an extension channel pull out the drawer to collect the defrost water see Fig 4 When defrosting is completed dry the interior thoroughly Keep the scraper for future use Warning Never use metal object...

Page 9: ...iance perhaps also at the door seal Unusual noises The compressor does not start immediately after pressing the fast freeze button or after changing the temperature setting Appliance is not switched on switch appliance on Mains plug is not inserted or is loose insert mains plug Fuse has blown or is defective check fuse replace if necessary Mains socket is defective Mains malfunctions are to be cor...

Page 10: ...net base allow accurate levelling of the appliance Electrical connection Before plugging in ensure that the voltage and frequency shown on the serial number plate correspond to your domestic power supply Voltage can vary by 6 of the rated voltage For operation with different voltages a suitably sized auto transformer must be used The appliance must be earthed The power supply cable plug is provide...

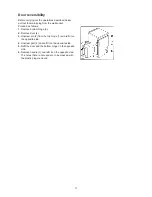
Page 11: ...ove bottom hinge 5 2 Remove door 4 3 Unscrew pin 2 from the top hinge 1 and refit it on the opposite side 4 Unscrew part 6 and refit it on the opposite side 5 Refit the door and the bottom hinge on the opposite side 6 Remove handle 3 and refit it on the opposite side The holes that are not used are to be masked with the plastic plugs removed ...

Reviews: