background image

14

Grilling must be carried out with the oven
door closed. The grill pan handle must be
removed from the pan.

How to Use the Grill

1. Turn the oven control function knob on 

.

2. Turn the thermostat control knob on the required

temperature.

3. Adjust the grid and grill pan runner position to

allow for different thicknesses of food. Position
the food close to the element for faster cooking
and further away for more gentle cooking.

Preheat the grill on a full setting  for a  few minutes
before sealing steaks or toasting. Adjust the heat
setting and the shelf as necessary, during cooking

During cooking, the cooling fan and the thermostat
control light will operate in the same way as
described for the fan oven function.

- Most foods should be placed on the grid in the grill
pan to allow maximum circulation of air to lift the
food out of the fats and juices. Food such as fish,
liver and kidneys may be placed directly on the grill
pan, if preferred
- Food should be thoroughly dried before grilling to
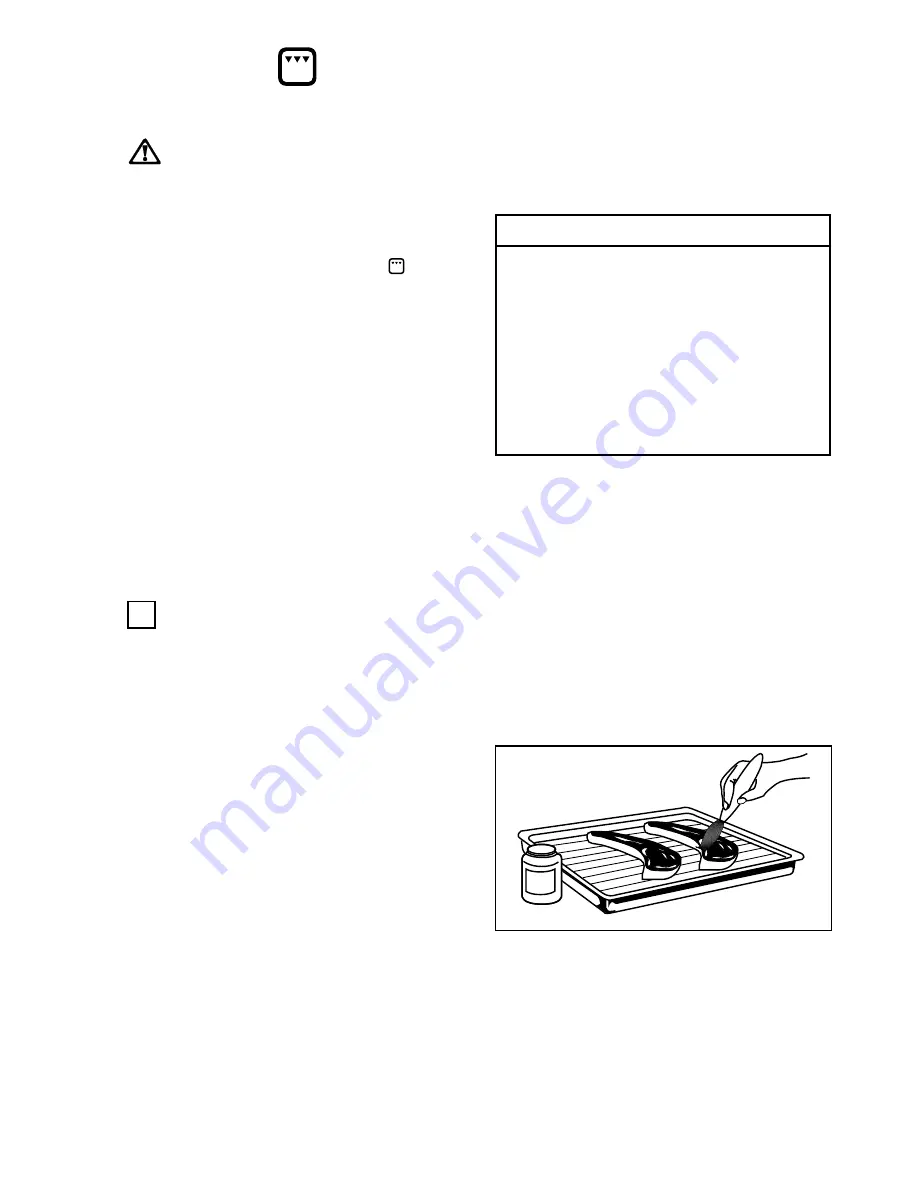
minimise splashing. Brush lean meats and fish lightly
with a little oil or melted butter to keep them moist
during cooking
- Accompaniments such as tomatoes and mushrooms
may be placed underneath the grid when grilling
meats
- When toasting bread, we suggest that the top runner
position is used with the grid in its 'high' position
- The food should be turned over during cooking, as
required.

The grill element is controlled by the thermostat.
During cooking, the grill cycles on and off to prevent
overheating.

COOKING CHART

Cooking time depends on the thickness of the meat
and not on its weight.

Type of food

Mins per side

Bacon rashers

2 - 5

Chicken joints

15 - 20

Gammon rashers

5 - 8

Lamb chops

6 - 12

Pork chops

10 - 15

Sausages (turning as required)

10 - 12

Steaks (average thickness)

Rare

3 - 6

Medium

6 - 10

Well done 8 - 12

Toast

1 - 1

1

/

2

i

OI

L

Grilling


Hints and Tips

Summary of Contents for ZBF 760

Page 1: ...2 OPERATING AND INSTALLATION MANUAL ZANUSSI 35668 6601 BUILT IN OVEN MODEL ZBF 760 ...

Page 2: ...handle until it is fully open Ensure that the anti tip oven shelves are installed in the correct way see instructions Ensure that all control knobs are in the OFF position when not in use Do not leave cookware containing foodstuffs e g fat or oil in or on the oven in case it is inadvertently switched ON When using other electrical appliances ensure the cable does not come into contact with the hot...

Page 3: ...instructions for an operation Hints and Tips Enviromental information For the User For the Installer Technical Data Page 20 Electrical Connection Page 20 Installation Page 21 Important safety information Page 3 Description of the appliance Page 5 Controls Page 6 The Electronic Timer Page 7 Before the First Use Page 9 Using the Fan Oven Page 9 Cooking Chart Page 11 Defrosting Page 13 Grilling Page ...

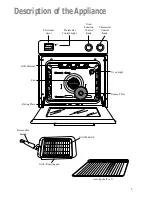
Page 4: ...rease Filter Oven Light Grill Element Fan Removable handle Grill Pan Grid Grill Roasting pan Rating Plate Anti tip shelf x 2 Thermostat Control Light Oven Function Control Knob Thermostat Control Knob Electronic timer Description of the Appliance ...

Page 5: ...p element 0 Grill Fan Ducted Cooking Defrosting Oven Light 1 0 0 1 5 0 2 0 0 MAX 5 0 Thermostat Control Knob Turn the thermostat control knob clockwise to select temperatures between 50 C and 250 C MAX ElectronicTimer Minute minder Cooking duration End of cooking time Manual function Cookpot symbol This will be displayed when a program is in operation Auto symbol This will be displayed when the ov...

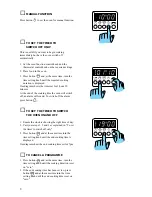
Page 6: ...stored the numbers on the display will flash and the timer has to be reset TO SET THE TIME OF DAY Press buttons and and at the same time turn the time setting knob until the correct time of day is displayed TO SET THE MINUTE MINDER Press button and at the same time turn the setting time knob until the duration time is displayed maximum 23 hours 59 minutes Our diagram shows the timer set for 45 min...

Page 7: ... cooking time the oven will switch off an alarm will sound To switch off the alarm press button TO SET THE TIMER TO SWITCH THE OVEN ON AND OFF 1 Ensure the clock is showing the right time of day 2 Carry out steps 1 2 and 3 as explained in To set the timer to switch off only 3 Press button and at the same time turn the time setting knob until the end cooking time is displayed Our diagram show the e...

Page 8: ...advantages of cooking with this function are Faster Preheating As the fan oven quickly reaches temperature it is not usually necessary to preheat the oven although you may find that you need to allow an extra 5 7 minutes on cooking times For recipes which require higher temperatures best results are achieved if the oven is preheated first e g bread pastries scones souffles etc Lower Temperatures F...

Page 9: ...ling kettle The oven is vented to allow some of this steam to escape However always stand back from the cooker when opening the oven door to allow any build up of steam or heat to release If the steam comes into contact with a cool surface on the outside of the oven e g a trim it will condense and produce water droplets This is quite normal and is not caused by a fault on the oven To prevent disco...

Page 10: ...equired temperature see table below MEAT TEMPERATURES Beef Rare 60 C Medium 70 C Well Done 80 C Pork Well Done 80 C Lamb Medium 70 C Well Done 80 C Cookware Baking trays oven dishes etc should not be placed directly against the grid covering the fan at the back of the oven or placed on the oven base Do not use baking trays larger than 30 cm x 35 cm 12 in x 14 in as they will restrict the circulati...

Page 11: ...are cooked they will not necessarily be ready together The fan oven can be used to heat foods through without thawing first e g fruit tarts mince pies sausage rolls and other small pastry items Use a temperature of 190 200 C and allow 20 40 minutes depending on the quantity of food in the oven The use of too high temperatures can cause uneven browning Check with the recommendations for oven temper...

Page 12: ...process Only joints of meat and poultry up to 2 kg 4 lb are suitable for defrosting in this way Refer to the following table for approximate defrosting times i Chicken 1000 g 100 140 20 30 Place the chicken on an inverted saucer on a large plate Defrost open and turn at half time or defrost covered with foil Remove giblets as soon as possible Meat 1000 g 100 140 20 30 Defrost open and turn at half...

Page 13: ...e food out of the fats and juices Food such as fish liver and kidneys may be placed directly on the grill pan if preferred Food should be thoroughly dried before grilling to minimise splashing Brush lean meats and fish lightly with a little oil or melted butter to keep them moist during cooking Accompaniments such as tomatoes and mushrooms may be placed underneath the grid when grilling meats When...

Page 14: ...a little liquid detergent has been added To prevent damaging or weakening the door glass panels avoid the use of the following Household detergent and bleaches Impegnated pads unsuitable for non stick saucepans Brillo Ajax pads or steel wool pads Chemical oven pads or aerosols Rust removers Bath Sink stain removers Clean the outer and inner door glass using warm soapy water Should the inner door g...

Page 15: ... after the oven has cooled down the following process will help to soften the splatters to help make cleaning easier 1 Place the grill meat pan on the oven shelf positioned in the lowest runner 2 Add a few drops of wasing up liquid to the pan and fill to about 12 mm with boiling water from the kettle 3 Close the oven door turn the oven function knob on fan oven and set the thermostat knob on 50 C ...

Page 16: ...Resistant to temperatures of 300 C Connection type E14 These bulbs are available from your local Zanussi Force Service Centre To replace the faulty bulb 1 Ensure the oven is isolated from the electrical supply 2 Push in and turn the glass cover anticlockwise 3 Remove the faulty bulb and replace with the new one 4 Refit the glass cover 5 Restore the electrical supply ...

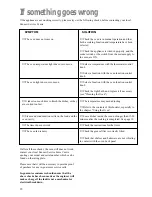
Page 17: ...ng the Oven The temperature may need adjusting Refer to the contents of this booklet especially to the chapter Using the Oven Leave dishes inside the oven no longer than 15 20 minutes after the cooking is completed See page 10 Check the instructions for the timer Check the grease filter is correctly fitted Check that shelves and bakeware are not vibrating in contact with the oven back panel If aft...

Page 18: ...een 8 30 am and 5 30 pm Monday to Friday Visits may be available outside these hours in which case a premium will be charged Any appliance or defective part replaced shall become our property EXCLUSIONS This guarantee does not cover Damage or calls resulting from transportation improper use or neglect the replacement of any light bulbs or removable parts of glass or plastic Costs incurred for call...

Page 19: ...tall a double pole switch between the appliance and the electricity supply mains with a minimum gap of 3mm between the switch contacts and of a type suitable for the required load in compliance with the current rules The switch must not break the yellow and green earth cable at any point Important After installation and connecting the cable must be placed so that it cannot at any point reach a tem...

Page 20: ... cabinet into which the oven will be built must comply with these specifications the dimensions must be as shown in the relevant diagrams the materials must withstand a temperature increase of at least 60 C above ambient proper arrangements must be made of a continuous supply of air to the oven to prevent the oven overheating Dimensions of the appliance and recess required are given in the relevan...

Reviews: