76
MAINTENANCE
Cleaning of the cooker
Splashes of juice, fruit juice, etc. must be removed as
quickly as possible with a damp cloth as they could, in
time, cause the enamel to loose its shine.
To remove light scratches from the enamel, use slightly
abrasive cleaning products in powder form. Do not use
steel wool or knives to remove deposits of dirt.
For daily cleaning use soap and water or one of the
numerous products available commerically.
Wash the enamelled grills with water and a cleaning
product.
Clean the oven door with hot water only, avoid using
rough clothes or abrasive substances.
Only clean the electric plates once they have become
cold.
Both the plates themselves and their edges can be
cleaned with a fine emergy-cloth. They can be oiled
occasionally with a little vegetable oil or vaseline whilst
they are still hot.
Cleaning of the oven
Carefully clean the oven after use and whilst still
slightly warm. In fact this is when deposits of fat or
similar, fruit juices, particles of sugar or grease can be
most easily removed as they will not have had time to
become hard.
Use hot water and a cleaning product or a product in
spray form which can be obtained commercially.
When using, follow with manufacturer’s instructions.
Do not direct sprays onto parts in burnished steel, as
you could damage them.
Clean oven accessories (grill, dripping pan, etc.) with
hot water and a cleaning product.
Remove any deposits by means of a slightly abrasive
powder.
Never cover the sides or the bottom of the oven
with aluminium foil to collect splashes of fat.
The resultant accumulation of heat would affect
cooking results and could damage the enamel.
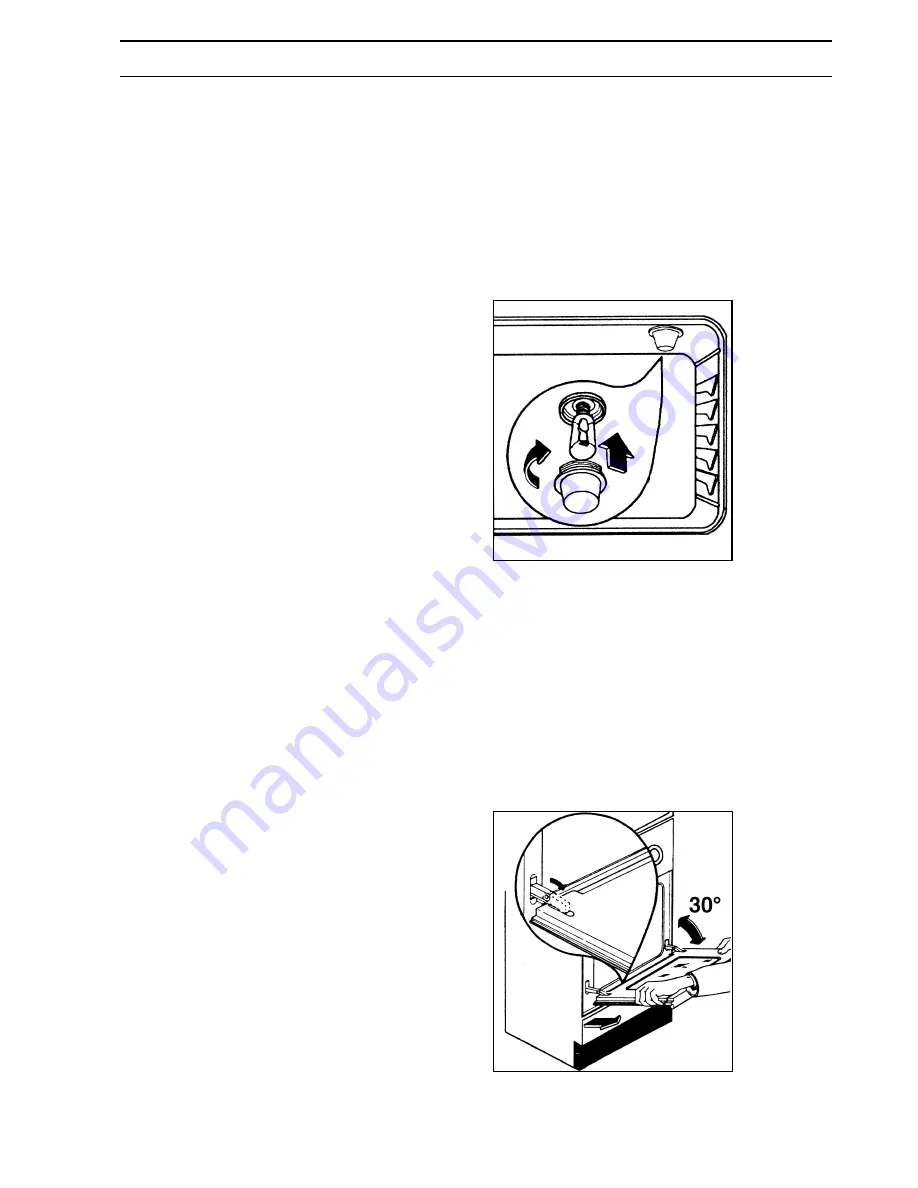
Replacement of the oven lamp (Fig. 15)
Disconnect the appliance
Unscrew the lamp and replace with another, capable
of tolerating high temperatures (300˚C) having the
following characteristics:
Tension: 230 V (50 Hz)
Power: 15W
Cap: E14
Cleaning of the oven door
To clean the oven door completely it is advisable to
dismount it by following these instructions (Fig. 16):
-
open the door completely;
-
turn the two staples positioned on the hinges’ arm
180˚;
-
partially open the door to an angle of -30˚, lift the
door and remove from the front.
Replace the door by carrying out the operations
described in reverse.
Fig. 15
Fig. 16
FO 0424
FO 0967
Summary of Contents for ZC 564 E
Page 3: ...62 ...


