5
Changing the opening direction of the door
Unplug the freezer before performing the following
operations:
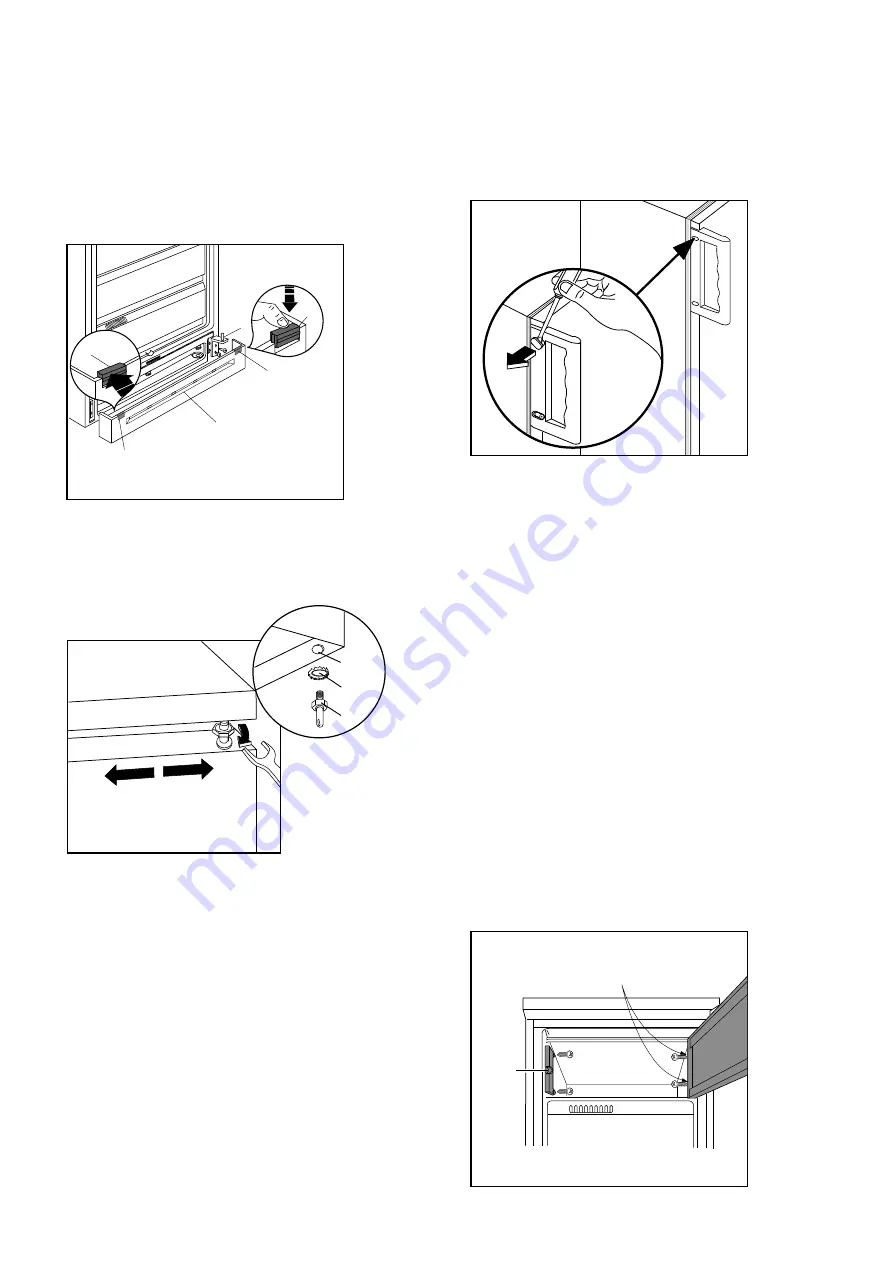
Remove the ventilation grill (D-Fig. 2).
Unscrew the bottom hinge (E-Fig. 2).
Fig. 2
Remove the door from the upper pivot (A-Fig. 3).
Remove the pivot and the washer (A+B-Fig. 3)
from the upper hinge (C), then mount these on the
opposite side.
Fig. 3
Re-assemble the door.
Screw down the bottom hinge (E-Fig. 2) on the
opposite side by using the screws previously
removed.
Detach the plug (F-Fig. 2) from the ventilation grill
(D). To do this, press it in the direction of the arrow.
Introduce the plug (G), which is delivered with the
appliance, into the hole left free on the opposite side.
Re-assemble the ventilation grill.
F
G
G
D
E
F
D071
F
G
D
E
F
C
B
A
D427
Reverse the direction of the handle.
The unused opening direction is concealed by plastic
plugs. Therefore, these plugs are to be mounted on
the holes left free.
Fig. 4
If, after having reversed the door, it is not in line
with the unit, the top hinge can be adjusted.
To do this, use a 10 mm spanner as shown in Fig. 3;
slacken the nut, align the door by pushing it to the
left or right, then re-tighten the nut.
Attention
After completion of the door reversibility operation,
verify that the door gasket is adherent to the
cabinet. If the ambient temperature is cold (i.e. in
Winter), the gasket may not fit perfectly to the
cabinet. In that case, wait for the natural fitting of
the gasket or accelerate this process by heating up
the part involved with a normal hairdrier.
Reversing the quick-freezing compartment door
(Fig. 5)
Unscrew the closing prong support (H).
Unscrew the two hinges (I) and remove the door.
Turn the closing prong support and fix it to the
other side of the quick-freezing compartment.
Reverse the door and the hinges and mount them on
the other side of the compartment.
Check to see that the door closes correctly.
Fig. 5
D162
D276
H
I
Summary of Contents for ZC240F
Page 10: ......


