background image


4

INSTALLATION

Caution

If this appliance featuring magnetic door seals is to 
replace an older appliance having a spring lock 
(latch) on the door or lid, be sure to make that 
spring lock unusable before you discard the old 
appliance. This will prevent it from becoming a 
death-trap for a child.

Location

Place the appliance away from all heat sources, such 
as: radiators, heating stoves, direct sunlight, etc. 
Best results are obtained with a room temperature 
ranging b18


°

C and +43

°

C.

Make sure that there is nothing at the back, at the 
top and at the bottom of the appliance to obstruct 
air circulation.
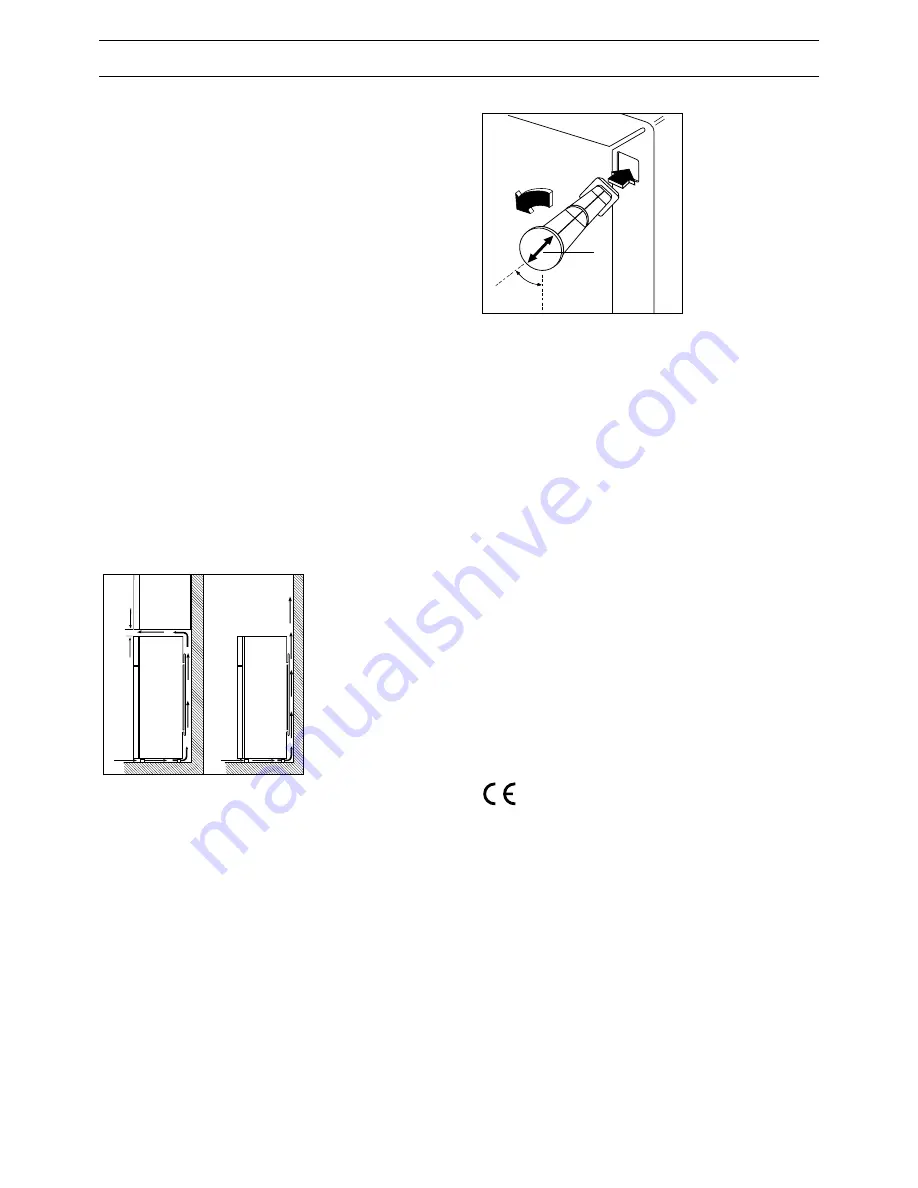
For a more efficient operation of the appliance, the 
minimum distance between the top of the appliance 
and other overhanging kitchen furniture, if any, 
should be at least 100 mm (see Fig. 1 - A).
However, the best solution would be that shown in 
Fig. 1 - B with no overhanging furniture.
Two adjustable feet make it possible to accurately 
level the appliance.

Fig. 1

Rear spacers 

(Fig. 2)

In the plastic envelope containing the Operating 
Instructions are also included two wall spacers to be 
fitted into the special openings provided on the back 
of the appliance.
Push-fit the spacers into the openings, making sure 
that arrow (A) is positioned as per Fig. 2 and then 
turn the spacers through 45

°

 until they lock in 

(arrow (A) in a vertical position).


100 mm min.

A

B

D042

Fig. 2

Power connection

Before plugging in the appliance to the mains 
socket, check that the voltage and frequency 
indicated on the appliance’s rating plate are the 
same as those provided by your home power supply.
A 6% fluctuation above or below rated voltage is 
acceptable.
For operation at different voltages, a suitable 
transformer should be used.

The appliance MUST be connected to an efficient 
earth or ground tap.

The supply-lead plug in fact incorporates a special 
earth or ground contact for this purpose. If by any 
chance the sockets of your domestic wiring system 
are not earthed, the appliance must be connected to 
a separate earth or ground wire by a qualified 
electrician, in accordance with existing safety 
regulations.

The manufacturer declines to accept any liability if  
this accident-prevention procedure is not followed.

This appliance complies with EEC directive 
number 87/308 of 2/6/87 relative to radio 
interference suppression.

This appliance complies with the following 
E.E.C. Directives:

-

73/23 EEC

 of 19.2.73 (Low Voltage Directive) and 

subsequent modifications;

-

89/336 EEC

 of 3.5.89 (Electromagnetic 

Compatibility Directive) and subsequent 
modifications.

Cleaning the interior

Before using the appliance for the first time, wash 
the interior and all internal accessories with 
lukewarm water and some neutral soap so as to 
remove the typical smell of a brand-new product, 
then dry thoroughly. Do not use detergents which 
will leave an odour or abrasive powders on the 
interior, as these will damage the finish.


D039

A

45°

Summary of Contents for ZC320D

Page 1: ...FRIDGE FREEZER REFRIGERATEUR CONGELATEUR FRIGORÍFICO CONGELADOR ZF 26 6 D INSTRUCTION BOOKLET MODE D EMPLOI LIBRO DE INSTRUCCIONES 2222 137 53 This document was created with FrameMaker 4 0 4 ...

Page 2: ... Temperature Regulation page 6 Storage of foods in refrigerator compartment page 6 Movable shelves page 6 Positioning the door shelves page 6 Freezing fresh food page 7 Storage of frozen food page 7 Thawing page 7 Defrosting page 7 Ice cube production page 8 Maintenance page 9 Internal cleaning page 9 External cleaning page 9 Periods of non operation page 9 Interior light bulb page 9 Customer serv...

Page 3: ...nstructions ª Parts which heat up should not be exposed Wherever possible the back of the product should be against a wall ª Before any cleaning or maintenance work is carried out be sure to switch off and unplug the appliance ª If the appliance has been transported horizontally it is possible that the oil contained in the compressor flows in the refrigerant circuit It is advisable to wait at leas...

Page 4: ...n A B D042 Fig 2 Power connection Before plugging in the appliance to the mains socket check that the voltage and frequency indicated on the appliance s rating plate are the same as those provided by your home power supply A 6 fluctuation above or below rated voltage is acceptable For operation at different voltages a suitable transformer should be used The appliance MUST be connected to an effici...

Page 5: ...fit them on the opposite side Refit lower door and bottom hinge 1 on the opposite side Turn the base upside down and refit it Remove handles 5 6 and refit them on the opposite side The holes that are not used are to be masked with the plastic plugs removed Attention After completion of the door reversibility operation verify that the door gasket is adherent to the cabinet If the ambient temperatur...

Page 6: ...the air circulation in the compartment Please note Do not place foodstuffs and paperbags etc in contact with the evaporator plate at the rear of the refrigerator compartment as this can lead to impairment of the operation of the refrigerator In addition food should be positioned inside the refrigerator compartment as indicated in the figure 4 that is given below 1 Cold cuts cheese butter milk 2 Me...

Page 7: ...eteriorates rapidly On the rear side of the door you will find a list of foods followed by a number These numbers indicate the maximum period of time for which the food in question may be conserved in months Storage of frozen food To obtain the best performance from this appliance we strongly recommend that you make sure that the commercially frozen foodstuffs were adequately stored by the retaile...

Page 8: ...s on a layer of cardboard so as to accelerate the defrosting process Place a basin on the first grill shelf in the refrigerator directly below the drainage hole and lift up the small lid Fig 9 Fig 9 Absorb all remaining water with a sponge and then accurately dry the freezer Reconnect the appliance to the power supply and then set the thermostat to the coldest position for approximately 2 hours an...

Page 9: ...gh the opening in the light holder If the light does not go on when the door is open check that it is screwed into place properly If it still does not light up change the bulb The rating is shown on the light bulb cover Fig 10 D025 CUSTOMER SERVICE What to do if the appliance is not functioning properly If something is not working properly check that the plug is firmly in the wall socket and the m...

Reviews: