background image

19

Something not working

   SYMPTOM

!

!!

!

!

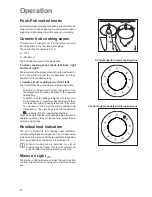
The cooker does not operate.

!

!!

!

!

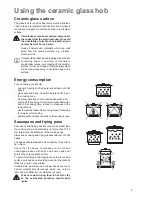
The ceramic hob is not giving satisfactory results.

!

!!

!

!

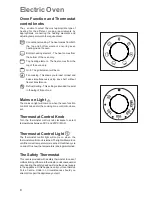
  The oven does not come on.

!

!!

!

!

The oven light does not come on.

!

!!

!

!

It takes too long to finish the dishes, or they are
cooked too fast.

!

!!

!

!

Steam and condensation settle on the food and the
oven cavity.

!

!!

!

!

The oven fan is noisy.

!

!!

!

!

The display shows "12.00".

   SOLUTION

"

"

"

"

"

Check that the unit is plugged in and the electrical
supply is switched on.

"

"

"

"

"

Check the mains fuse has not blown.

"

"

"

"

"

Check the correct control knob has been turned.

"

"

"

"

"

Check the cooking pan is the correct size for the
cooking zone.

"

"

"

"

"

Check the cooking pan has a flat base.

"

"

"

"

"

Check the setting is correct for the type of cooking.

"

"

"

"

"

Check that a cooking function has been selected.

"

"

"

"

"

Check that the oven door is completely closed.

"

"

"

"

"

Check that the time of day has ben set (see
chapter "How to set the time of day").

"

"

"

"

"

Check that the socket switch or the switch from the
mains supply to the cooker are ON.

"

"

"

"

"

Select a function with the oven function control
knob.

"

"

"

"

"

Check the light bulb, and replace it if necessary
(see "Oven Lamp replacement").

"

"

"

"

"

The temperature may need adjusting.

"

"

"

"

"

Refer to the contents of this booklet, especially to
the chapter “Using the Oven”.

"

"

"

"

"

Leave dishes inside the oven no longer than 15-20
minutes after the cooking is completed.

"

"

"

"

"

Check that shelves and bakeware are not vibrating
in contact with the oven back panel.

"

"

"

"

"

Set the time of day (see chapter "How to set the
time of day").

If after all these checks, the cooker still does not work, contact your local Service Force Centre.

If the appliance is not working correctly, please carry out the following checks, before contacting your local Service
Force Centre.
IMPORTANT: If you call out an engineer to a fault listed below, or to repair a fault caused by incorrect use or installation,
a charge will be made even if the appliance is under guarantee.

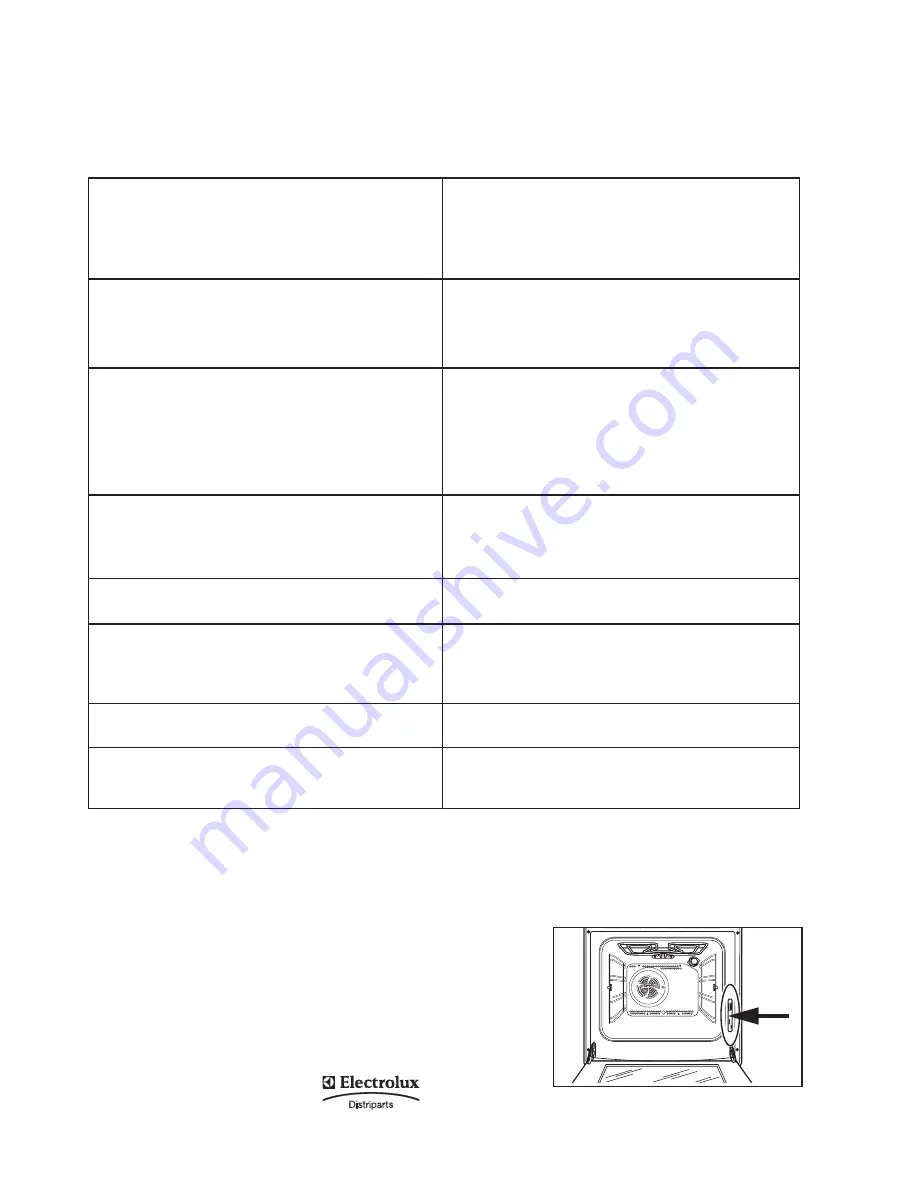
If after the checks listed in the previous chapter, the
appliance still does not work correctly, contact your
locals  Service Centre, specifying the type of
malfunctioning, the appliance model (Mod.), the product
number (Prod. No.) and the serial number (Ser. No.)
marked on the identification plate.
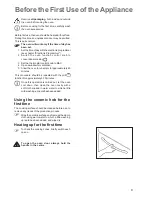
This plate is placed on the front external edge of the oven
cavity.

Original spareparts, certified by the
product manufacturer and carrying
this symbol are only available at our
Service Centre and authorized
spareparts shops.

Service and Spare Parts

Summary of Contents for ZCC 6600

Page 1: ...INSTRUCTIONBOOKLET ÖÕËËÁÄÉÏ ÏÄÇÃÉÙÍ GR ELECTRIC COOKER ÇËÅÊÔÑÉÊÇ ÊÏÕÆÉÍÁ ZCC 6600 ...

Page 2: ......

Page 3: ...ooking only It is not designed for commercial or industrial purposes Do not use this appliance if it is in contact with water Do not operate the appliance with wet hands Ensure the control knobs are in the OFF position when not in use During use the appliance becomes hot Care should be taken to avoid touching heating elements inside the oven Always stand back from the oven when opening the oven do...

Page 4: ...pean Guarantee 22 These instruction are only valid in the countries whose symbols appear on this booklet s cover Environmental Information After installation please dispose of the packaging with due regard to safety and the environment When disposing of an old appliance make it unusable by cutting off the cable The symbol on the product or on its packaging indicates that this product may not be tr...

Page 5: ...ccessoriessuchasbakingsheets willalso becomehot thereforecareshouldbetakenwhen removing these items from the drawer whilst the oven is in use or still hot 1 Front left cooking zone control knob 2 Back left cooking zone control knob 3 Back right cooking zone control knob 4 Front right cooking zone control knob 5 Electronic Programmer 6 Oven function control knob 7 Mains on Light 8 Oven Thermostat P...

Page 6: ... the wider cooking zone will switch on Then turn back the knob to position 9 and adjust it to the required heat setting Please be aware that the two heating elements will now operate together giving a higher power output than a normal cooking zone Residual heat indicators The hob is fitted with four residual heat indicators correspondingtoeachcookingzone Thecorresponding indicator will remain on u...

Page 7: ...ne wherever possible cover pots and pans with a lid switch off the cooking zone a few minutes before the end of the cooking time in order to make use of the residual heat use the residual heat of the cooking zones for keeping food warm or for melting position pots and pans centrally on the cooking zones Saucepans and frying pans Saucepans and frying pans should not be smaller than the cooking zone...

Page 8: ...tended to assist in thawing of frozen food Mains on Light The mains on light will come on when the oven function control knob and or the cooking zone control knob are set Thermostat Control Knob Turn the thermostat control knob clockwise to select temperatures between 50 C and 230 C MAX Thermostat Control Light The thermostat control light will come on when the thermostatcontrolknobisturned Thelig...

Page 9: ...shouldbeheatedwithoutfood During this time an unpleasant odour may be emitted This is quite normal The oven will work only if the time of day has been set 1 Set the time of day with the electronic programmer see chapter Electronic Programmer 2 Switch the oven function control knob to conventional cooking 3 Set the thermostat control knob to MAX 4 Open a window for ventilation 5 Allow the oven to r...

Page 10: ...o automatically switch off at the end of a programmedcookingdurationtime Place foodintheoven selectacooking functionandadjustthecookingtemperature Pressbutton repeatedlyto select the Cooking Duration function The relevant pilot lamp will start flashing Then proceed as follows To set the duration time 1 Press button or 2 After the setting is carried out wait for 5 seconds the Cooking Duration pilot...

Page 11: ...maticallyatalatertime 1 With the Cooking duration function carry out the cooking duration setting as described in the relevant chapter set the duration time Then press button the display will show the programmed setting 2 With the End of cooking time function carry out the End of cooking setting as described in the relevant chapter set the end of cooking time The relevant pilot lamps will come on ...

Page 12: ...es and tins vary in their thickness conductivity colour etc which affects the way they transmit heat to the food inside them A Aluminium earthenware oven glassware and bright shiny utensils reduce cooking and base browning B Enamelledcastiron anodizedaluminium aluminium withnon stickinteriorandcolouredexterioranddark heavy utensils increase cooking and base browning 4 3 2 1 Always cook with the ov...

Page 13: ...ding a little oil on them Inthegrillfunction heatcomesonlyfromthetopelement Therefore youneedtoadjustthecookinglevel depending on meat or fish s thickness Always remember to place the dripping pan in the lower position with some water in it Defrosting The oven fan operates without heat and circulates the air at room temperature inside the oven This increases the speed of defrosting However please ...

Page 14: ...00 Beef 2 190 2 175 50 70 On shelf and dripping pan 1200 Pork 2 180 2 175 100 130 On shelf and dripping pan 1000 Veal 2 190 2 175 90 120 On shelf and dripping pan 1500 English roast beef 1500 rare 2 210 2 200 50 60 On grid and dripping pan 1500 medium 2 210 2 200 60 70 On grid and dripping pan 1500 well done 2 210 2 200 70 80 On grid and dripping pan 2000 Shoulder of pork 2 180 2 170 120 150 With ...

Page 15: ... Fish fillets 4 400 3 max 12 14 10 12 Sandwiches 4 6 3 max 3 7 Toast 4 6 3 max 2 4 2 3 Grilling Upper side C Temperature Pieces Weight Quantity Cooking time minutes Lower side TYPE OF DISH The oven temperatures are intended as a guide only It may be necessary to increase or decrease the temperatures to suit individual preferences and requirements Level 4 3 2 1 Cooking times do not include pre heat...

Page 16: ...with a scouring effect This will not impair the efficiency of your ceramic hob when metallic discolourations appear on Pots and pans with unsuitable bottoms or unsuitable cleaning the cooking zone agents have been used The discolourations can only be removed with considerable effort using a ceramic glass cleaner when the surface shows scratches These may be caused by scraping or melted on objects ...

Page 17: ...ing any cleaning materials on your oven check that they are suitable and that their use is recommended by the manufacturer Cleaners that contain bleach should NOT be used as they may dull the surface finishes Harsh abrasives should also be avoided Never use steam or steam machines to clean the appliance External cleaning Regularly wipe over the control panel oven door and door seal using a soft cl...

Page 18: ...r glass with warm soapy water and a softh cloth only Never use harsh abrasives Once the cleaning is carried out refit the oven door followingtheprocedureinreverse DO NOT clean the oven door while the glass panels are warm If this precaution is not observed the glass panel may shatter If the door glass panel becomes chipped or has deep scratches the glass will be weakened and must be replaced to pr...

Page 19: ...y need adjusting Refer to the contents of this booklet especially to the chapter Using the Oven Leave dishes inside the oven no longer than 15 20 minutes after the cooking is completed Check that shelves and bakeware are not vibrating in contact with the oven back panel Set the time of day see chapter How to set the time of day If after all these checks the cooker still does not work contact your ...

Page 20: ...xisting regulations Whenever changes are mode involving the disconnection of the machine it is necessary to proceed with maximum caution THE MANUFACTURING COMPANYDECLINES ANY RESPONSABILITY FOR POSSIBLE DAMAGES RESULTING FROM AN INSTALLATION WHICH DOESN TCOMPLYWITHTHERULESINFORCE Installation environnement Installation and maintenance must be carried out by a qualified technician in compliance wit...

Page 21: ...nd wire must not be interrupted by the switch The supply cable must in all cases be laid out in such a way as to ensure that it does not reach at any given point a temperature 50 C higher than the ambient tem perature The manufacturer disclaims any liability in case these accident preventing rules are not observed Suitable power supply cables are the following types considering the respective nece...

Page 22: ... of the appliance The appliance guarantee is for the same period and to the same extent for labour and parts as exists in your new country of residence for this particular model or range of appliances The appliance guarantee is personal to the original purchaser of the appliance and cannot be transferred to another user The appliance is installed and used in accordance with instructions issued by ...

Reviews: