


15
individual preference
and requirements. For best
results,
moist recipes (for example pizza, fruit flans
etc)
should be baked on one level. To ensure optimal
performance when cooking convenience
foods, pizza
or frozen and chilled ready meal,
always preheat the
oven first
.
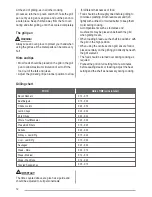
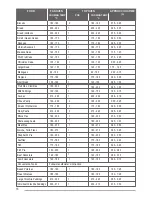
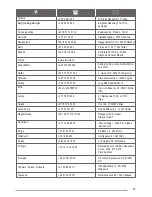
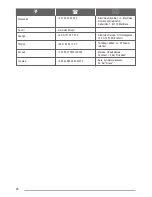
Oven cooking chart
The temperature and baking times are for guidance
only, as these will depend on the
consistency of the
various ingredients and the
number, type and size of
baking tray or tins
used. It may be necessary
to
increase or decrease
the temperature to suit
Cooking tables
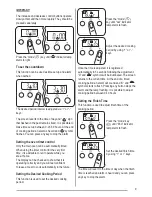
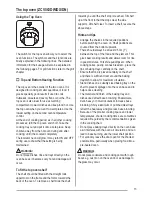
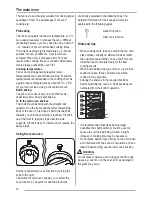
Defrost
Set the defrost function by turning the knob to the
right
.
This main oven function defrosts most
foods
faster
than more conventional methods. It is particularly
suitable for delicate frozen foods which are to be
served cold e.g. cream filled gateaux, cakes covered
with icings or frostings cheesecakes, biscuits,
scones, etc. Turn the main oven temperature control
to the required setting.
Hints and tips
•
Place the frozen food in a single layer where
possible and turn it over half way through the
defrosting process.
•
The actual speed of defrosting is influenced
by
room temperature. On warm days defrosting will be
faster than on cooler days.
•
It is preferable to thaw fish, meat and poultry
slowly
in the fridge. However, this process can be
accelerated by using the defrost function. Small or
thin fish fillets, frozen peeled prawns, cubed or
minced meat, liver, thin chops, steaks etc., can be
thawed in 1 -2 hours.
•
A 1 kg/2¼lb oven ready chicken will be
thawed in
approximately 5 hours. Remove the giblets as soon
as possible during the thawing process.
•
Joints of meat up to 2kg/4½lb in weight can
be
thawed using the defrost function.
•
All joints of meat and poultry must be thawed
thoroughly before cooking.
•
Always cook thoroughly immediately after
thawing.
•
Do not leave food at room temperature once
it is
defrosted. Cook raw food immediately or store
cooked food in the fridge,
once it has
cooled.
•
Care must always be taken when handling
foods in
the home. Always follow the basic
rules of food
hygiene to prevent bacterial
growth and cross
contamination when defrosting,
preparing, cooking,
cooling and
freezing foods.
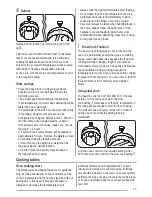
Slow Cook Function
The slow cook setting gives a very low heat in
the
oven. It is particularity useful when you are
cooking
soups, stews and casseroles because
the long slow
cooking will make cheaper,
tougher cuts of meat
more tender. Some foods
such as pastry and biscuits
are not suitable for
slow cooking because the
temperature is too
low. Cover all foods during cooking
to prevent
it from drying out. You can uncover food for
the
last half hour if it is normally served golden
brown.
Using slow cook
You need to cook food at 180-190C for 30 minutes
before you turn the oven down to the slow
cook setting. This makes sure that the temperature of
the food gets hot enough to start the food
cooking.
The indicator neon will glow. It may turn on and
off
during use to show that the setting is being
maintained.
Turn the oven control to the required setting. After
30 minutes turn the control to the slow cook setting
.
Summary of Contents for ZCE560DW
Page 1: ...Cooker ZCE560 ZCV561 ZCV563 ...
Page 27: ......


