


27
Cleaning the hob
Clean the hotplate top using a mild abrasive.
Take care not to damage the spark
electrodes. If the spark electrodes are
damaged the burners will not light.
You can remove the pan supports, burner
caps and burner crowns to clean them.
Again take care not to damage the spark
electrodes.
Clean the burner crowns and pan supports
by soaking them in very hot soapy water.
Aluminium based saucepans can leave
shiny metal marks on the pan supports. You
can remove any stubborn stains by scouring
with a soap impregnated steel wool pad. If
you look after the burner crowns and pan
supports in this way they will stay reasonably
clean. However the surface will dull with
time. After cleaning the appliance parts, dry
them thoroughly before you put them back.
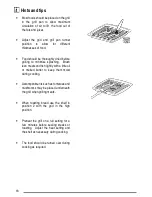
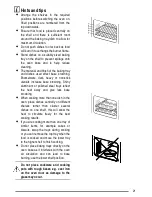
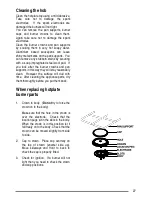
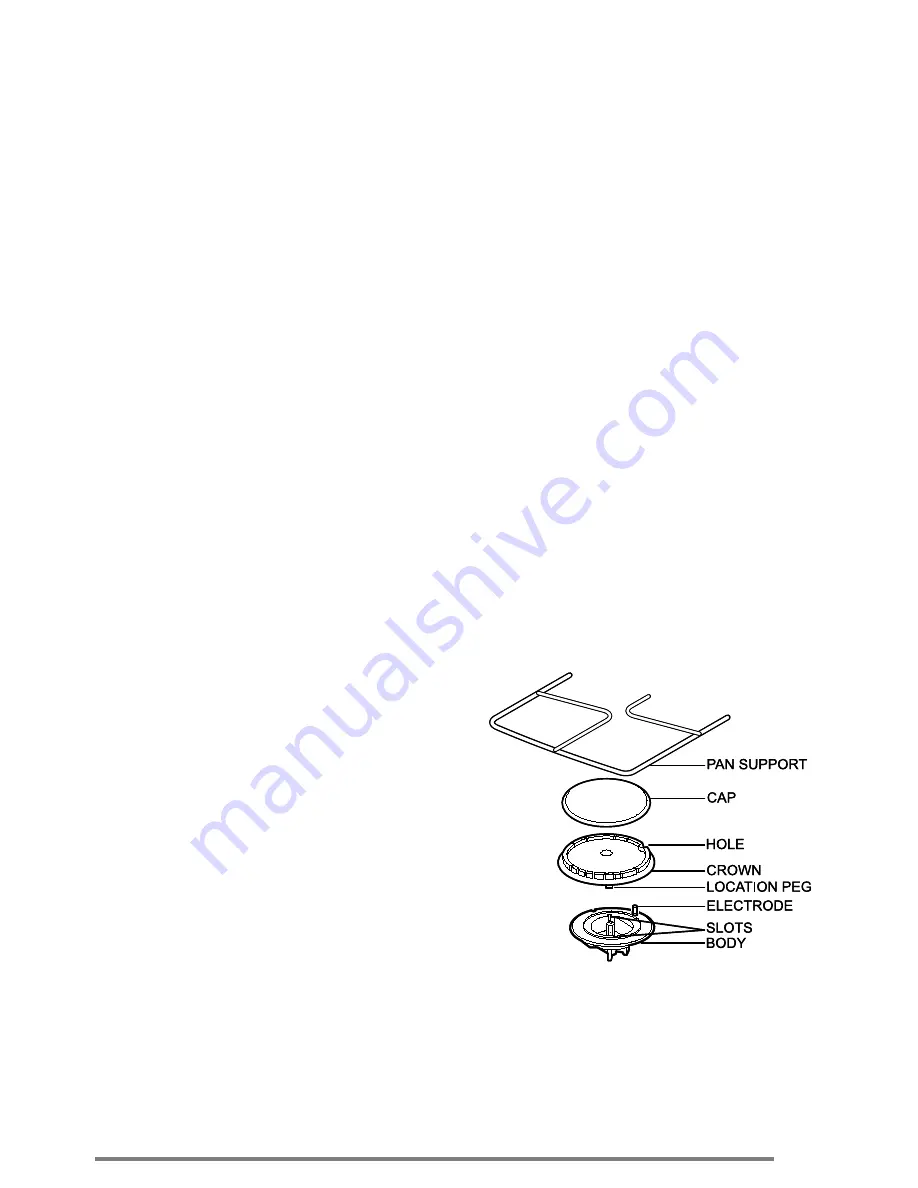
When replacing hotplate
burner parts
1. Crown to body. (
Do not
try to force the
crown on to the body).
Make sure that the hole in the crown is
over the electrode. Check that the
location pegs sit in the slots in the body.
When the crown is in this position let it
fall freely on to the body. Check that the
crown can be moved slightly from side
to side.
2. Cap to crown. Place cap centrally on
the top of crown (enamel side up).
Move sideways and front to back to
check the cap is properly fitted.
3. Check for ignition. If a burner will not
light then you need to
check the crown
and cap positions.


