background image

IF YOU CANNOT FIND A SOLUTION...
If you cannot find a solution to the problem yourself,

contact your dealer or an Authorised Service

Centre. Give the data from the rating plate. Give

also three digit letter code for the glass ceramic (it

is in the corner of the glass surface). Make sure,

you operated the hob correctly. If not the servicing

by a service technician or dealer will not be free of

charge, also during the warranty period. The

instructions about the Service Centre and

conditions of guarantee are in the guarantee

booklet.

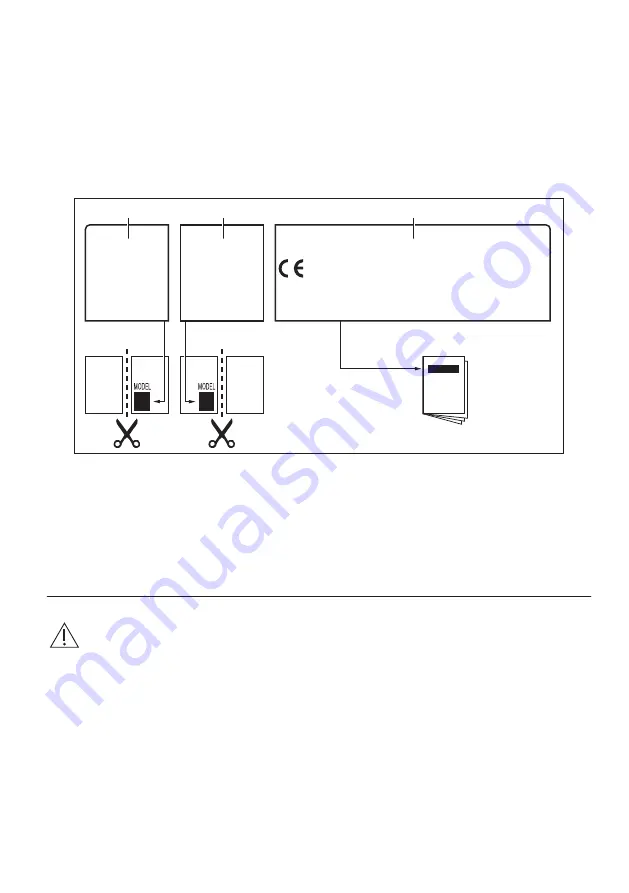
LABELS SUPPLIED WITH THE ACCESSORIES

BAG
Stick the adhesive labels as indicated below:

MOD.

PROD.NO.

SER.NO

DATA

MOD.

PROD.NO.

SER.NO

DATA

MOD.

PROD.NO.

SER.NO.

03   IT

MADE IN ITALY

TYPE

IP20

0049

A

B

C

A. Stick it on Guarantee Card and send this part

(if applicable).

B. Stick it on Guarantee Card and keep this part

(if applicable).

C. Stick it on instruction booklet.

INSTALLATION

WARNING! Refer to Safety chapters.

BEFORE THE INSTALLATION
Before you install the hob, write down the

information bellow from the rating plate. The rating

plate is on the bottom of the hob.

Model .......................................

PNC .........................................

Serial number ...........................

BUILT-IN HOBS
Only use the built-in hobs after you assemble the

hob into correct built-in units and work surfaces

that align to the standards.

CONNECTION CABLE
• The hob is supplied with a connection cable.

• To replace the damaged mains cable use the

following (or higher) mains cable type:

H05V2V2-F T min 90°C. Speak to your local

Service Centre.

7

Summary of Contents for ZES3921IBS

Page 1: ...GETTING STARTED EASY User Manual ZES3921IBS EN User Manual Hob ...

Page 2: ...ispose of it appropriately Keep children and pets away from the appliance when it operates or when it cools down Accessible parts are hot If the appliance has a child safety device this should be activated Children shall not carry out cleaning and user maintenance of the appliance without supervision Children aged 3 years and under must be kept away from this appliance when it is in operation at a...

Page 3: ...tance from the other appliances and units Always take care when moving the appliance as it is heavy Always use safety gloves and enclosed footwear Seal the cut surfaces with a sealant to prevent moisture to cause swelling Protect the bottom of the appliance from steam and moisture Do not install the appliance adjacent to a door or under a window This prevents hot cookware to fall from the applianc...

Page 4: ...ce with wet hands or when it has contact with water Do not use the appliance as a work surface or as a storage surface If the surface of the appliance is cracked disconnect immediately the appliance from the power supply This to prevent an electrical shock When you place food into hot oil it may splash WARNING Risk of fire and explosion Fats and oil when heated can release flammable vapours Keep f...

Page 5: ...URFACE LAYOUT 145mm 180 mm 1 3 2 1 Cooking zone 2 Power indicator 3 Control knobs CONTROL KNOB Symbol Function 0 Off position 1 6 Heat settings RESIDUAL HEAT WARNING There is a risk of burns from residual heat DAILY USE WARNING Refer to Safety chapters THE HEAT SETTING To set or change the heat setting turn the knob to the correct heat setting To deactivate turn the knob to off position Power indi...

Page 6: ...ot the dirt can cause damage to the hob Take care to avoid burns Put the special scraper on the glass surface at an acute angle and move the blade on the surface Remove when the hob is sufficiently cool limescale rings water rings fat stains shiny metallic discoloration Clean the hob with a moist cloth and non abrasive detergent After cleaning wipe the hob dry with a soft cloth Remove shiny metall...

Page 7: ...NO SER NO DATA MOD PROD NO SER NO DATA MOD PROD NO SER NO 03 IT MADE IN ITALY TYPE IP20 0049 A B C A Stick it on Guarantee Card and send this part if applicable B Stick it on Guarantee Card and keep this part if applicable C Stick it on instruction booklet INSTALLATION WARNING Refer to Safety chapters BEFORE THE INSTALLATION Before you install the hob write down the information bellow from the rat...

Page 8: ...remove the excess sealing min 28 mm min 12 mm min 20 mm INSTALLATION OF MORE THAN ONE HOB 40 50 mm 55 mm 30 mm min 650 mm 490 mm 270 mm If several 30 cm hobs are to be installed side by side into the same cut out an assembly kit including a support side bracket and supplementary seals is available at our Authorised Service Centres The relevant installation instructions are supplied within the kit ...

Page 9: ...t 2 Hobs Methods for measuring performance ENERGY SAVING You can save energy during everyday cooking if you follow below hints When you heat up water use only the amount you need If it is possible always put the lids on the cookware Before you activate the cooking zone put the cookware on it The cookware bottom should have the same diameter as the cooking zone Put the smaller cookware on the small...

Page 10: ...10 ...

Page 11: ...11 ...

Page 12: ...WWW ZANUSSI COM SHOP 867333052 B 082017 ...

Reviews: