background image

Summary of Contents for ZF 56/45

Page 1: ...INSTRUCTIONS FOR THE USE AND CARE OF ZANUSSI FRIDGE FREEZER...

Page 2: ...vant instructions There are working parts in this product which heat up Always ensure that there is adequate ventilation as a failure to do this will result in component failure and possible food loss...

Page 3: ...e 9 The fridge compartment Page 12 The freezer compartment Page 15 Looking after your machine Page 19 Door reversal Page 21 Servicing Page 22 ZANUSSI guarantee Page 23 ZANUSSI 5 year cover Please note...

Page 4: ...m 21 7ins Depth 60 0cm 23 6ins Capacity Gross fridge 160 litres 5 6cu ft Freezer 125 litres 4 4cu ft Net fridge 156 litres 5 5cu ft Freezer 104 litres 4 2cu ft Star rating 4 Power Absorbed 190W Voltag...

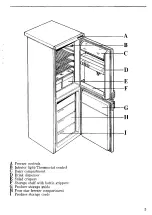
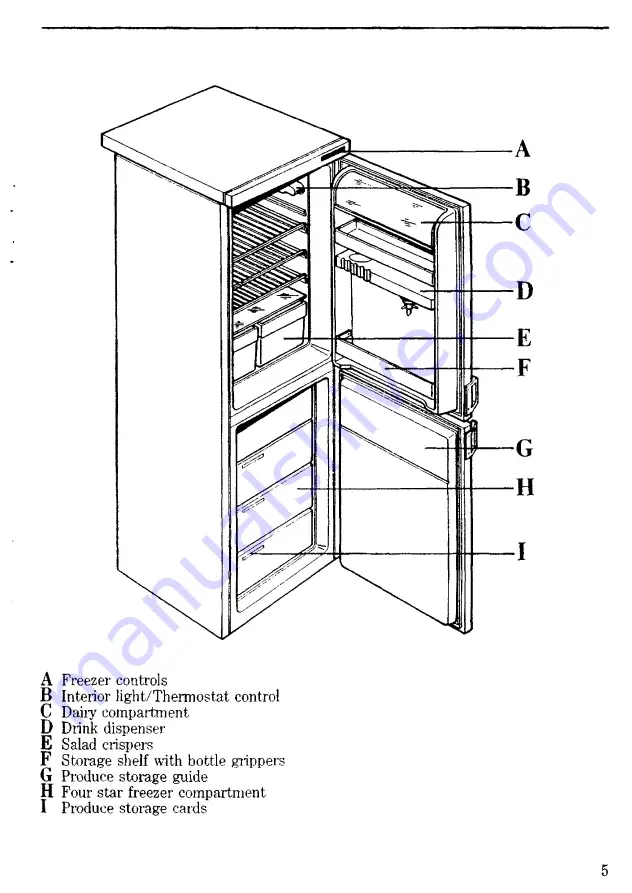
Page 5: ...ls B Interior light Thermostat control C Daily compartment D Drink dispenser E Salad crispers F Storage shelf with bottle grippers G Produce storage guide H Four star freezer compartment I Produce sto...

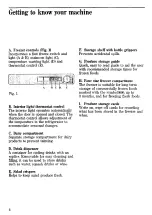
Page 6: ...Quick easy to read guide to aid the user with recommended storage times for frozen foods H Four star freezer compartment The freezer is suitable for long term storage of commercially frozen foods mar...

Page 7: ...32 degrees C or drops below 16 degrees e g conservatories You should also ensure that air can circulate freely around the back and the top of the cabinet There must also be at least 50mm 2 distance be...

Page 8: ...s is what you have to do Connect the green and yellow earth wire to the terminal in the plug which is marked with the letter E or the earth symbol or coloured green or coloured green and yellow Connec...

Page 9: ...er numbers to obtain a lower temperature and anticlockwise if a less cold temperature is required The required temperature inside the fridge compartment is from 0 C to 7 C 32 F to 45 F To obtain the b...

Page 10: ...sliced meat 2 3 days Pies 1 day Casseroles and pate 2 days Bacon 1 week Dairy produce Milk 2 3 days Cream 1 week Butter 3 4 weeks Hard cheese 3 4 weeks Soft cheese 1 week Vegetables and salads 1 week...

Page 11: ...between every To pour a drink press a glass upwards filling using a solution of sterilising fluid against the tap arms To stop the flow of liquid remove the glass If using the dispenser we recommend t...

Page 12: ...l E to a medium setting For easier turning of this control use a small coin The internal temperature of the freezer is automatically adjusted by the thermostat to ensure safe storage of the food Howev...

Page 13: ...al from the freezer can possibly result in a low temperature skin bum If there is a power failure during the storage of frozen food do not open the door during the whole time of the failure If the fre...

Page 14: ...ver melons and pineapples and only store for short periods Rotate stocks of frozen foods date markings will help with this Leave the door ajar when the fridge freezer is not in use DON T Obstruct air...

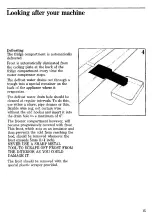
Page 15: ...be cleaned at regular intervals To do this use either a straw pipe cleaner or thin flexible wire e g net curtain wire without the end hooks and insert it into the drain hole to a maximum of 6 The free...

Page 16: ...e 0 setting Leave the freezer door open and the door to the fast freeze compartment Introduce the plastic scraper in the appropriate seating as shown in figure 4 place underneath a basin to collect th...

Page 17: ...the door seal which should be cleaned with the bicarbonate of soda solution A small amount of wax polish or silicone wax spray can be used to maintain the gloss finish of the outside cabinet The motor...

Page 18: ...mains plug and then replace the bulb as follows Remove the bulb housing cover situated underneath the light thermostat mechanism by unscrewing the screw and by sliding it out see Fig 6 Unscrew the lig...

Page 19: ...1 by unscrewing the two screws Be sure to keep the plastic washer safe 3 Remove the freezer door by opening the door and pulling gently downwards to release it from the middle hinge pin 2 4 Remove th...

Page 20: ...efit it on the opposite side 10 Refit the freezer door and the bottom hinge 1 with washer to the left hand side 11 Remove the two door handles 6 7 by unscrewing them and refit on the opposite side by...

Page 21: ...e Switch on the house fights Is the fuse in the plug intact and are the wires in the mains lead correctly connected to the plug see page 7 for Electrical Connections Have you turned the thermostat to...

Page 22: ...cordance with the manufacturer s operating and maintenance instructions The appliance has not been serviced maintained repaired taken apart or tampered with by any person not authorised by us The appl...

Page 23: ...having done so nullify the exclusions 3 The Engineer will need to check the details of your Cover card and may make a charge for his services if it is not presented to him at the time of his call 4 Th...

Page 24: ...ppliance of science IAZ International UK Ltd Zanussi House Newbury The information in this manual is correct at time of going to press Zanussi reserve the right to alter specifications without notice...

Reviews: