


15
GB
○
○
○
○
○
○
○
○
○
○
○
○
○
○
○
○
○
○
○
○
○
○
○
○
○
○
○
○
○
○
○
○
○
○
○
○
○
○
○
○
○
○
○
○
○
○
○
○
○
○
○
○
○
○
○
○
○
○
○
○
○
○
○
○
○
○
○
○
○
○
○
○
○
○
○
○
○
○
○
○
○
○
○
○
○
○
• Recirculation fitting
• The filtered air is returned to the room through the two plastic venting grilles
G
located on
the lower chimney stack
I
.
• Connect
additional recirculation spigot
P
to the round diffuser outlet, pushing it downwards,
and fit spigot
R
to additional spigot
P
in a similar manner (ensure that the two additional
recirculation spigots
P1
are fitted to spigot
R
). Cut additional recirculation spigot
P
at a
point corresponding to outlets 1 and 2, indicated directly on the additional spigot. Make
sure that the height of the assembly
R
+
P
corresponds to the height of the chimney
outlet.
• Fit
the activated charcoal filters inside the hood canopy (see paragraph on
Maintenance
).Do not fit the venting grilles; this must only be done after installation of the
chimney stack.
Connection to the mains power supply
• Check that the mains voltage corresponds to the one indicated on the rating plate
inside the hood.
• Connect the hood to the mains, inserting a two-pole switch with contact aperture of
at least 3 mm.
• Ensure that the domestic electric system is properly earthed.
• The mains lead should be routed through the central keyhole in the frame before being
connected.
• Connect the mains lead to the power supply.
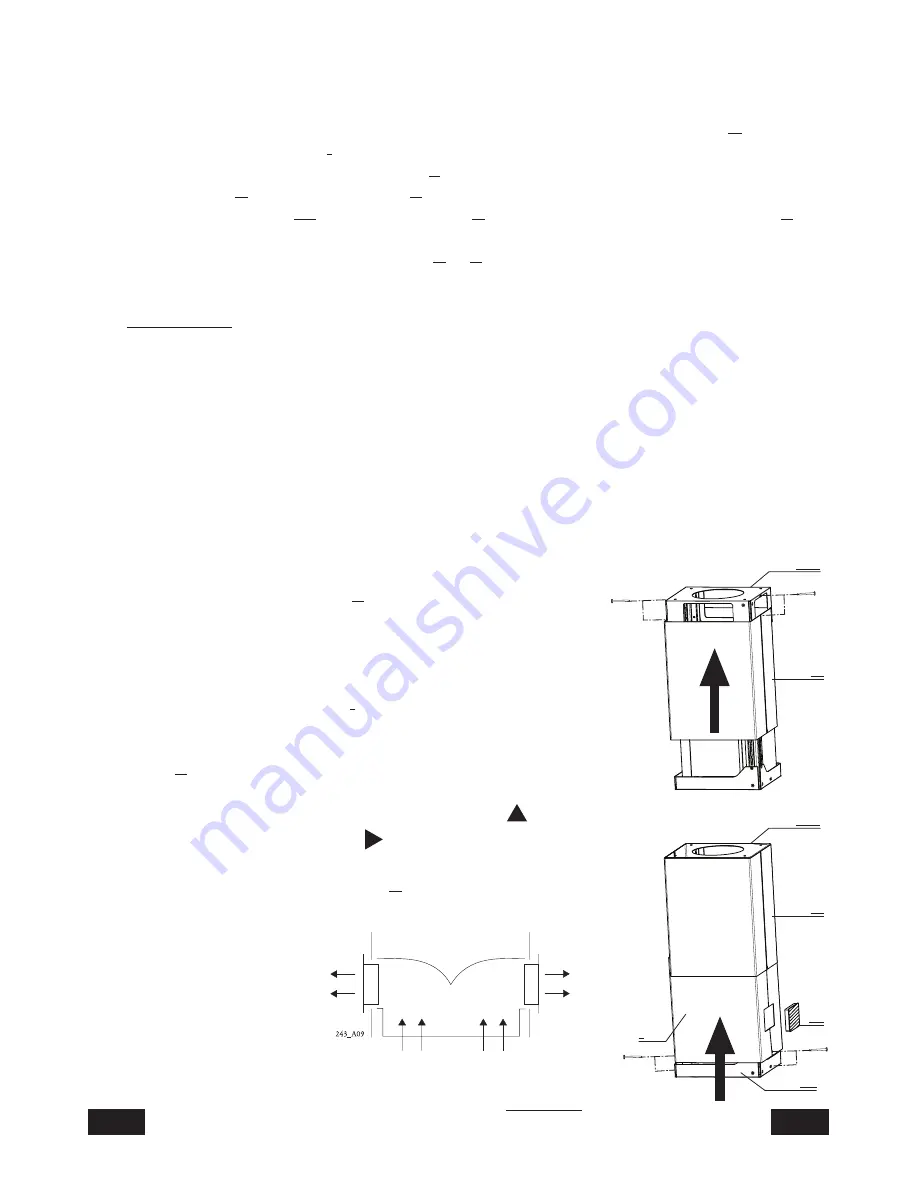
Fitting the telescopic chimney
• Fit
the upper chimney stack
S
to the frame fastened to the
ceiling or to the wooden buttress.
• Fasten
the upper chimney stack using two of the screws
size 2.9x9.5 provided in bag (2), making sure that you
insert
one screw on each side of the chimney.
• Fit
the lower chimney stack
I
in a similar way, using two of
the screws size 2.9x9.5 provided in bag (2), inserting the
chimney stack into the same slot used for upper chimney
stack
S
.
• Fit
the two venting grilles, which snap onto the metal, into
the housings provided, so that the symbol
points
upwards and the symbol
points forwards. For
recirculation versions, also check that the venting grilles
are properly inserted into clamp
R
(
fig. 4
).
TS
S
TS
I
G
S
TI
Fig. 4


