background image

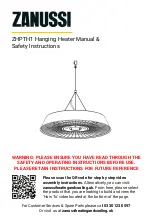
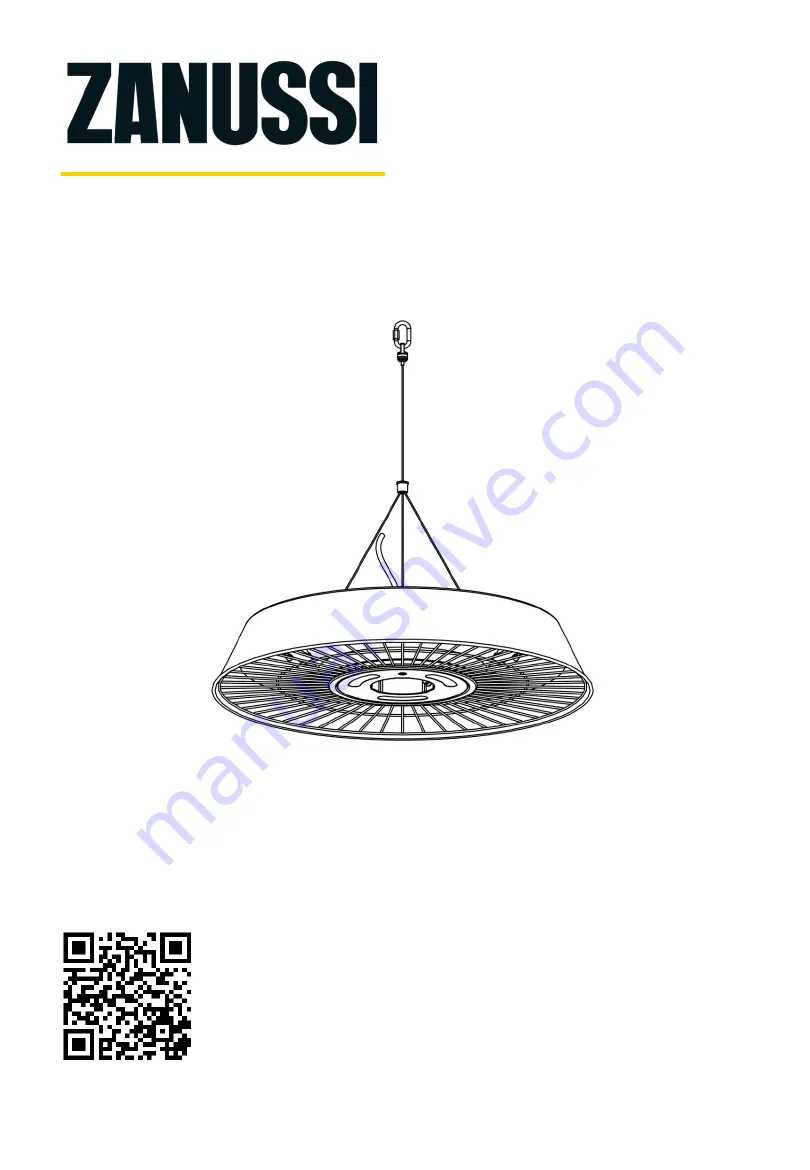
ZHPTH1 Hanging Heater Manual & 
Safety Instructions

WARNING: PLEASE ENSURE YOU HAVE READ THROUGH THE 

SAFETY AND OPERATING INSTRUCTIONS BEFORE USE. 

PLEASE RETAIN INSTRUCTIONS FOR FUTURE REFERENCE

For Customer Services & Spare Parts please call 

0330 1230 597

Or visit us at 

zanussiheatingandcooling.uk

Please scan the QR code for step by step video 
assembly instructions. 

Alternatively, you can visit:  

zanussiheatingandcooling.uk.

From here, please select 

the product that you are looking to build and view the 

‘How 

T

o’ video located at the bottom of the page.

Summary of Contents for ZHPTH1

Page 1: ...R FUTURE REFERENCE For Customer Services Spare Parts please call 0330 1230 597 Or visit us at zanussiheatingandcooling uk Please scan the QR code for step by step video assembly instructions Alternatively you can visit zanussiheatingandcooling uk From here please select the product that you are looking to build and view the How To video located at the bottom of the page ...

Page 2: ...s List Feature Diagram 9 Installation Instructions 10 14 Operating Instructions 15 17 Maintenance Care Instructions 18 Troubleshooting 18 Specification 19 Guarantee and Customer Services 20 Notes 21 23 PATIO HEATER 2 Revision 1 2 ...

Page 3: ...paint residue Extra packaging is added to some models for transportation protection which must be removed before assembly When you are ready to start make sure that you have plenty of space and a clean dry area for assembly Using the steps in order and the detailed drawings in the steps to assemble the outdoor heater Important Whilst every care is taken in the manufacture of this product care must...

Page 4: ...le of leaving on their own unless constant supervision is provided Children of less than 3 years should be kept away unless continuously supervised Children under 8 years shall not plug in regulate and clean the appliance or perform user maintenance This appliance is not intended for use by persons including children with reduced physical sensory or mental capabilities or lack of experience and kn...

Page 5: ...nd well away from any obstructions such as branches or where the heater is near any objects that can be affected by heat such as furniture curtains or other inflammable objects minimum distance 1 metre DO NOT use this heater in the immediate surroundings of a bath a shower or a swimming pool Do not use near water DO NOT use in unventilated areas DO NOT use where gas petrol paint or other surely fl...

Page 6: ...tructions The unit is at high temperature during operation It keeps hot for a period after shut down Potential danger would occur when touching it during this period Unplug the unit and wait till it cools before cleaning DO NOT place the unit close to curtain and or other flammable objects Otherwise there will be a danger of catching fire DO NOT cover the unit with anything during operation or a s...

Page 7: ...raising DO NOT immerse this unit into water for cleaning The unit should be plugged in a socket which is easily visible and reachable DO NOT use this heater with a programmer timer or any other device that switches the heater on automatically since a fire risk exists if the heater is covered or positioned incorrectly Children should be supervised to ensure that they do not play with the appliance ...

Page 8: ... the cord is on a reel it must be fully unwound before use Disconnect the power cable from the electrical supply when the heater is not in use If the power cord becomes damaged it must be replaced by a qualified electrician One dark point may exist on the surface of the heating elements during the first few minutes after it is turned on This is normal and will not affect the performance of the uni...

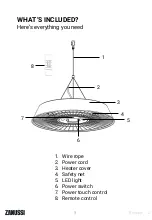
Page 9: ...WHAT S INCLUDED Here s everything you need 9 1 4 1 Wire rope 2 Power cord 3 Heater cover 4 Safety net 5 LED light 6 Power switch 7 Power touch control 8 Remote control 3 2 5 6 7 8 Revision 1 2 ...

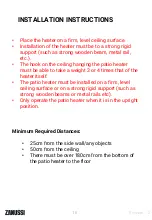
Page 10: ...e to take a weight 3 or 4 times that of the heater itself The patio heater must be installed on a firm level ceiling surface or on a strong rigid support such as strong wooden beams or metal rails etc Only operate the patio heater when it is in the upright position Minimum Required Distances 25cm from the side wall any objects 50cm from the ceiling There must be over 180cm from the bottom of the p...

Page 11: ...l the wire and power cord upwards and then adjust the length of the wire to the appropriate height please check the minimum required distances on the previous page To adjust the height of the wire please see the next step 11 Revision 1 2 ...

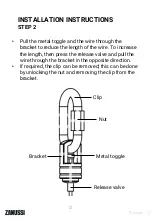
Page 12: ...ngth of the wire To increase the length then press the release valve and pull the wire through the bracket in the opposite direction If required the clip can be removed this can be done by unlocking the nut and removing the clip from the bracket 12 Clip Metal toggle Bracket Nut Release valve Revision 1 2 ...

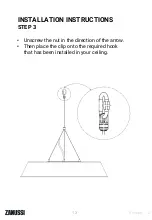
Page 13: ...INSTALLATION INSTRUCTIONS STEP 3 Unscrew the nut in the direction of the arrow Then place the clip onto the required hook that has been installed in your ceiling 13 Revision 1 2 ...

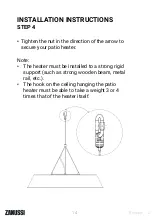
Page 14: ...he arrow to secure your patio heater Note The heater must be installed to a strong rigid support such as strong wooden beam metal rail etc The hook on the ceiling hanging the patio heater must be able to take a weight 3 or 4 times that of the heater itself 14 Revision 1 2 ...

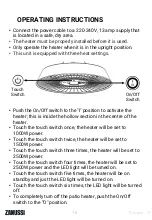
Page 15: ...h the touch switch once the heater will be set to 1000W power Touch the touch switch twice the heater will be set to 1500W power Touch the touch switch three times the heater will be set to 2500W power Touch the touch switch four times the heater will be set to 2500W power and the LED light will be turned on Touch the touch switch five times the heater will be on standby and just the LED light wil...

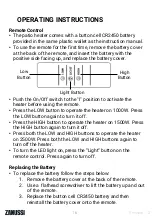
Page 16: ...tton again to turn it off Press the HIGH button to operate the heater on 1500W Press the HIGH button again to turn it off Press both the LOW and HIGH buttons to operate the heater on 2500W Press both the LOW and HIGH buttons again to turn off the heater To turn the LED light on press the Light button on the remote control Press again to turn off Replacing the Battery To replace the battery follow ...

Page 17: ... battery compartment does not close securely stop using the product remove the battery and keep it away from children If you think the battery might have been swallowed or placed inside any part of the body seek immediate medical attention The cells should be disposed of correctly including keeping them away from children even used cells may cause injury WARNING Although the patio heater is shower...

Page 18: ...f time store it in a cool dry location when not in use To prevent dust and dirt build up use the original packaging to repack the unit MAINTAINANCE CARE INSTRUCTIONS WARNING Ensure the appliance is cold before storing 18 PROBLEM POSSIBLE CAUSE SOLUTION Heater will not operate Check if the power cord is plugged into an electrical outlet if not plug in Check if electricity to the main fuse is workin...

Page 19: ...SPECIFICATION 19 Power supply 220 240V 50 60Hz Wattage 2500W max Insulation class I IP rating IP45 Dimensions CMs 10 H x 61 W x 61 D Revision 1 2 ...

Page 20: ...ith the original proof of purchase The product must be installed and used in accordance with the instructions contained in this instruction guide and any other instructions for use which are supplied It must be used for domestic purposes only and for its intended use This guarantee does not cover wear and tear damage misuse or consumable parts This does not affect your statutory rights For Custome...

Page 21: ...This page is intentionally blank NOTES 21 Revision 1 2 ...

Page 22: ...This page is intentionally blank NOTES 22 Revision 1 2 ...

Page 23: ...This page is intentionally blank NOTES 23 Revision 1 2 ...

Page 24: ...usehold waste Only discard electrical electronic battery items in separate collection schemes which cater for the recovery and recycling of materials contained within Your co operation is vital to ensure the success of these schemes and for the protection of the environment For your nearest disposal facility visit www recycle more co uk or ask in store for details SEDEX Connecting businesses and t...

Reviews: