background image

4

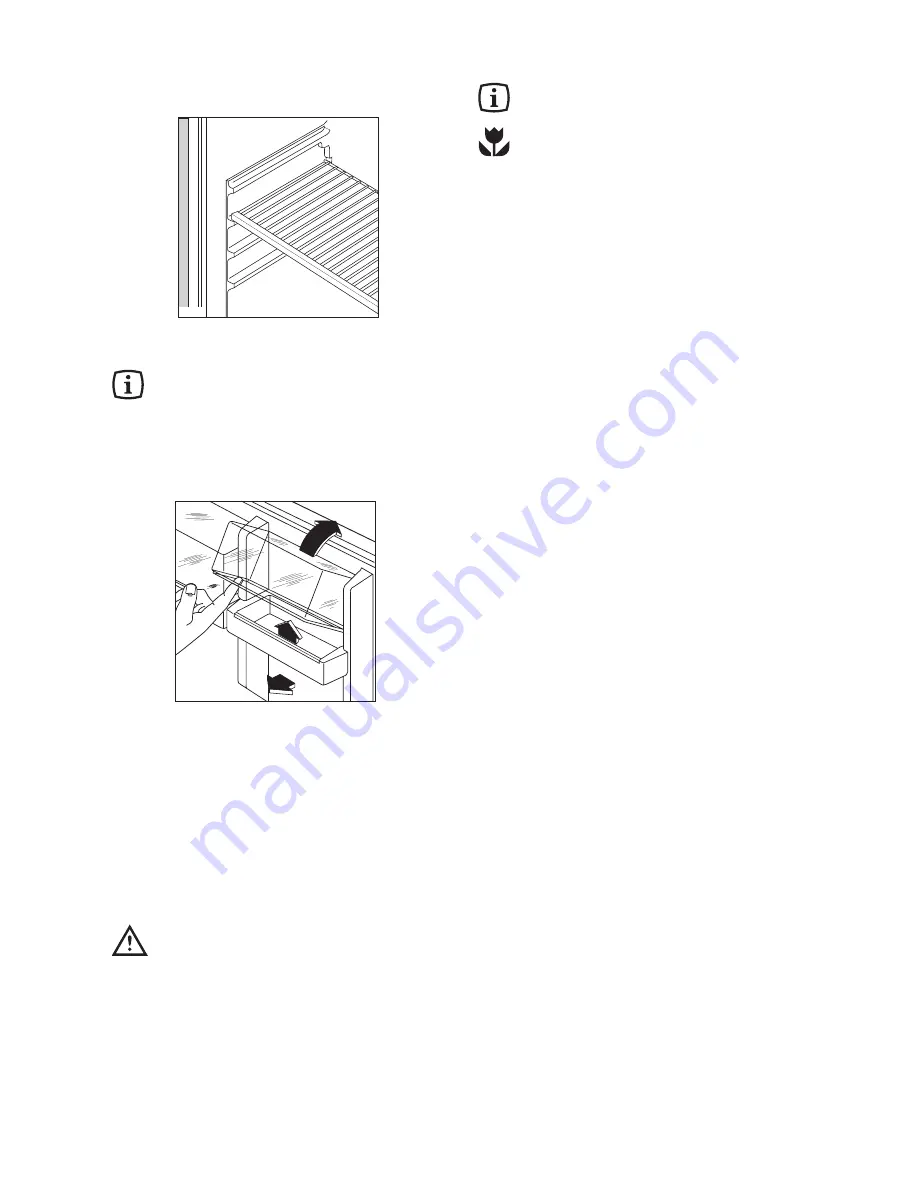
¥ To remove the internal shelf pull forward until it can

be tipped up or down and removed.

¥ Please do the same in reverse to insert the shelf at

a different height.

The glass shelf above the vegetable drawers
and the bottle shelf should always remain in
position, to ensure correct air circulation.

Door shelves

¥ To permit storage of food packages of various

sizes, the 

door shelves can be adjusted in height.

¥ Gradually pull the shelf in the direction of the

arrows until it comes free, then reposition as
required.

¥ For more thorough cleaning, the top door shelves

can be removed by pulling them in the direction of
the arrows, then refitting them in position.

D040

D006

Hints

Saving Energy

¥ Pay careful attention to where the cabinet is

placed. See the section ÒInstallationÓ. When
installed correctly the cabinet will consume less
energy.

¥ Try to avoid keeping the 

door open for long periods

or opening the door too frequently as warm air will
enter the cabinet and cause the compressor to
switch on unnecessarily often.

¥ If the ambient temperature is high, the thermostat

knob is on the coldest setting (higher numbers) and
the appliance is fully loaded, the compressor may
run continuously, causing frost or ice to form on the
evaporator. If this happens, turn the knob to a
warmer setting (lower numbers) to allow a saving
in electricity consumption.

¥ Do not place warm foods inside the appliance.

Allow warm foods to cool first.

¥ Keep the heat emitting condenser, the metall grille

on the rear wall of your appliance, always clean.

Ice cube production

The refrigerator is equipped with one or more ice
cube trays, which should be filled with drinking water
and placed in the special compartment.

Do not use metal implements to detach the
trays.

Hints for refrigeration

¥

Do not store warm food or evaporating liquids in
the refrigerator and do cover or wrap up the food,
particularly if it has a strong smell.

To help you use your refrigerator correctly, here are
some useful hints:
¥

Raw meat 

(beef, pork, lamb & poultry): wrap in

polythene bags and place on top of the salad
compartment, this being the coldest spot in the
refrigerator.

Meat can only be stored safely in this way for
one or two days at the most.

¥

Cooked food, cold cuts, jelly, etc.:

these should

be well covered and can be stored on any of the

wire shelves.

¥

Fruit & vegetables:

these should be thoroughly

cleaned and placed in the bottom drawer

/s.

¥

Butter & cheese:

these should be placed in

special airtight containers or wrapped in aluminium
foil or polythene bags to keep out as much air as
possible.

¥

Milk bottles:

these should have a top and should

be stored in the bottle rack on the door.

Bananas, potatoes, onions and garlic, if not
packed, must not be kept in the refrigerator.

Summary of Contents for ZI 1451

Page 1: ...2222741 43 INSTRUCTION BOOKLET REFRIGERATOR ZI 1451 t ...

Page 2: ...es Any electrical work required to install this appliance should be carried out by a qualified electrician or competent person Ensure that the appliance does not stand on the electrical supply cable Do not use electrical appliances inside the appliance Do not keep carbonated drinks or bottles in the freezer compartment The glass bottles may break Ice lollies can cause Ôfrost freezer burnsÕ if cons...

Page 3: ...e first time wash the interior and all internal accessories with lukewarm water and some neutral soap so as to remove the typical smell of a brand new product then dry thoroughly Do not use detergents or abrasive powders as these will damage the finish Remove safety elements used for transportation Starting the appliance Insert the plug into the wall socket and turn the thermostat knob clockwise b...

Page 4: ...he knob to a warmer setting lower numbers to allow a saving in electricity consumption Do not place warm foods inside the appliance Allow warm foods to cool first Keep the heat emitting condenser the metall grille on the rear wall of your appliance always clean Ice cube production The refrigerator is equipped with one or more ice cube trays which should be filled with drinking water and placed in ...

Page 5: ...s other than those recommended by the manufacturer Cleaning Never use metal objects for cleaning your appliance as it may get damaged NEVER use detergents abrasive powders highly perfumed cleaning products or wax polishes to clean the interior as these will damage the surface and leave a strong odour Clean the inside with warm water and bicarbonate of soda Rinse and dry thoroughly To guarantee a s...

Page 6: ...may cause clicking sounds when the system is connected or disconnected The injected cooling gas may produce a gurgling sound while passing through the tubes The motor may cause a humming noise and or slight bumping The insulation material used has a tendency to slighly increase noise levels how ever it allows for much better insulation and a lower energy consumption Door does not close It is too w...

Page 7: ...e following table shows which ambient temperature is correct for each climate classification Climate classification SN 10 to 32 C 16 to 32 C 18 to 38 C 18 to 43 C N ST T for an ambient temperature of 50 mm min 200cm2 200 cm 2 min D526 Electrical connection Before plugging in ensure that the voltage and frequency shown on the serial number plate correspond to your domestic power supply Voltage can ...

Page 8: ... involved with a normal hairdrier D480 B A Dimensions of the recess Height of housing 1 702 mm Depth of housing 2 550 mm Width of housing 3 560 mm It is necessary that the niche is provided with a conduct of ventilation having the following dimensions Depth 50 mm Width 540 mm Under a worktop To ensure adequate ventilation follow the instructions in the figure The appliance door must be about 20 mm...

Page 9: ...tchen furniture opposite to that of the appliance hinges Fasten the appliance with 2 screws provided in the kit included with the appliance Snap vent grill D and hinge cover E into position 5 Separate parts A B C D as shown in the figure PR266 A B C D 6 Place guide A on the inside part of the furniture door up and down as shown in the figure and mark the position of external holes After having dri...

Page 10: ...uares and drill holes with 2 mm at 8 mm from the outer edge of the door Place the small square on the guide again and fix it with the screws supplied 8mm PR167 A B 9 Should the lining up of the furniture door be necessary use the clearance of slots At the end of operations it is necessary to check if the door of the furniture closes properly PR168 10 Fix cover D on guide B until it clips into plac...

Page 11: ......

Page 12: ...923 525 605 ...

Reviews: