background image

I nstructions for totally built-in
appliances

Dimensions of the recess

Height                    1580 mm                
Depth                       550 mm                  
Width                        560 mm                  

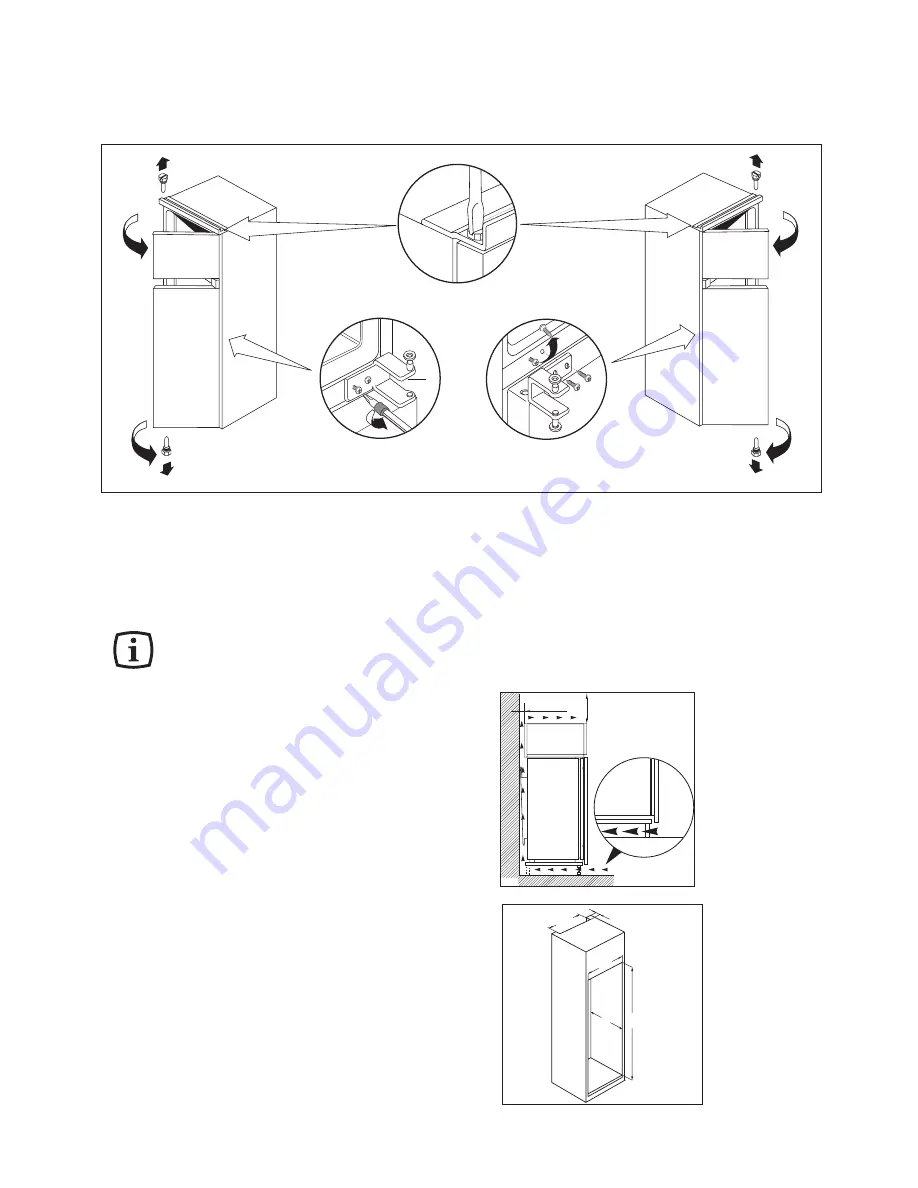
The applianceÕs door has been locked in
position for transport by means of pins on
both sides. According to the door opening
direction, remove relevant pins at the top
and at the bottom.

For safety reasons, minimum ventilation must
be as shown in Fig. 2

Attention: keep ventilation openings clear of
obstruction.

Furthermore, it is necessary that the niche is provid
with a  conduct of ventilation having the   following
dimensions:

depth 50 

mm

width          540 mm 

38

I nstructions for totally built-in appliances

Door reversibility (Fig. 1)

P

P1

P1

P

D564

A

50 mm

min.

cm

2


 200

200 cm

2

min.

D567

Fig. 2

Right opening

Remove the pins (P) and (P1)

Left opening

Remove (P) from both sides and the door.
Remove the middle hinge and refit it on the
opposite side. Refit the door and pin (P) on the
left side. Remove pin (P1 ) from the right side.

PR01

540

50

B

T

H

Fig. 3

Summary of Contents for ZI 7280 D

Page 1: ...REFRIGERATEUR CONGELATEUR FRIGORÍFICO CONGELADOR FRIDGE FREEZER ZI 7280 D NOTICED UTILISATION LIBRODEINSTRUCCIONES INSTRUCTIONBOOKLET 2222 014 66 ...

Page 2: ... it creates pressure on the container which may cause it to explode resulting in damage to the appliance Installation There are working parts in this product which heat up Always ensure that there is adequate ventilation as a failure to do this will result in component failure and possible food loss See installation instructions Care must be taken to ensure that the appliance does not stand on the...

Page 3: ...class N 10 C and 32 C class SN The class of your appliance is shown on its rating plate For building into kitchen units follow the special Ò Building inÓ instructions given Important It is essential that the appliance be connected to an efficient earth tap For this purpose the supply cable plug incorporates a special earth contact If the sockets of your domestic wiring system are not earthed have ...

Page 4: ...on keep ventilation openings clear of obstruction Furthermore it is necessary that the niche is provid with a conduct of ventilation having the following dimensions depth 50 mm width 540 mm 38 I nstructions for totally built in appliances Door reversibility Fig 1 P P1 P1 P D564 A 50 mm min cm2 200 200 cm 2 min D567 Fig 2 Right opening Remove the pins P and P1 Left opening Remove P from both sides ...

Page 5: ... vent grille C and hinge cover D into position Press in the joint covers between the appliance and the kitchen unit Apply covers B on joint cover lugs and into hinge holes Position the runners A at the top and bottom of the inside of the kitchen unit as shown in Fig and mark the position of the external holes After preparing the holes screw the runners to the kitchen unit door using 3 5x16 mm scre...

Page 6: ...k that the doors of the appliance and the kitchen unit open properly If the appliance is to be fitted laterally to the kitchen unit it will be sufficient to loosen the screws of the little plates G move them as shown in Fig 11 and then fasten them up again Fit the cover H 40 8mm PR34 PR35 D729 G H G Fig 9 Fig 10 Fig 11 Electrical connection Before plugging in ensure that the voltage and frequency ...

Page 7: ...t part The maximum quantity of food which can be frozen in 24 hrs is shown on the rating plate Only freeze top quality fresh and thoroughly cleaned foodstuffs Prepare the fresh food in small portions to enable it to be rapidly and completely frozen and to make it possible subsequently to thaw only the quantity required at the time Wrap up the food in aluminium foil or polythene and make sure that ...

Page 8: ...e special drawer s provided Butter and cheese these should be placed in special airtight containers or wrapped in aluminium foil or polythene bags to exclude as much air as possible Milk bottles these should trave a cap and should be stored in the bottle rack on the door Bananas potatoes onions and garlic if not packed must not be kept in the refrigerator Use and features of the ÇCRISPÕN FRESHÈfil...

Page 9: ...to switch off the power supply or to remove the foodstuffs Never use sharp metal tools to scrape off frost from the evaporator as you could damage it Do not use a mechanical device or any artificial means to speed up the thawing process other than those recommended by the manufacturer However when the ice becomes very thick on the inner liner complete defrosting should be carried out as follows pu...

Page 10: ...t to be used Interior light The light bulb inside the refrigerator compartment can be reached as follows unscrew the light cover securing screws unhook the moving part by pressing it as shown in the figure If the door is open and the light does not come on check that the bulb is properly screwed in if it still does not work replace the bulb with one of the same power The maximum rating is shown on...

Page 11: ...areil exigez du Service Apr s Vente les Pi ces de Rechange certifiŽes Constructeur En appelant un Service Apr s Vente indiquez lui toutes les rŽfŽrences et numŽros PNC N de sŽrie É Ces indications figurent sur la plaque signalŽtique Questions Techniques Assistance Technique Consommateurs ZANUSSI B P 20139 60307 SENLIS Cedex TŽl 03 44 62 27 78 e mail zanussi frs notes electrolux fr permanence tŽl d...

Reviews: