

10
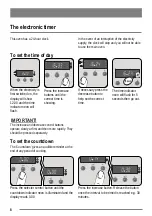
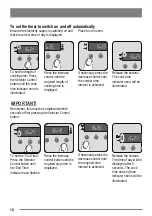
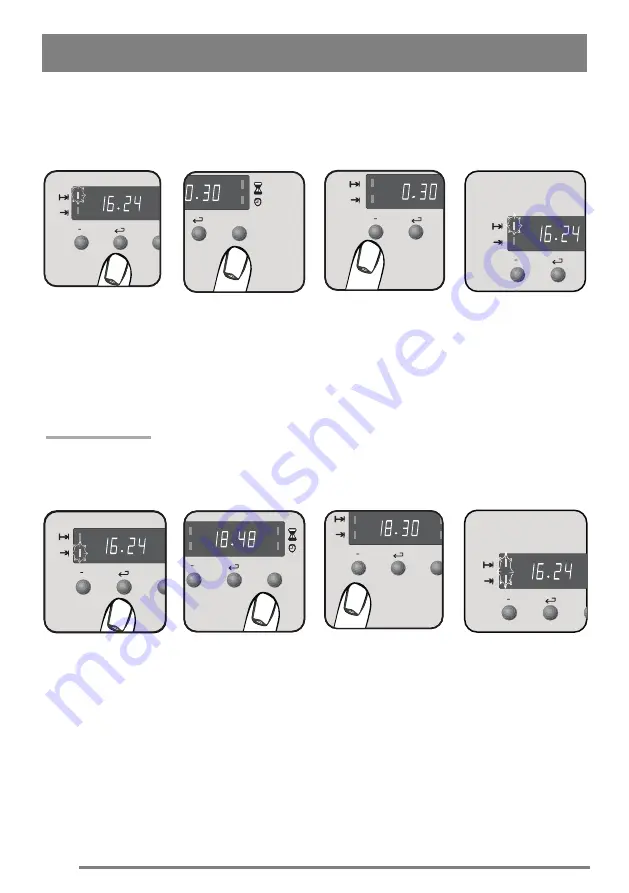
To set the timer to switch on and off automatically
Ensure the electricity supply is switched on and
that the correct time of day is displayed.
Place food in oven.
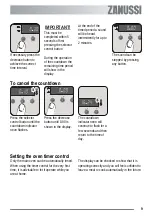
+
To set the length of
cooking time. Press
the Selector Control
button until the cook
time indicator neon is
illuminated.
+
Press the increase
control until the
required length of
cooking time is
displayed.
If necessary press the
decrease control until
the correct time
interval is achieved.
Release the buttons.
The cook time
indicator neon will be
illuminated.
IMPORTANT!
Remember, this must be completed within 5
seconds of first pressing the Selector Control
button.
+
To set the 'End Time'.
Press the Selector
Control button until
the 'End Time'
indicator neon flashes.
+
Press the increase
control button until the
required stop time is
displayed.
+
If necessary press the
decrease control until
the required time
interval is achieved.
Release the buttons.
The time of day will be
displayed after 5
seconds. The cook
time and end time
indicator neons will be
illuminated.
Summary of Contents for ZKC6020W
Page 1: ...Model ZKC6020 User Manual Cooker ...
Page 37: ...37 Notes ...
Page 38: ...38 Notes ...
Page 39: ...39 Notes ...


