background image

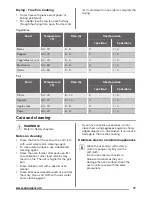
Drying - True Fan Cooking

• Cover trays with grease proof paper or

baking parchment.

• For a better result, stop the oven halfway

through the drying time, open the door and

let it cool down for one night to complete the

drying.

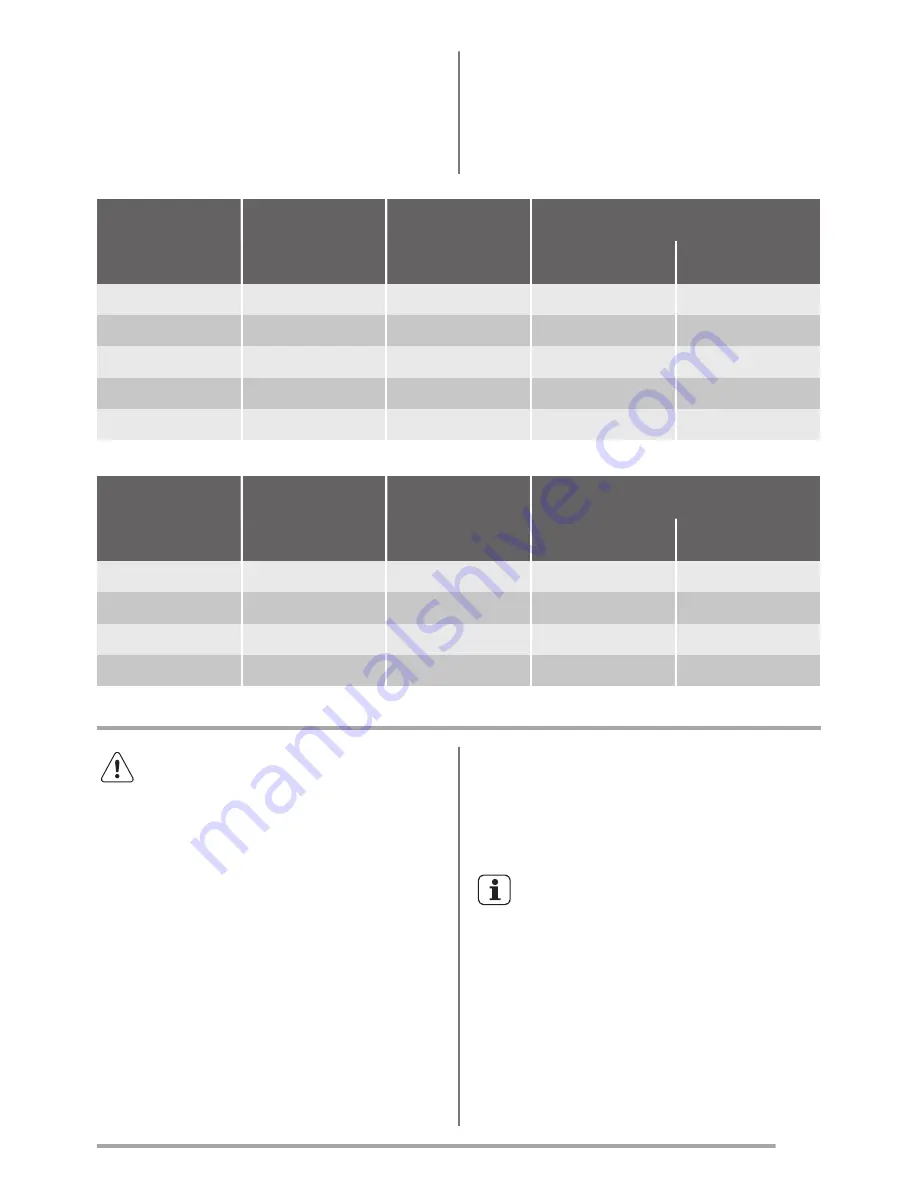
Vegetables

Food

Temperature

(°C)

Time (h)

Shelf position

1 position

2 positions

Beans

60 - 70

6 - 8

3

1 / 4

Peppers

60 - 70

5 - 6

3

1 / 4

Vegetables for sour 60 - 70

5 - 6

3

1 / 4

Mushrooms

50 - 60

6 - 8

3

1 / 4

Herbs

40 - 50

2 - 3

3

1 / 4

Fruit

Food

Temperature

(°C)

Time (h)

Shelf position

1 position

2 positions

Plums

60 - 70

8 - 10

3

1 / 4

Apricots

60 - 70

8 - 10

3

1 / 4

Apple slices

60 - 70

6 - 8

3

1 / 4

Pears

60 - 70

6 - 9

3

1 / 4

Care and cleaning

WARNING!

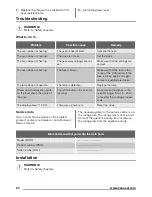
Refer to Safety chapters.

Notes on cleaning

• Clean the front of the oven with a soft cloth

with warm water and a cleaning agent.

• To clean metal surfaces, use a dedicated

cleaning agent.

• Clean the oven interior after each use. Fat

accumulation or other food remains may

result in a fire. The risk is higher for the grill

pan.

• Clean stubborn dirt with a special oven

cleaner.

• Clean all accessories after each use and let

them dry. Use a soft cloth with warm water

and a cleaning agent.

• If you have nonstick accessories, do not

clean them using aggressive agents, sharp-

edged objects or a dishwasher. It can cause

damage to the nonstick coating.

Stainless steel or aluminium appliances

Clean the oven door with a damp

cloth or sponge only. Dry it with a

soft cloth.

Do not use steel wool, acids or

abrasive materials as they can

damage the oven surface. Clean the

oven control panel with the same

precautions.

www.zanussi.com

17

Summary of Contents for ZOA35802BK

Page 1: ...EN ZOA35802BK ZOA35802XD User Manual Oven ...

Page 2: ...y children aged from 8 years and above and persons with reduced physical sensory or mental capabilities or lack of experience and knowledge if they have been given supervision or instruction concerning the use of the appliance in a safe way and understand the hazards involved Do not let children play with the appliance Keep all packaging away from children and dispose of it appropriately Keep chil...

Page 3: ...e walls Install the shelf supports in the opposite sequence The means for disconnection must be incorporated in the fixed wiring in accordance with the wiring rules Safety instructions Installation WARNING Only a qualified person must install this appliance Remove all the packaging Do not install or use a damaged appliance Follow the installation instruction supplied with the appliance Always take...

Page 4: ...ce Open the appliance door carefully The use of ingredients with alcohol can cause a mixture of alcohol and air Do not let sparks or open flames to come in contact with the appliance when you open the door Do not put flammable products or items that are wet with flammable products in near or on the appliance WARNING Risk of damage to the appliance To prevent damage or discoloration to the enamel d...

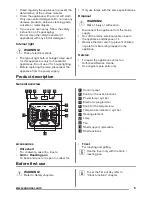
Page 5: ... Disconnect the appliance from the mains supply Cut off the mains electrical cable close to the appliance and dispose of it Remove the door catch to prevent children or pets from becoming trapped in the appliance Service To repair the appliance contact an Authorised Service Centre Use original spare parts only Product description General overview 8 7 11 9 10 5 4 1 2 3 3 1 6 4 5 2 1 Control panel 2...

Page 6: ...airflow in the room is sufficient Daily use WARNING Refer to Safety chapters Retractable knobs To use the appliance press the control knob The control knob comes out Activating and deactivating the appliance It depends on the model if your appliance has lamps knob symbols or indicators The lamp turns on when the appliance operates The symbol shows whether the knob controls the oven functions or th...

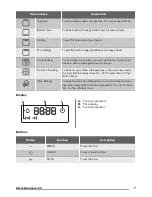
Page 7: ...helf position Also to make gratins and to brown True Fan Cooking To bake on up to three shelf positions at the same time and to dry food Set the temperature 20 40 C lower than for Top Bottom Heat Pizza Setting To bake food on one shelf position for a more intensive brown ing and a crispy bottom Set the temperature 20 40 C lower than for Top Bottom Heat Display A B C A Function indicators B Time di...

Page 8: ...ime The display shows 4 When the time ends flashes and an acoustic signal sounds The appliance deactivates automatically 5 Press any button to stop the acoustic signal 6 Turn the knob for the oven functions and the knob for the temperature to the off position Setting the END 1 Set an oven function and temperature 2 Press again and again until starts to flash 3 Press or to set the time The display ...

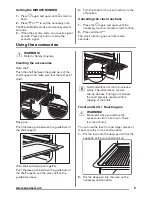
Page 9: ...guide bars of the shelf support and make sure that the feet point down Deep pan Push the deep pan between the guide bars of the shelf support Wire shelf and deep pan together Push the deep pan between the guide bars of the shelf support and the wire shelf on the guide bars above Small indentation at the top increase safety The indentations are also anti tip devices The high rim around the shelf pr...

Page 10: ...liance floor The appliance has a special system which circulates the air and constantly recycles the steam With this system you can cook in a steamy environment and keep the food soft inside and crusty outside It decreases the cooking time and energy consumption to a minimum Moisture can condense in the appliance or on the door glass panels This is normal Always stand back from the appliance when ...

Page 11: ...5 60 In a cake mould Shortbread dough 170 2 160 3 2 and 4 20 30 In a cake mould Buttermilk cheesecake 170 1 165 2 60 80 In a 26 cm cake mould Apple cake Apple pie 1 170 2 160 2 left and right 80 100 In two 20 cm cake moulds on a wire shelf Strudel 175 3 150 2 60 80 In a baking tray Jam tart 170 2 165 2 left and right 30 40 In a 26 cm cake mould Sponge cake 170 2 160 2 50 60 In a 26 cm cake mould C...

Page 12: ... 35 45 In a baking tray Meringues one level 120 3 120 3 80 100 In a baking tray Meringues two levels1 120 2 and 4 80 100 In a baking tray Buns1 190 3 190 3 12 20 In a baking tray Eclairs one level 190 3 170 3 25 35 In a baking tray Eclairs two levels 170 2 and 4 35 45 In a baking tray Plate tarts 180 2 170 2 45 70 In a 20 cm cake mould Rich fruit cake 160 1 150 2 110 120 In a 24 cm cake mould Vict...

Page 13: ... the oven for 10 minutes Flans Food Top Bottom Heat True Fan Cooking Time min Com ments Tempera ture C Shelf po sition Tempera ture C Shelf po sition Pasta flan 200 2 180 2 40 50 In a mould Vegetable flan 200 2 175 2 45 60 In a mould Quiches1 180 1 180 1 50 60 In a mould Lasagne1 180 190 2 180 190 2 25 40 In a mould Cannelloni1 180 190 2 180 190 2 25 40 In a mould 1 Preheat the oven for 10 minutes...

Page 14: ...70 2 120 150 With rind Shin of pork 180 2 160 2 100 120 2 pieces Lamb 190 2 175 2 110 130 Leg Chicken 220 2 200 2 70 85 Whole Turkey 180 2 160 2 210 240 Whole Duck 175 2 220 2 120 150 Whole Goose 175 2 160 1 150 200 Whole Rabbit 190 2 175 2 60 80 Cut in pieces Hare 190 2 175 2 150 200 Cut in pieces Pheasant 190 2 175 2 90 120 Whole Fish Food Top Bottom Heat True Fan Cooking Time min Com ments Temp...

Page 15: ... 30 4 Kebabs 4 max 10 15 10 12 4 Breast of chicken 4 400 max 12 15 12 14 4 Hamburger 6 600 max 20 30 4 Fish fillet 4 400 max 12 14 10 12 4 Toasted sandwiches 4 6 max 5 7 4 Toast 4 6 max 2 4 2 3 4 Turbo Grilling Beef Food Quantity Temperature C Time min Shelf position Roast beef or fillet rare 1 per cm of thick ness 190 200 5 6 1 or 2 Roast beef or fillet me dium1 per cm of thick ness 180 190 6 8 1...

Page 16: ... kg Temperature C Time min Shelf position Leg of lamb roast lamb 1 1 5 150 170 100 120 1 or 2 Saddle of lamb 1 1 5 160 180 40 60 1 or 2 Poultry Food Quantity kg Temperature C Time min Shelf position Poultry portions 0 2 0 25 each 200 220 30 50 1 or 2 Chicken half 0 4 0 5 each 190 210 35 50 1 or 2 Chicken poulard 1 1 5 190 210 50 70 1 or 2 Duck 1 5 2 180 200 80 100 1 or 2 Goose 3 5 5 160 180 120 18...

Page 17: ... Clean the front of the oven with a soft cloth with warm water and a cleaning agent To clean metal surfaces use a dedicated cleaning agent Clean the oven interior after each use Fat accumulation or other food remains may result in a fire The risk is higher for the grill pan Clean stubborn dirt with a special oven cleaner Clean all accessories after each use and let them dry Use a soft cloth with w...

Page 18: ...ave no effect on catalytic properties WARNING Keep children away when you clean the oven at a high temperature The oven surface becomes very hot and there is a risk of burns Before you turn on the catalytic cleaning remove all the accessories from the oven The cavity with a catalytic coating is self cleaning It absorbs fat To support the self cleaning procedure heat the empty oven on a regular bas...

Page 19: ...he screen printing zone must face the inner side of the door Make sure that after the installation the surface of the glass panel frame on the screen printing zones is not rough when you touch it Make sure that you install the internal glass panel in the seats correctly A Replacing the lamp Put a cloth on the bottom of the interior of the appliance It prevents damage to the lamp glass cover and th...

Page 20: ... does not operate The lamp is defective Replace the lamp Steam and condensation settle on the food and in the cavity of the oven You left the dish in the oven for too long Do not leave the dishes in the oven for longer than 15 20 mi nutes after the cooking process ends The display shows 12 00 There was a power cut Reset the clock Service data If you cannot find a solution to the problem yourself c...

Page 21: ...is supplied without a main plug and a main cable Applicable types of cables for Europe Minimum size Cable flex 1 5 mm Cable flex type H07 RN F H05 RN F H05 RRF H05 VV F H05 V2V2 F T90 H05 BB F Applicable types of cables for UK only Connection via Min size cable flex Cable flex type Fuse Oven Control Circuit 2 5 mm PVC PVC twin and earth 15 A min 20 A max Energy efficiency Product Fiche and informa...

Page 22: ...le do not preheat the oven before you put the food inside When the cooking duration is longer than 30 minutes reduce the oven temperature to minimum 3 10 minutes before the end of the cooking time depending on the duration of the cooking The residual heat inside the oven will continue to cook Use the residual heat to warm up other dishes Keep breaks between baking as short as possible when you pre...

Page 23: ...www zanussi com 23 ...

Page 24: ...www zanussi com shop 867341142 A 242017 ...

Reviews: