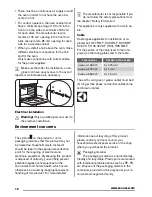
1
2
4
3
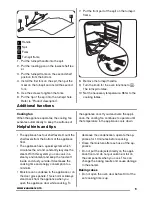
1
Handle
2
Spit
3
Forks
4
Turnspit frame
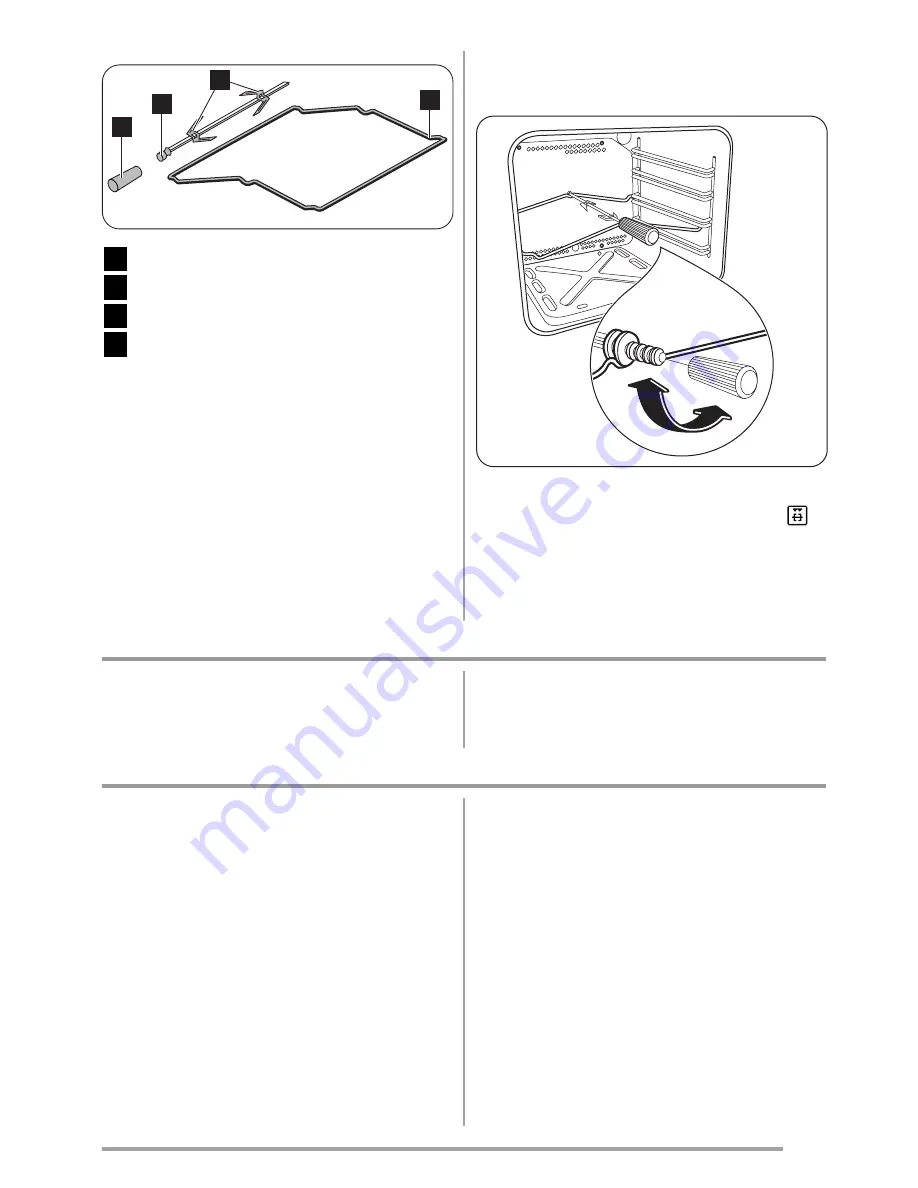
1. Put the turnspit handle into the spit.
2. Put the roasting pan on the lowest shelf lev-
el.
3. Put the turnspit frame on the second shelf
position from the bottom.
4. Install the first fork on the spit, then put the
meat on the turnspit and install the second
fork.
5. Use the screws to tighten the forks.
6. Put the tip of the spit into the turnspit hole.
Refer to "Product description".
7. Put the front part of the spit on the turnspit
frame.
8. Remove the turnspit handle.
9. Turn the knob for the oven functions to
.
The turnspit rotates.
10
.
Set the necessary temperature. Refer to the
cooking tables.
Additional functions
Cooling fan
When the appliance operates, the cooling fan
activates automatically to keep the surfaces of
the appliance cool. If you deactivate the appli-
ance, the cooling fan continues to operate until
the temperature in the appliance cools down.
Helpful hints and tips
• The appliance has four shelf levels. Count the
shelf levels from the bottom of the appliance
floor.
• The appliance has a special system which
circulates the air and constantly recycles the
steam. With this system you can cook in a
steamy environment and keep the food soft
inside and crusty outside. It decreases the
cooking time and energy consumption to a
minimum.
• Moisture can condense in the appliance or on
the door glass panels. This is normal. Always
stand back from the appliance when you
open the appliance door while cooking. To
decrease the condensation, operate the ap-
pliance for 10 minutes before cooking.
• Clean the moisture after each use of the ap-
pliance.
• Do not put the objects directly on the appli-
ance floor and do not put aluminium foil on
the components when you cook. This can
change the baking results and cause damage
to the enamel.
Baking cakes
• Do not open the oven door before 3/4 of the
set cooking time is up.
9
www.zanussi.com
Summary of Contents for ZOG11311
Page 1: ...EN User manual Oven ZOG11311 GB ...
Page 19: ...19 www zanussi com ...


