background image

A medium setting is generally the

most suitable.

However, the exact setting should

be chosen keeping in mind that the

temperature inside the appliance

depends on:

• room temperature,

• how often the door is opened,

• the quantity of food stored,

• the location of the appliance.

1. Turn the Temperature regulator toward

lower settings to obtain the minimum

coldness.

2. Turn the Temperature regulator toward

higher settings to obtain the maximum

coldness.

CAUTION!

If the ambient temperature is high or

the appliance is fully loaded, and the

appliance is set to the lowest

temperatures, it may run

continuously causing frost to form

on the rear wall. In this case the dial

must be set to a higher temperature

to allow automatic defrosting and

therefore reduced energy

consumption.

First use

Cleaning the interior

Before using the appliance for the first time, the

interior and all internal accessories should be

washed with lukewarm water and some neutral

soap to remove the typical smell of a brand-new

product, then dried thoroughly.

CAUTION!

Do not use detergents or abrasive

powders, as these will damage the

finish.

Daily use

WARNING!

Refer to Safety chapters.

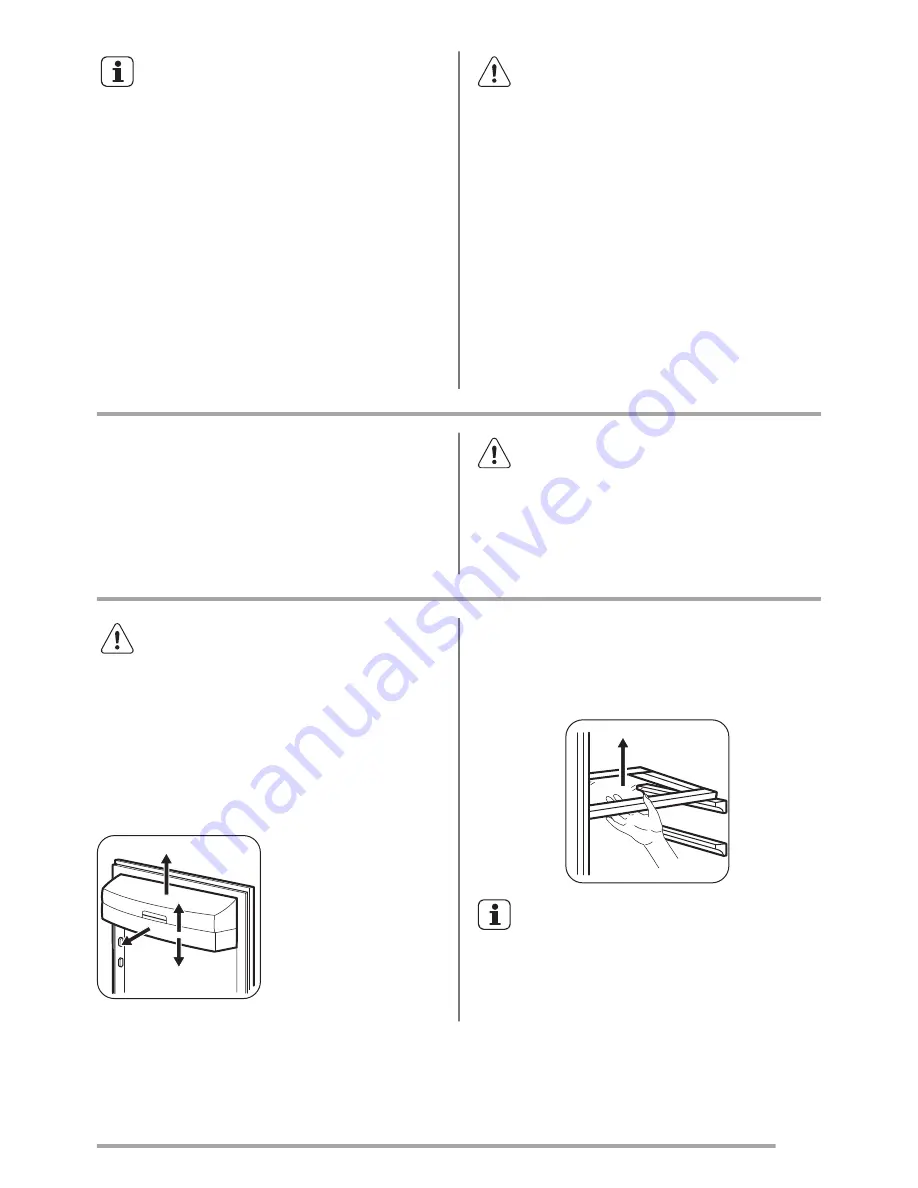
Positioning the door shelves

To permit storage of food packages of various

sizes, the door shelves can be placed at

different heights.
1. Gradually pull the shelf in the direction of

the arrows until it comes free.

2. Reposition as required.

2

1

3

Movable shelves

The walls of the refrigerator are equipped with a

series of runners so that the shelves can be

positioned as desired.

Do not move the glass shelf above

the vegetable drawer and the bottle

shelf to ensure correct air

circulation.

www.zanussi.com

5

Summary of Contents for ZQA14033DA

Page 1: ...EN ZQA14033DA User Manual Refrigerator ...

Page 2: ...and above and persons with reduced physical sensory or mental capabilities or lack of experience and knowledge if they have been given supervision or instruction concerning use of the appliance in a safe way and understand the hazards involved Do not let children play with the appliance Cleaning and user maintenance shall not be made by children without supervision Keep all packaging away from chi...

Page 3: ... Wait at least 4 hours before connecting the appliance to the power supply This is to allow the oil to flow back in the compressor Do not install the appliance close to radiators or cookers oven or hobs The rear of the appliance must stand against the wall Do not install the appliance where there is direct sunlight Do not install this appliance in areas that are too humid or too colds such as the ...

Page 4: ...e maintenance deactivate the appliance and disconnect the mains plug from the mains socket This appliance contains hydrocarbons in the cooling unit Only a qualified person must do the maintenance and the recharging of the unit Regularly examine the drain of the appliance and if necessary clean it If the drain is blocked defrosted water collects in the bottom of the appliance Disposal WARNING Risk ...

Page 5: ...nd therefore reduced energy consumption First use Cleaning the interior Before using the appliance for the first time the interior and all internal accessories should be washed with lukewarm water and some neutral soap to remove the typical smell of a brand new product then dried thoroughly CAUTION Do not use detergents or abrasive powders as these will damage the finish Daily use WARNING Refer to...

Page 6: ...ne or two days at the most Cooked foods cold dishes etc these should be covered and may be placed on any shelf Fruit and vegetables these should be thoroughly cleaned and placed in the special drawer s provided Butter and cheese these should be placed in special airtight containers or wrapped in aluminium foil or polythene bags to exclude as much air as possible Bottles these need a cap and should...

Page 7: ...ad drawers to prevent the water overflowing and dripping onto the food inside Use the special cleaner provided P which you will find already inserted into the drain hole P F Cleaning the air channels 1 Remove the plinth A then the ventilation grille B 2 Clean the ventilation grille 3 Carefully pull the air deflector out C checking that there is no water left from the defrosting 4 Clean the lower p...

Page 8: ...d open the door The lamp is defective Refer to Replacing the lamp The compressor operates contin ually Temperature is set incorrectly Refer to Operation chapter Many food products to be frozen were put in at the same time Wait some hours and then check the temperature again The room temperature is too high Refer to climate class chart on the rating plate Food products placed in the ap pliance were...

Page 9: ... the appliance Make sure that there is cold air circulation in the appliance If the advice does not lead to the desired result call the nearest Authorized Service Centre Replacing the lamp Disconnect the plug from the mains socket 1 Remove the screw from the lamp cover 2 Remove the lamp cover refer to the illustration 3 Replace the used lamp with a new lamp of the same power and specifically desig...

Page 10: ... not be observed The wires in the mains lead are coloured in accordance with the following code A B C D E A green and yellow Earth C brown Live D blue Neutral As the colours of the wires in the mains lead of this appliance may not correspond with the coloured markings identifying the terminals in your plug proceed as follows 1 Connect the wire coloured green and yellow to the terminal marked eithe...

Page 11: ... and in the energy label ENVIRONMENT CONCERNS Recycle the materials with the symbol Put the packaging in applicable containers to recycle it Help protect the environment and human health and to recycle waste of electrical and electronic appliances Do not dispose appliances marked with the symbol with the household waste Return the product to your local recycling facility or contact your municipal ...

Page 12: ...www zanussi com shop 211622806 A 252015 ...

Reviews: