11
INSTALLATION
If this appliance featuring magnetic door seals is to
replace an older appliance having a spring lock (latch) on
the door or lid, be sure to make that spring lock
unusable before you discard the old appliance.
This will prevent it from becoming a death-trap for a
child.
Positioning
The appliance should be installed well away from
sources of heat such as radiators, boilers, direct
sunlight etc.
Best performance is obtained with ambient
temperature b16
°
C and +32
°
C (class N) or
b10
°
C and +32
°
C (class SN).
The class of your appliance is shown on its rating
plate.
For building into kitchen units follow the special
“Building-in” instructions given.
Electrical connection
Before plugging in, ensure that the voltage and
frequency shown on the serial number plate
correspond to your domestic power supply.
Voltage can vary by
±
6% of the rated voltage.
For operation with different voltages, a suitably
sized auto-transformer must be used.
The appliance must be earthed.
The power supply cable plug is provided with a
contact for this purpose.
If the domestic power supply socket is not earthed,
connect the appliance to a separate earth in
compliance with current regulations, consulting a
specialist technician.
The Manufacturer declines all responsibility if the above
safety precautions are not observed.
This appliance complies with EEC directive number 87/308
of 2/6/87 relative to radio interference suppression.
This appliance complies with the following
E.E.C. Directives:
-
73/23 EEC
of 19.2.73 (Low Voltage Directive) and
subsequent modifications;
-
89/336 EEC
of 3.5.89 (Electromagnetic
Compatibility Directive) and subsequent
modifications.
Cleaning the interior
Before using the appliance for the first time, wash
the interior and all internal accessories with
lukewarm water and some neutral soap so as to
remove the typical smell of a brand-new product,
then dry thoroughly.
Do not use detergents or abrasive powders, as these
will damage the finish.
Instructions for totally built-in appliances
Dimensions of the recess
Height
1225 mm
Depth
550 mm
Width
560 mm
The appliance’s door has been locked in position for
transport by means of pins on both sides. According to
the door opening direction, remove relevant pins at the
top and at the bottom.
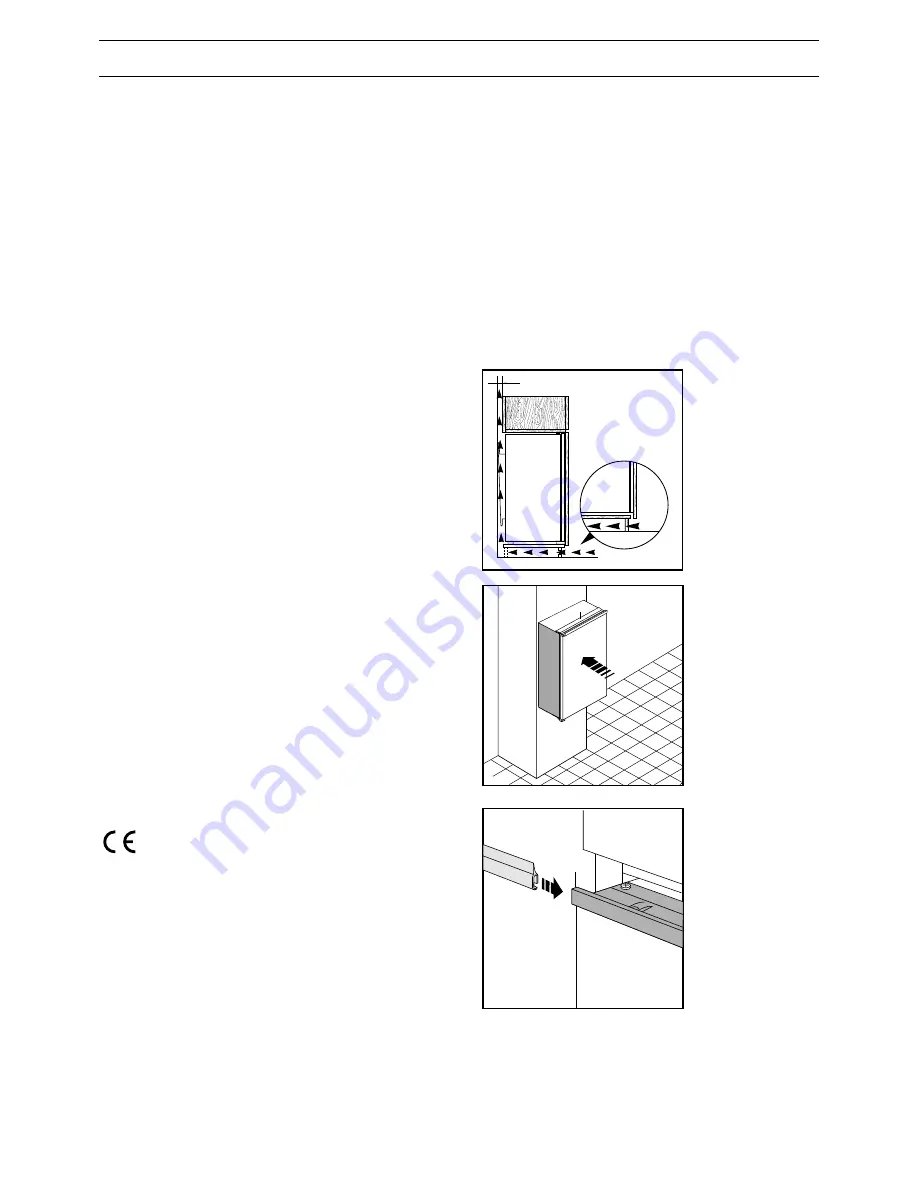
For appropriate venting, follow indications in Fig. 1.
Fig. 1
Fig. 2
Push appliance
into the housing
until stop strip
(A) touches the
kitchen unit.
Fig. 3
If after having
carried out the
previously
described
operation there is
still some space
left between the
appliance and the
kitchen unit, fit
the trimming
provided
together with the appliance on the stop strip (A).
D028
min.
cm
2
200
50-min. cm
2
200
A
D022
D265
A


